Path to the Future and Freedom is a Quest in Scarlet Nexus. Did Karen take on Yakumo Sumeragi's identity? Seeking the whereabouts of Karen, who holds the key to closing the Kunad Gate, they head to Sumeragi Tomb where Yakumo has been laid to rest.
[quest banner]
General Information
- Phase: Phase 12
- Character: Yuito Sumeragi
- Previous: Feeling Unraveled Time Together
- Next: --
- Bosses: Dominus Circus, Karen Travers
NPCs & Characters
- Luka Travers
- Hanabi Ichijo
- Gemma Garrison
- Tsugumi Nazar
- Wataru Frazer
- Haruka Frazer
- Kasane Randall
- Shiden Ritter
- Arashi Spring
- Kagero Donne
- Kyoka Eden
- Kaito Sumeragi
- Satori the Archivist
Bosses
Items
Consumables and Other Items
- Enhance Burn
- SAS Refueling Drink
- Barisa Santa Analysis
- Santa-type Suppression
- Marabou Pendu Analysis
- Yawn-type Suppression +
- Pendu-type Suppression +
- Chinery-type Suppression +
- Abandoned Subway Environment A
- Abandoned Subway Environment S
- Research Facility Environment B
Equipment & Upgrades
Enemies
- Rat Rut
- Cushion Pound
- Barrista Santa
- Grin Yawn
- Slippy Chinery
- Vase Paws
- Marabou Pendu
- Booger Sabbat
- Spawn Yawn
- Winery Chinery
- Bandeau Pendu
- Brawn Yawn
- Base Paws
- Saliva Santa
- Session Pound
- Saws Paws
- Doppel Pool
- Vine Yawn
- Missin Pound
- Rainy Rummy
- Cut Rat
Path to the Future and Freedom Walkthrough
The team returns to Sumeragi Tomb in Suoh City Ryujin Ward to confront and find Karen Travers in order to close the Kunad Gateway. Yuito finds his brother Kaito Sumeragi at the tomb who tells him that he is proud of avenging their mother's plan of stopping Togetsu - the team sets forth to Sumeragi Tomb to put an end to the madness before it's too late.
Sumeragi Tomb
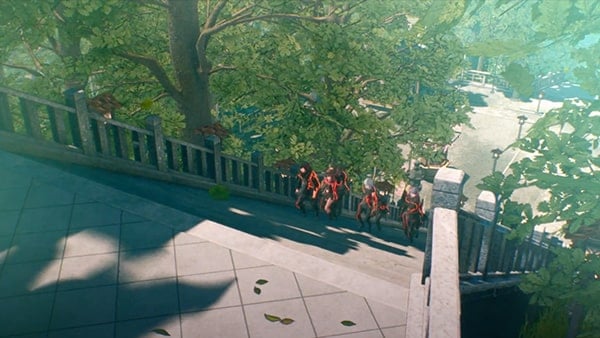
Upon gaining control of Yuito, head down the steps to reach the lower section of the tomb. At the bottom, go through the narrow path and head towards the marked objective to trigger a cutscene. The team then loses transmission with Wataru and Haruka, and are transported to what seems a brain field on a larger scale. You'll then encounter the first group of enemies such as the Rat Rut and Cushion Pound. Another cutscene will then trigger after defeating the enemies where you'll see a vision of what seems to be memories showing Karen Travers, Fubuki Spring, and Alice Ichijo.
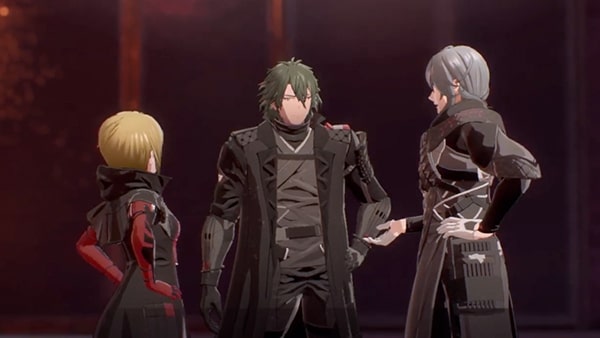
After the cutscene, walk onto the floating train cars to reach the Abandoned Station, which is on the west side of the map. Head inside and you'll encounter a Barrista Santa and Cushion Pound. A Grin Yawn will then spawn after defeating the first group of enemies. Proceed north on the mini-map after killing all enemies to find Satori the Archivist - recover your HP, restock on items, and save your progress if you need to.
Continue towards an open area which is behind Satori and you'll encounter another group of enemies, x2 Rat Rut, followed by x2 Barrista Santa, and a Slippy Chinery. Remember that you need to use SAS: Clairvoyance so that you can see the Chinery when it becomes invisible. After defeating the enemies, head towards the next section, 2. Memories of Fighting.
Memories of Fighting
In the next section, you'll find yourself at Kikuchiba and you'll encounter a group of Vase Paws and a Marabou Pendu, followed by a Booger Sabbat. Use Psychokinesis and pair it up with SAS: Duplication to throw multiple objects at it so its shell can easily break. Kill all the enemies and proceed forward, don't forget to grab the resource cache nearby which contains x1 Enhance Burn.
[img]
Now, you'll find yourself at a familiar location which is Kunad Highway, you can ride a bus with Psychokinesis and maneuver your way towards the area and run over enemies blocking your path. You'll then trigger another cutscene when you get past the enemies. Once the cutscene is done, work your way forward towards the highway and you'll be ambushed by x2 Spawn Yawn, Marabou Pendu, and a Booger Sabbat. The easiest way to take them out is to use Psychokinesis on the two oil trucks and make them explode, inflicting a large amount of damage, as well as the Burning Status Effect. After you've cleared the area, you'll reach the construction site of Mizuhagawa District where you'll encounter another group of Vase Paws and Marabou Pendu, followed by a Booger Sabbat, a Spawn Yawn, and a Winery Chinery - make sure to grab the resource cache nearby to find x1 Plug-in Parallelization Program H.
Memories of Longing
[img]
Next, head towards the waymarker, head up the slope where you'll find Satori the Archivist. When you're ready, continue into the next section to reach 3. Memories of Longing. You'll now reach another section of Kikuchiba where you'll encounter a group of Bandeau Pendu and x2 Brawn Yawn, as well as a Barrista Santa. Defeat all enemies and proceed towards the next area which is Arahabaki Secure Site. You'll see that there's a Base Paws blocking the path ahead, and what you can do is control a drone with Psychokinesis and use it to attack the large Other enemy. Work your way through the site while you fight more enemies along the way until you reach the entrance of the Supernatural Life Research Facility. Proceed through the facility as you fight the enemies along the way and you reach the end where Satori is standing and next to him is a large painting that you'll need to interact to continue the quest - make sure to save your game to prepare for a boss fight.
Boss Battle: Dominus Circus
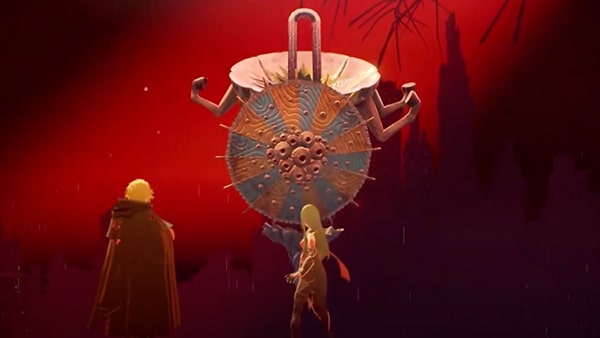
One of the most bizarre Bosses in the game, all of the Dominus Circus Others have a cumbersome, cone-shaped body causing it to support itself with one point on the bottom, forcing it to mostly be on a standstill. To completely beat this boss, the player is required to defeat a series of four sculptures that alternates between phases.
The Dominus Circus will appear as a coil-headed sculpture in the initial phase. Holding a metal umbrella in one hand, it will launch water-based attacks, such as a jet stream spraying out of the umbrella, and a shockwave that launches a wall of running water surrounding itself. Although these attacks do moderate damage, they can be avoided by simply running out of range, allowing for the player to counter with continuous Psychokinesis attacks.
If you wish to close in on the Dominus Circus while the walls of water are still active, you may do so with SAS: Teleportation, though bear in mind the respective character will be affected by the Soaked Status Ailment. By doing this, the player should be able to knock the Dominus Circus down with ease, allowing for a window of opportunity to run in and stack melee burst damage. Use SAS: Pyrokinesis to maximize damage output during this time. As the Dominus Circus attempts to stand again, the player can keep it pinned down by using SAS: Psychokinesis to perform a powerful psychokinesis burst, throwing all surrounding objects at in one swift motion. Repeat this cycle of attack for one to two more rounds to defeat the Dominus Circus in this first form.
Following the defeat of the first sculpture, a second one will instantly float up from below, beginning phase 2 of the battle. Although resembling the first sculpture in form, the second one is attached to an elephant's head, wearing a small hat. Just as cumbersome and even less protected as it wields no weapon, this sculpture is even more vulnerable to Psychokinesis attacks. Although it is capable of executing melee strikes with its trunk, and may even spray a cloud of blood from it occasionally, it can be easily dodged and countered by simply running to its side before attacking. As it takes more damage the Dominus Circus will frequently breathe steam out of hits ears to cover the entire arena up in a layer of thick fog.
Use SAS: Clairvoyance when it is available to see through the fog and continue with attacks. Use SAS: Velocity and SAS: Electrokinesis to speed things up, as the Dominus Circus in this form is weak to the Shocked Status Ailment. As it falls, bombard with melee attacks as per the Dominus Circus in its first form. The elephant stands again its hat will have been shifted, revealing a fleshy organ underneath. You will receive a prompt from your team, suggesting that this unprotected organ is especially vulnerable to attacks. Damage that organ with Psychokinesis and Aerial Attacks to deal extra damage. This cycle of attack will repeat itself a few more times until the Dominus Circus' Crush Gauge is fully depleted, allowing you to kill it in this form with a Brain Crush.
Once this second sculpture is defeated, phase 3 will begin with yet another new one, springing up from below. Completely identical to the coil-headed sculpture from the first phase, this one will wield a spiral seashell in its extended left arm. After it initiates a few swinging melee strikes with the shell, you will receive a prompt from Gemma Garrison, suggesting the party to attack its left arm right after it performs the swing. However, this tactic is risky as the swinging attack with the seashell deals enough burst damage to 2-hit kill you. Therefore, adopt this strategy with the help of SAS: Sclerokinesis and SAS: Velocity to avoid the swings, and stay protected from it them if unable to dodge. Focus on the fleshy part of that left arm just above the seashell to deal higher damage to the Dominus Circus. Continue to pressure with SAS: Electrokinesis to shock the sculpture, causing it to fall. Repeat the cycle until Dominus Circus is defeated with Brain Crush again.
At this point, the final phase will begin and the last sculpture will appear. Though created in a similar form, this final Dominus Circus will be a combination of the three previous phases - It will be assembled with the elephant head, wielding a metal umbrella in its right hand, and the seashell in its left. It will be very difficult to approach it in melee as it is shielded by a large weapon on both sides, therefore it is recommended to run around it and use Psychokinesis. Keep running around the Dominus Circus until it is facing you and away from large objects behind it, and use Psychokinesis to pull these objects onto its back to deal damage.
Once you land a sufficient amount of strikes, the Dominus Circus will again deploy a fog screen over the arena. As it does this, the Dominus Circus raises both arms, exposing itself to attacks. Use SAS: Clairvoyance right away to pinpoint its location, and throw more objects at the Dominus Circus, as you run in for a wave of melee attacks. With SAS: Electrokinesis, the Dominus Circus should fall and stay pinned down for a period of time. Another way the Dominus Circus can protect itself is to execute the shockwave that can launch walls of flowing water to deflect incoming damage from all directions. In this scenario, use SAS: Teleportation again to bypass these walls, and interrupt with a flurry of melee slashes to drop the Dominus Circus. Repeat the above steps until the Dominus Circus is finally eliminated for good.
Memories of Pursuit
[img]
After you've defeated the boss, as well as the cutscene, approach the large frame and you'll come out of the Abandoned Subway or the next section, 4. Memories of Pursuit. Upon arriving, you'll immediately encounter enemies such as the Fuel Pool and Auger Sabbat. You're outnumbered here but there's a train car nearby that you can use to hit the enemy with Psychokinesis. Make sure to use SAS: Sclerokinesis first so that you don't get interrupted while you focus on moving the train car. Work your way towards the objective until you reach a section of Hieno Mountain - the path here is pretty much linear and you simply just need to reach the entrance of Memories of Rebellion while you fight familiar enemies along the way such as the Fuel Pool and Session Pound.
Memories of Rebellion
[img]
You'll now arrive at a section of BABE. Make your way through the section as you fight enemies such as the Saws Paws, Brawn Yawn, Vine Yawn, and the Doppel Pool. The next section you'll enter is the museum section of the Supernatural Life Research Facility. Repeat the process as you fight through the enemies until you reach the marked objective leading towards the Memories of Nightmare.
Memories of Nightmare
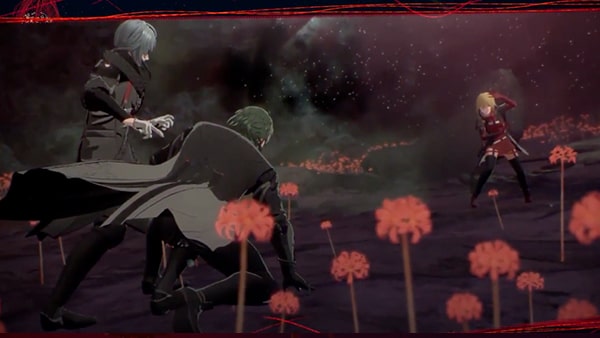
Upon arriving, another cutscene will trigger that involves Alice, Fubuki, and Karen, the past memory shows how Alice changed into an Other. After the cutscene, you'll immediately encounter enemies such as the Rainy Rummy and Cut Rat, followed by a Booger Sabbat. Again, simply defeat all the enemies, and proceed towards the marked objective. Make sure you have a lot of health recovery items here since the enemy encounters here get pretty chaotic and hard to beat since you'll be fighting the large enemies here - eventually, you'll reach the entrance leading towards Memories of Impasse.
Memories of Impasse
[img]
Before you continue any further, make sure to save your game and restock on items since you'll be running through another round of defeating more enemies until you reach the next section. And this time, it can be quite annoying since you will be fighting against the Session Pound enemies that explode upon contact, as well as more large enemies. You'll find yourself at another section of Kunad Highway in the Memories of Impasse. Also, always save your game whenever you see Satori at various checkpoints - you'll eventually reach Millennium Hall.
Boss Battle: Karen Travers
[img]
After going on a trip through memory lane, you'll return back to Sumeragi Tomb. The path here is pretty much linear, so just go straight towards the narrow path until you reach Karen Travers' location where a cutscene will trigger. Karen Travers is encountered as the final boss of the game in the Sumeragi Tomb. In the first phase, Karen will fight using a combination of all the attacks he displayed in the first two encounters, in addition to a new move, Eruption, where he is stagnant as he becomes immune to attacks, before stomping the ground to release an eruption around himself, knocking up and damaging units within.
[img]
A frequently executed move, this attack is quite difficult to avoid once caught within the radius when cast, but players can run away preemptively when they notice Karen becoming immune to damage as he charges up the skill. Ironically, during this battle Karen will use his Teleportation skill more passively than the second encounter, allowing the player to use SAS: Velocity to catch up to Karen after he executes attacks. Another advantage the player has this time is having access to all the SAS abilities since the full platoon is present. One such ability that enables Yuito to sneak up on Karen Travers is SAS: Invisibility. Since Karen only blinks away in response to attacks throughout this fight, the player can hide in stealth, approach Karen and unleash a charged attack from behind.
When Karen's health is roughly at 70%, he will activate his Brain Field. Both during and after this state, Karen will teleport slightly more frequently, and use more lightning-based attacks, such as releasing the tracking lighting orbs and striking foes with Electrical Discharge after blinking away. Fortunately, players can utilize abilities such as SAS: Sclerokinesis to negate the lethal effects of those persistent lightning orbs.
Bear in mind that when SAS: Sclerokinesis is not available, use alternatives such as SAS: Velocity or Perfect Dodges to evade Karen's and his clones' charge attacks. This is because while lightning orbs are tailing you, a charge attack will knock you down, leaving you vulnerable to the incoming stuns from all 3 orbs, resulting in a stun lock and death from accumulated damage. Maintain pressure using SAS: Velocity after dodging attacks, or SAS: Psychokinesis if at range to continue dealing damage to Karen.
At approximately 30% health, Karen will use Psychokinesis in a fashion similar to SAS: Psychokinesis - he will pull all nearby objects to levitate around him, spinning as he hurls them at you consecutively. During this stage, players should focus on running and evading, as the levitating boxes around Karen will likely prevent all kinds of attacks. Right before the respective box is thrown, it will be highlighted in red, prompting the player to dodge.
If hit by any of the boxes, a cutscene will play, featuring Karen using a Brain-Crush-like combo on the player, dealing roughly 70% damage to the respective character's health. Quickly heal up with Medium Jelly, and counter pressure with previously mentioned SAS abilities. At this point, Karen's Crush Gauge should be depleted soon. Proceed to win this first stage of the fight against Karen with Brain Crush.
The next cutscene will begin, revealing Karen's past memories and pain manifesting as 5 giant, masked statues. In this second phase, the player does not fight Karen himself, but rather, against these statues one by one, each defeated through using the same attack pattern. During this battle, Karen will be unconscious, hidden behind one of the statue's metal fans as he controls these statues with his mind. Defeating each statue will knock down the metal fan, exposing Karen to damage for a long duration. The metal fan will then resume position as the next statue readies itself to fight the player.
These 5 statues will start off as mere holograms holding a flower in front of their faces. Each statue will then take turns materializing, turning the flower into a mask as they appear to fight the player. The fight will always start off with the statue spawning a specific, large object on the arena, such as a Big Dipper Fan, Anchor Crystal, Column Crystal, etc. When these objects spawn, a timer will appear on the object, and the player must fully deplete that object's health bar with attacks before time is out.
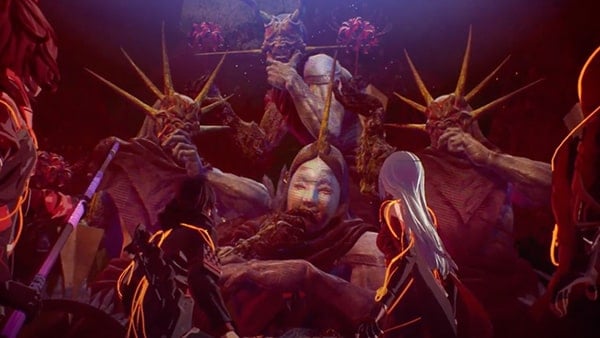
Doing this will allow the player to throw the large object at the respective statue, causing its mask to fall onto the arena. The player must then hold down the (LT) button in order to lift the mask and smash it down onto the ground with Psychokinesis to destroy it. The impact from the smash will send out a shockwave, knocking down all statues and the metal fan protecting Karen, allowing players to stack damage on him for a set duration. Once Karen's body begins to release dark matter, you will receive a prompt to back up from Karen, and the next statue will materialize with a new mask as the cycle repeats.
Some of these statues will spawn their respective object on the arena with false copies, leaving the player to guess which object to destroy as the timer counts down. Use SAS: Clairvoyance to see through the disguises and destroy the real object before time is out. Additionally, in the battle against the last few statues, an untargeted shadow of Karen will cast attacks to disrupt the player from destroying said objects, as well as charging up Psychokinesis to throw the statue's mask. Make sure to use SAS: Sclerokinesis and SAS: Velocity to avoid Shadow Karen's attacks, and if the objects are obstructed by lightning fields, use SAS: Psychokinesis to destroy them instead. Fully deplete Karen's health in between battles against each statue to progress onto the next phase.
With most of his powers exhausted, Karen will resort to using some form of dark illusion to isolate the player from the rest of the team. In this third phase, the battle will begin with the player fighting against Karen alone, with all forms of SAS powers and communications disabled. The goal here, in the beginning, is to merely survive, allowing the respective character to read out the monologue in prompts. After dodging a few of Karen's blinks and melee attacks, a cutscene will play, showing the timely entrance of Hanabi and Shiden, saving the player from Karen's attack and automatically dealing damage.
As the fight goes on, Karen will often be automatically countered by pre-determined cutscenes, featuring the entrances of other OSF members. At this stage of the story, you can begin to counter pressure and defeat the weakened Karen with ease as you will have near perma-access to all SAS abilities. As Karen is finally defeated for good, the system log will display the reward of 70,00 EXP and 50,000 kins received for defeating this final boss.
Trivia & Notes:
Trivia and notes go here
