Protecting Lives and Protected Lives is a Quest in Scarlet Nexus. Cooperating with Yuito Platoon, Kasane and her team decide to pressure the Seiran government to help them stop Togetsu's plan. They try to think of who to bring this to.

General Information
- Phase: Phase 9
- Character: Kasane Randall
- Previous: They Speak of the Hidden Past
- Next: Conclusion, and an Accidental Meeting
- Bosses: Kodama Melone (Boss), Dispen Fisher
NPCs & Characters
- Arashi Spring
- Kyoka Eden
- Luka Travers
- Shiden Ritter
- Satori the Archivist
- Hanabi Ichijo
- Tsugumi Nazar
- Kagero Donne
- Wataru Frazer
- Yuito Sumeragi
- Haruka Frazer
- Fubuki Spring
- Kaito Sumeragi
- Karen Travers
Bosses
Items
Consumables and Other Items
- Max Jelly
- Medium Jelly
- SAS Refueling Drink
- Mizuhagawa Environment A
- Mizuhagawa Environment B
- Mizuhagawa Environment C
- Mizuhagawa Environment S
- Arahabaki Environment A
- Arahabaki Environment B
- Arahabaki Environment C
- Arahabaki Environment S
- Sabbat-type Suppression
- Paws-type Suppression
Equipment & Upgrades
- n/a
Enemies
Protecting Lives and Protected Lives Walkthrough
Cooperating with Yuito Platoon, Kasane and her team decide to pressure the Seiran government to help them stop Togetsu's plan. They try to think of who to bring this to...
Mizuhagawa District
Haruka will receive an update that they are starting to transport the Other Weapons from the Supernatural Life Research Facility to Mizuhagawa District. It appears to be led the General Fubuki.
The team will need to head to Mizuhagawa District to investigate. Head into the construction site. Save with Satori the Archivist if needed. Avoid the water attacks from others and head up the stairs follow the quest marker on the map to get to your target location. Head to the hall on the left and clear the Others. You will want to head down to the next area and there will be an elevator that will take you to the target destination. This will begin the next cutscene.
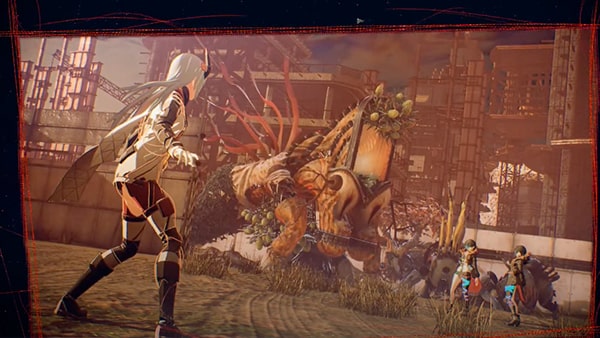
This is where they will come across Naomi and Kodama Platoon. Fubuki will explain that he needed extra help to go against Karen and turned to the Other weapons, but mid-conversation, Arashi will deliver a blow and reveal that Fubuki is actually Kodama's twin in disguise, Yuta Melone. This will initiate a fight against Kodama and her twin. You will need to clear Kodama Melone (Boss) and Yuta Melone.
Boss Battle: Kodame Melone

Kodama Melone (Boss)
-
When your Brain Field gauge is fully charged, deploy your Brain Field to dominate the fight against Yuta and damage her as much as possible with rapid throws. Once Yuta's health reaches about 60%, Kodama will join in and the twins will perform the unison cane smash once more, sending out another shockwave. As you dodge the shockwave, a cutscene will play, featuring the two sisters pushing their pipes into the ground, then releasing a powerful sonic boom in ensemble, knocking down the team and inflicting heavy damage. Once the cutscene ends, you will find the whole party in low health with one or two still bleeding, so prioritize and heal everyone up with Medium Jellies, before going back into the fight. Sneak in using SAS: Invisibility to backstab Yuta, depleting her Crush Gauge, speeding up the fight with an early Brain Crush.
-
With Yuta's health reduced to less than 25%, the twins will automatically activate their own Brian Field. In this state, the two sisters will continuously spam series of soundwave attacks, which can be fairly hard to dodge. This is why it is important to have saved up SAS: Velocity right before using the earlier Brain Crush, as it will come in handy now to dodge all attacks. As SAS: Invisibility charges up again, use it to confuse the sisters on your location and stall the fight, as well as counter-attacking with a backstab near the end of their Brain Field.
For a strategy guide to defeating Kodame Melone and Yuta Melone, click here.
After their defeat, they will resort to using the Others, including Naomi, against them. They will also be joined by the Design Children from Togetsu and Naomi will lead an attack against them to protect Kasane. This will lead to Naomi's death.
Karen will seem to appear out of nowhere and will once again take a copy of Kasane's powers before mentioning Yuito's name and teleporting out. Haruka is able to locate Yuito Platoon at Arahabaki Secure Site.
Suoh City Ryujin Ward
Travel to Suoh City Ryujin Ward to see the aftermath of a battle. Wataru will show them a safe route to Arahabaki Site and this will be their next location
Arahabaki Secure Site
Continue forward. Follow the quest marker and clear any Others in your way. You will encounter a few Base Paws and Vase Paws. Once you reach a closed gate, you won't be able to get through with the laster protection field. Use Arashi's power, SAS: Velocity to get through the barrier. Clear the Booger Sabbat. When coming across any upright bridges, use Kasane's SAS: Psychokinesis to lower the bridge and be able to cross. Make your way to the objective point. Head south and save with Satori the Archivist. Investigate the blue switch to open the gates or continue to use Arashi's power to get through. clear the Plateau Pendu. Enemies in this area can cause the Confusion Status Effects, and in the next area, the Base Paws can deal oil which will make you susceptible to Burning, so be sure to avoid these, or to clear these effects with your Items if hit.
Continue following the objective point. In this next area, lower the bridge to reach the activation switch, then activate it and continue. Head west through the gates and up the stairs going south and activate the next switch.You will encounter some walkways going in the opposite direction. Use Arashi's powers to counter them if being attacked at the same time. Continue heading south until you reach the Worship Hall. Hrad south till you reach the open area and flip the center switch. Head west to the next area and use Velocity to get through.
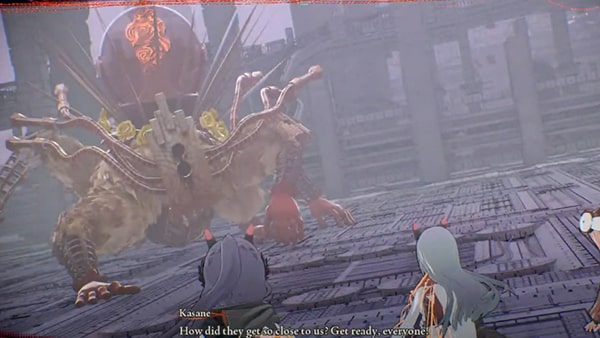
While in Arahabaki, you will eventually receive a video transmission of Chief Sumeragi revealing that Yakumo Sumeragi is still alive. Shortly, they will be attacked by a major other, Dispen Fisher.
Boss Battle: Dispen Fisher

Dispen Fisher
- Since the Dispen Fisher will alternate between fighting on ground and kiting from the ceiling, it is recommended for players to start charging and conserving the Psychokinesis bar by attacking it in melee shortly before it crawls up. Having sufficient Psychokinesis energy in the Psychokinesis bar will ensure the player maintains a relevant damage output at all stages, even when the Dispen Fisher is untouchable by melee attacks.
For a detailed strategy guide on the Dispen Fisher, click here.
Defeat the Dispen Fisher and Hanabi will be heard after the short earthquake. Yuito will be found unconscious and will be at risk of losing his memories. The teams call out to him and send him their memories to bring him back.
The teams will return to Suoh and they will be joined by General Fubuki. He will be hurt when they encounter him and they will all have to return to the Hideout together. They will decide to share the Hideout.
Trivia & Notes:
Trivia and notes go here
