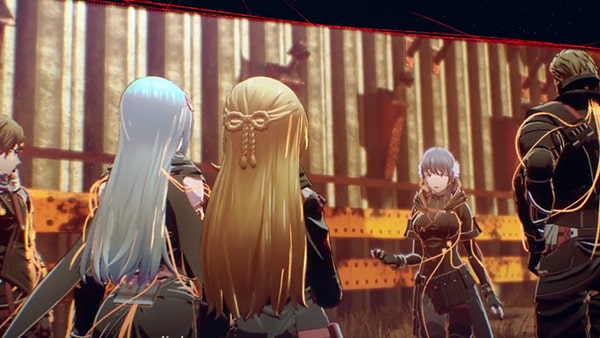
Searching for Freedom is a Quest in Scarlet Nexus. Kasane and her sister, Naomi, are both assigned under Kyoka Eden's Platoon. Together with her teammate, Shiden Ritter, Kasame is sent to the Mizuhagawa District for their field training and first mission. After defeating a major Other, Kasane finds herself surrounded by press drones.

General Information
- Phase: Phase 1
- Character: Kasane Randall
- Previous: Prologue: Encounter
- Next: Broken, Scattered Days
- Bosses: Dispen Perry
NPCs & Characters
- Kyoka Eden
- Naomi Randall
- Haruka Frazer
- Shiden Ritter
- Arashi Spring
- Kodama Melone
- Fubuki Spring
- Satori the Archivist
Bosses
Items
Consumables and Other Items
Equipment & Upgrades
- N/A
Enemies
Searching for Freedom Walkthrough
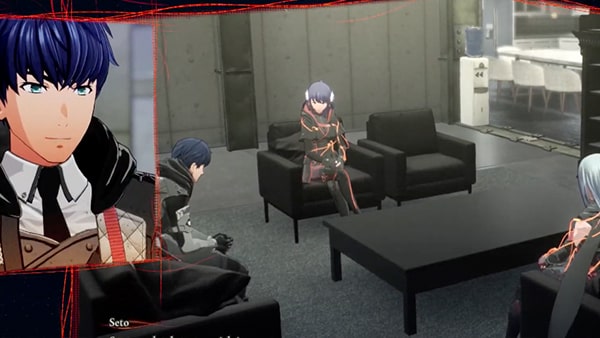
Kasane and Naomi travel to the OSF Headquarters, where they first meet Seventh Class Septentrion Captain Seto Narukami, before being introduced to their platoon. Having been assigned to the First Platoon, the two sisters nervously make their introductions as they meet fellow teammates Gemma Garrison, Shiden Ritter, Psynet Support Specialist Haruka Frazer, and leader of the Eighth Company of the First Regiment, their commander Kyoka Eden. Paired up with the self-conceited Shiden, Kasane and the rest of the platoon is ordered to meet Kyoka at Mizuhagawa District in one hour. Right before she leaves, Haruka reveals that she has been chosen by the OSF to test out the new power-enhancing system, the BIAS, and installs it on Kasane while warning her about its potential risks.
Mizuhagawa District - The First Assignment

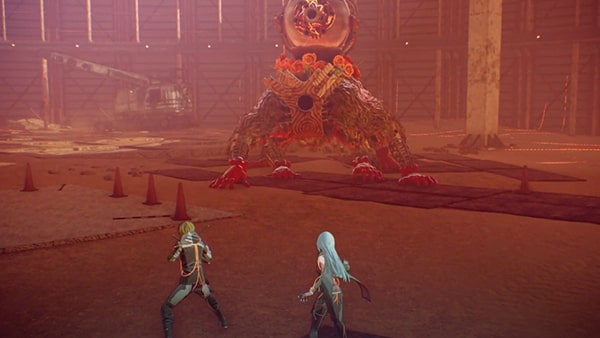
Mizuhagawa New Development District will be unlocked as a location on your World Map right after the cutscene ends, and a tutorial window displaying how to navigate around the world map will pop up. Follow the tutorial and travel to Mizuhagawa District's Construction Site to begin your first assignment. A cutscene will play once you arrive, featuring Kyoka giving the order for each pair in the team to follow Haruka's instructions and look for the objective. Travel onwards up the curved slope and jump down onto the floor below. Following a brief cutscene, you will encounter Scummy Pendus in the area. Defeat them with easy using Psychokinesis attacks. During the fight, a tutorial regarding SAS abilities will pop up. With Shiden Ritter nearby, you may access SAS: Electrokinesis to familiarize with its powers while fighting the Scummy Pendus. As you explore the area, you may also encounter Plateau Pendus and Bile Roots. Dispatch of these flying creatures using Psychokinesis at range, and land consecutive strikes with SAS: Electorokinesis to pin them down with the Shocked Status Ailment. Continue to follow the objective marker to proceed, picking up Materials such as Mizuhagawa Environment Datas and Battle Records along the way. Follow Haruka's prompts on the left as she will alert you if you are heading towards the wrong direction. As you run around the circular well, you should eventually pass by Satori the Archivist. Save the game at this point, and purchase any Battle Items you are short of. Continue to follow the objective marker, clearing more Others on the way. It should first lead you down one level through a construction elevator, then down another level again with a flight of stairs. Once you reach this bottom floor, a cutscene will automatically play, An enormous Other with a mammalian body and glass tank on its back, known as the Dispen Perry, will suddenly descend from above. This will be the first boss fight encountered in Kasane's Story.
Boss Fight - Dispen Perry

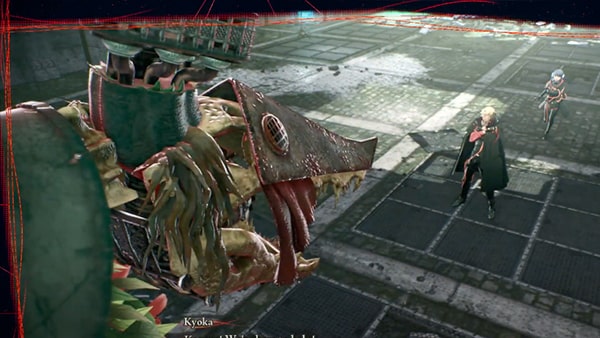
The Dispen Perry has two initial major attack types, a melee side slash and a ranged projectile attack that will shoot from its water-cannon tank. This will cause players to be affected with the Status Ailment: Soaked, which can be cured with the Normalization Tablet. It can also use a one-armed swipe in melee. The prompts on the left will suggest using Psychokinesis Attacks to hurl objects at the tank, so briefly disabling the Dispen Perry while it is applying the Soaked Status Ailment. Using SAS: Electrokinesis attacks at this point will automatically apply the Shocked Status Ailment, further stunning the Other monstrosity. As the Dispen Perry takes damage up to a threshold, it will get more aggressive and perform a leap attack, where it jumps in projectile motion and crash lands in your area. It will briefly stay put and struggle after landing.
At this stage, a prompt on the left will reveal that there is a dump truck two floors above, about to fall as it is hanging on the edge. Follow the prompt and position yourself near that dump truck to lure the Dispen Perry to leap at you. Once it jumps, follow the prompt to hold down the (RT) button to pull the dump truck off the cliff, causing it to crush the Dispen Perry, killing it in the process. A cutscene will play, featuring the "Crows" drones swooping in to interview Kasane's success on her first mission, as well as the team's return to Suoh City Ryujin Ward.
Kikuchiba - Deserted Merchant City
[img]
Kasane and Naomi meet up with Kyoka and Haruka outside the OSF Headquarters in Suoh. After receiving personal acknowledgements from Second Class Septentrion Commander, Fubuki Spring, the platoon receive a system message, requesting members to travel to Kikuchiba to support Kagero Donne from the Seto Platoon.
The location Kikuchiba will be unlocked on your map right after the cutscene ends. Open up the map and travel to the Underground Facility in Kikuchiba as the story suggested. When you arrive, you will receive prompts from Haruka via the Psynet regarding Kagero's exact location. Travel onwards towards the objective marker, and explore nearby routes to collect Kikuchiba Environmental Datas (e.g: Kikuchiba Environment B) and Light Jellies along the way. Defeat Scummy Pool and Vase Paws that spawn to gain EXP and ![]() . You will soon enter into a large room, where you will encounter a Wither Sabbat with two Kitchen Rummies. A tutorial with pop up, displaying respective buttons for activating SAS: Duplication, followed by another one, revealing that some others have "shells" that need to be broken to expose their weak spots, rendering them vulnerable and depleting their Crush Gauge. Follow these tutorials and refer to the tip on the left by throwing duplicated objects at the Wither Sabbat's back shell using the (RT) button. Continue to follow the path towards the objective marker after the skirmish. You will soon reach a flight of stairs leading to the floor above, with Satori the Archivist standing on the landing in the middle. Approach him to save the game before proceeding up. You will be greeted by 4 Scummy Pools and 2 more Kitchen Rummies on the next floor. Defeat them as you did before, then proceed directly into the objective marker to trigger the cutscene. You will be introduced to Kagero Donne, and witness a huge Brawn Yawn emerge from below the ground. Right when the battle begins, a tutorial will pop-up, granting you access to Kagero's ability, SAS: Invisibility, making you undetectable, during which all forms of attacks will deal massive damage to enemies' health and Crush Gauge.
. You will soon enter into a large room, where you will encounter a Wither Sabbat with two Kitchen Rummies. A tutorial with pop up, displaying respective buttons for activating SAS: Duplication, followed by another one, revealing that some others have "shells" that need to be broken to expose their weak spots, rendering them vulnerable and depleting their Crush Gauge. Follow these tutorials and refer to the tip on the left by throwing duplicated objects at the Wither Sabbat's back shell using the (RT) button. Continue to follow the path towards the objective marker after the skirmish. You will soon reach a flight of stairs leading to the floor above, with Satori the Archivist standing on the landing in the middle. Approach him to save the game before proceeding up. You will be greeted by 4 Scummy Pools and 2 more Kitchen Rummies on the next floor. Defeat them as you did before, then proceed directly into the objective marker to trigger the cutscene. You will be introduced to Kagero Donne, and witness a huge Brawn Yawn emerge from below the ground. Right when the battle begins, a tutorial will pop-up, granting you access to Kagero's ability, SAS: Invisibility, making you undetectable, during which all forms of attacks will deal massive damage to enemies' health and Crush Gauge.
Mini-boss Fight: Brawn Yawn

The Brawn Yawn will first perform a ranged attack by releasing a beam of energy from its mouth. Move to the side to avoid it, then approach to land a flurry of melee strikes. As it takes damage, the Brawn Yawn will burrow into the ground, becoming undetected, before explosively reemerging from the area below you. Follow the tips and prompts from Haruka on the left to use SAS: Invisibility to vanish, and land a backstab by holding (Y) as the Brawn Yawn reemerges, clueless as to where you went. Repeat this strategy and land heavy backstabs on the Brawn Yawn's arms, where the cluster of bulbs are extra vulnerable to damage. If the Brawn Yawn burrows while SAS: Invisibility is on cooldown, simply maintain movement by running in circles to prevent its reemergence from knocking you up. Swiftly take down the Brawn Yawn with Brain Crush once its Crush Gauge has been depleted. A cutscene will play, where Kagero will request you to stay behind and look for his commander, Seto Narukami, before leaving the area.
Proceed to exit the room through another flight of stairs to access Kikuchiba's Mid-Level Shopping District. Continue to follow the path collecting Light Jellies on the way, and you shall arrive at the objective marker after a few turns. The next cutscene will play, featuring Seto defeating 2 Brawn Yawns with ease. As an undetected third one leap up from below Kasane, Seto instantly leaps forward to rescue her, killing the intimidating Others with his powerful Electrokinesis, but receives a wound on his back in the process. Fortunately, Kasane recalls of a shelter nearby that her family, the wealthy Randalls, privately owned. To treat Seto's injury, they travel to the shelter together.
Hideout: Site for Rest and Relaxation

Upon their arrival to the Randall's shelter, commander Seto mentions how nice the place is, and that it would be an ideal location if used as a team's Hideout. Kyoka goes on to explain to Kasane that a hideout is a private location each platoon exclusively uses as a station outside of the OSF Headquarters for emergencies, replenishment, and support. Without hesitation, Kasane promptly agrees to soliciting her shelter to be Kyoka Platoon's hideout. The cutscene then goes on to feature the arrival of Naomi and Shiden Ritter, who came to support their platoon, as it concludes with the beginning of Standby Phase 1.
Trivia & Notes:
Trivia and notes go here
