Trusting the Path to the Future (Kikuchiba) is a Quest in Scarlet Nexus. Yuito formally enlists in the OSF and is assigned to Seto Platoon, commanded by the Septenrion Seto Narukami. He joins with his childhood friend Hanabi Ichijo and heads to Kikuchiba for their first mission and field training.

General Information
- Phase: Phase 1
- Character: Yuito Sumeragi
- Previous: Prologue: Reunion
- Next: Trusting the Path to the Future (Mizuhagawa District)
- Bosses: Gunkin Perry
NPCs & Characters
- Hanabi Ichijo
- Seto Narukami
- Nagi Karman
- Tsugumi Nazar
- Kagero Donne
- Wataru Frazer
- Satori the Archivist
Bosses
Items
Consumables and Other Items
- Light Jelly
- All: Light Jelly
- Battle Record B
- Other Ecology A
- Normalization Tablet
- Kikuchiba Environment A
- Kikuchiba Environment B
- Kikuchiba Environment C
Equipment & Upgrades
- n/a
Enemies
Trusting the Path to the Future (Kikuchiba) Walkthrough
Yuito finally is enlisted as an official member and cadet of the OSF. He is now part of the Seto Platoon that is lead by Seto Narukami. For his first mission, he is joined by his childhood friend Hanabi Ichijo to dispatch a threat of Others in the area. This is his first mission and field training as a cadet of the OSF.
To Kikuchiba

After the cutscenes during the events in the previous main quest, Prologue: Reunion, you return to Suoh City Ryujin Ward where you started, outside the OSF Training Facility, only this time, you are accompanied by a Companion character, Hanabi Ichijo. Throughout this quest, you will learn more advanced mechanics, such as the Struggle Arms System or SAS where the playable character is able to connect and manifest the power of the companion for a period of time. You can save your game first by interacting with Satori the Archivist who's just near where you start this quest - when you are ready, open the World Map and choose Kikuchiba as your next location to travel - upon arriving, head to the objective marker to rendezvous with Seto Platoon.
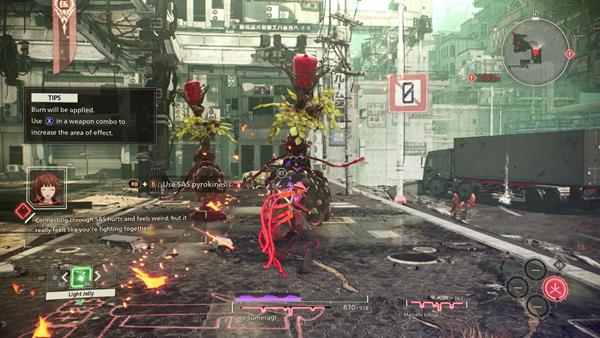
After the cutscene, head to the marked objective. In this first section, you'll encounter x2 Fuel Pool enemies. Here, you'll be given a tutorial on how the Struggle Arms System or SAS works, make sure to read it to fully understand the combat mechanic. By using SAS: Pyrokinesis, flames engulf Yuito's weapon and Psychokinesis objects for the attack, and weapon combos will have an increased area. it increases damage to the enemy and can also cause the Burned Status when repeatedly used. It is effective against enemies with the Oiled Status. Additional effects will be added as you strengthen your bond with Hanabi.

Continue further and you'll encounter x2 Vase Paws and x1 Fuel Pool enemies, clear the area and in this section, you'll see a glowing item on the right side where you can obtain x1 Light Jelly. Before going up the stairs towards the marked objective, check the corner at the northeast side of the mini-map, where you'll find another Fuel Pool enemy, kill it and keep going towards the end of the corner to find another green glowing item to find another Light Jelly and Kikuchiba Environment C, after grabbing it, go back, and head up the steps.
Shopping District: 2nd Level
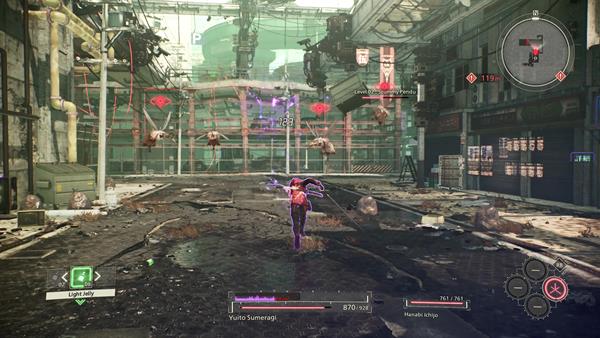
On the next level, you'll encounter a group of Scummy Pendu enemies. Use Rising Slash here to deal a large amount of damage and simultaneously use Psychokinesis to easily defeat these enemies. Quickly eliminate them since you'll most likely aggro x2 Vase Paws that are just around the corner where these airborne enemies are.

After defeating the enemies, check the right side to find Battle Record B. From where you picked up the item, there's a short narrow alleyway, go towards it and behind the buildings, you'll find Kikuchiba Environment B, keep going straight, and head towards the parking garage where you can find Kikuchiba Environment C. There's a gate that's open at the side. Also, still on the same level, there's a green glowing item where you can acquire x1 Normalization Tablet - when you're done grabbing all items, continue going up via the stairs.
Shopping District: 3rd Level
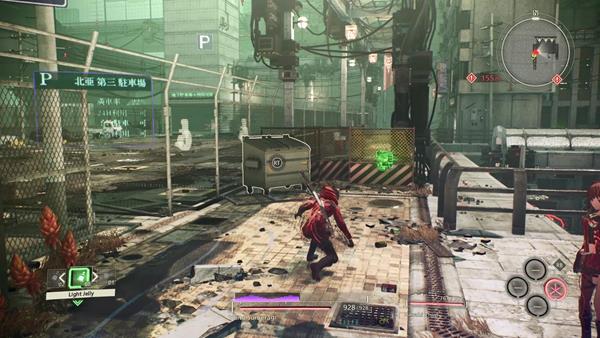
At the top of the second stairs, you'll find Satori the Archivist and the NPC's shop. You are free to interact to save your progress and check his shop to restock on items. Before you head towards the open parking lot, make sure to grab the green glowing item to acquire x1 All: Light Jelly.

When you're ready, head towards the parking lot, and x3 Vase Paws, followed by x1 Wither Sabbat enemies will spawn. You'll then be given another tutorial on how to trigger a Special Object Attack - after defeating the enemies, head up the steps to reach the fourth level and a dialogue cutscene will trigger.
Shopping District: 4th Level
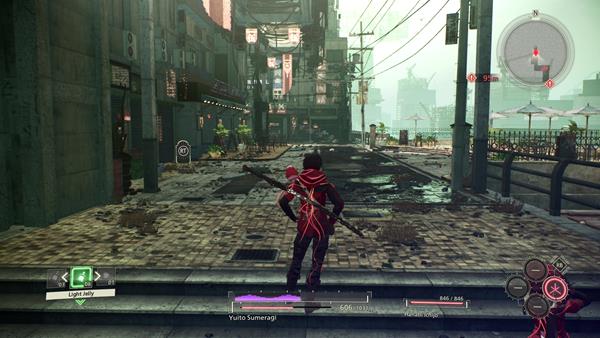
Proceed further into the shopping district where you'll encounter another swarm of Scummy Pendu around the corner. Defeat the enemies, and head up another set of steps to reach the 5th level, the Upper-Level Construction Site. There are no items lying around the 4th level, so just defeat the enemies and continue going up towards the next section of Kikuchiba.
Kikuchiba: Upper-Level Construction Site

As soon as you head up the short steps, you'll encounter x2 Scummy Pendu and x3 Vase Paws. Try taking out the airborne enemies first to stop them from shooting projectiles at you and so that it is easier to take out the Vase Paws enemies. Once you defeated the enemies, before going up the long steps, check the path on the right, at the end of it, you'll find x2 Kikuchiba Environment A.

At the top of the steps, you'll encounter x4 Fuel Pool roaming the area, remember that using SAS: Pyrokinesis is strong against this enemy, and continuously attacking it while the SAS ability is active causes it to be engulfed in flames. Where the Fuel Pools were, if you check the right side of the map, there's a large open field where it looks to be a place where a statue or monument was. There's x3 Kikuchiba Environment B on the ground next to a sitting bench. After grabbing the item, continue further and you'll encounter x2 Fuel Pool at the east side of the mini-map, opposite to where the next steps are, kill the enemies and approach the closed security grates to find x1 Normalization Tablet before going up the stairs.
Construction Site
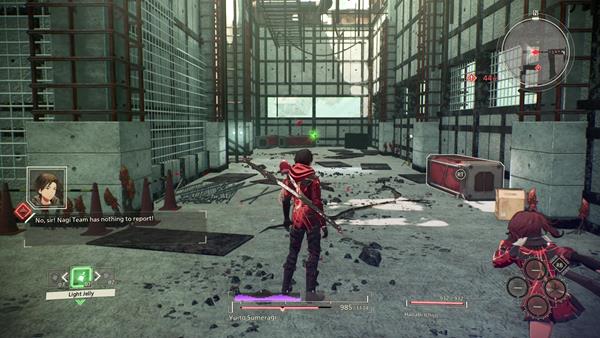
You'll now reach the construction site proper at the top of the stairs. Look to your left to find x1 Kikuchiba Environment B and straight ahead of you is a green glowing item that contains x1 Light Jelly. After grabbing both items, head up the metal slope that's on the left where you got the Light Jelly. At the top, you'll encounter x1 Fuel Pool enemy. Before you ride the lift on the left side, check the corner on the right side to find Kikuchiba Environment A.

Upon reaching the topmost level of the Construction Site, make sure to grab the items that are shown in the mini-map, you'll find those items are marked with a green icon. You'll find items such as x1 Normalization Tablet and x1 All: Light Jelly. Also, Satori the Archivist is here, so save your game at this point since you'll be entering a boss arena. When you're ready, head up the metal slope that's on the right side of Satori and approach the large area to trigger a cutscene.
Boss Battle: Gunkin Perry

You'll now fight against the first boss of the game, Gunkin Perry. The Gunkin Perry has two initial major attack types, a melee side slash and a ranged projectile attack that will shoot from its jar head. It only uses its right arm to perform the side swipe attacks, so avoid this area in general by remaining directly on its left or keeping behind its arm range.
Hanabi Ichijo will suggest using Psychokinesis on the surrounding objects to hurl them at the creature's head. Upon landing a successful hit, the glass layer will break and the Gunkin Perry is temporarily stunned which gives players an opening to perform combo attacks. Furthermore, hurling large objects at the Gunkin Perry's glass tank on its back by using Psychokinesis will cause it to explode, drenching it in oil. Hanabi will then prompt players to use her attack to follow up with SAS: Pyrokinesis which will cause the Gunkin Perry to ignite and burn, dealing additional damage. Continue with this combination along with using Psychokinesis to drain its HP bar.

During its next wave of attacks, the Gunkin Perry will execute two melee attacks, which consist of a stagnant spin attack and a smash attack by leaping high into the air. Both of these melee attacks are avoidable by running away from Gunkin Perry as they are telegraphed, and are slow to execute. Take note that the Gunkin Perry is grounded during his spin attack, rendering it stagnant and unable to travel. Hence players can use this as an opportunity to spam Psychokinesis skills to damage it during its spin attack, before alternating back to melee attacks when the skill is over. On the other hand, its leap attack is always followed up with stomps from all six of its legs, so make sure to wait until the Gunkin Perry stands up again before approaching it again.
Additionally, the Gunkin Perry is capable of a ranged attack where it will launch three oil bombs that spread out in different directions. These bombs apply the Status Ailment "Oil", which causes affected units to lose their footing, and burn when hit by fire attacks. Fortunately, these oil bombs are fired in large blobs that spread out in projectile motion, giving players enough time to move away in any direction to avoid them.
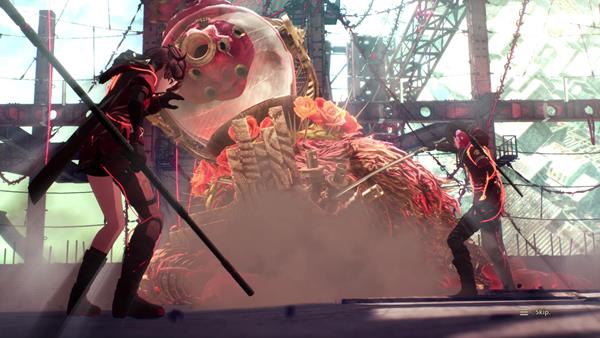
Platoon Leader Seto Narukami will also point out some environmental features including the hanging objects in the area. Lure the Gunkin Perry under the hanging materials and use Yuito's powers to knock it down over its head. A cutscene will then trigger after defeating this boss, you'll complete this quest, and return to Suoh City Ryujin Ward - defeating Gunkin Perry yields 400 EXP and 250 Currency, as well as the Gunkin Perry Analysis.
Trivia & Notes:
Trivia and notes go here
