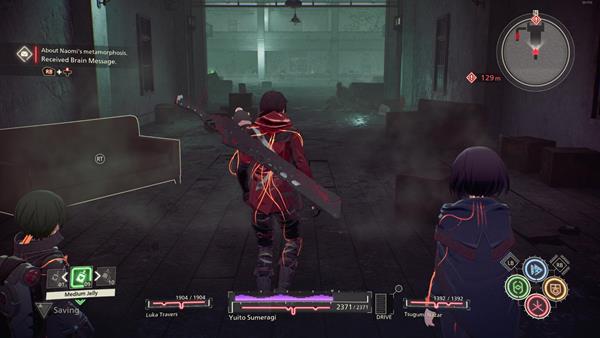
Where Lost Memories Lead is a Quest in Scarlet Nexus. Fubuki tells Yuito that both sides are trying to develop weapons against the Others. Fubuki suggests using the city computer Arahabaki to transmit the memory data of the moment Naomi became an Other to all the citizens' minds. This will create doubts in the minds of the people and break the government's control. Yuito decides to infiltrate the Old OSF Hospital again to search for the memory data that should have been taken from Nagi during his personality rehabilitation.

General Information
- Phase: Phase 7
- Character: Yuito Sumeragi
- Previous: Choice to Face it, Eyes Open (Research Facility)
- Next: Collecting Pieces of Unknown History
- Bosses: Nagi Karman
NPCs & Characters
- Wataru Frazer
- Nagi Karman
- Karen Travers
- Fubuki Spring
- Hanabi Ichijo
- Tsugumi Nazar
- Luka Travers
- Gemma Garrison
- Satori the Archivist
Bosses
Items
Consumables and Other Items
- Max Jelly
- Light Jelly
- Medium Jelly
- All: Light Jelly
- All: Medium Jelly
- All: Max Jelly
- Brain Field Gear
- Normalization Tablet
- SAS Refueling Drink
- Fire-Proof Barrier: Generic
- Famous Alcohol Set
Equipment & Upgrades
- n/a
Enemies
Where Lost Memories Lead Walkthrough
Yuito and his platoon return back to the Old OSF Hospital in search of data that needs to be used and transmitted into the minds of the citizens of New Himuka in order for them to break free from the government's hold. Yuito knows he must find his old friend, Nagi, hoping that it's not too late for him.
Old OSF Hospital: Lobby

You'll arrive at the Old OSF Hospital along with your platoon, Tsugumi Nazar, Luka Travers, Hanabi Ichijo, and Gemma Garrison, also with Wataru Frazer who is assisting the team via comms. It's best to have at least Luka and Tsugumi in your active party since Tsugumi can attack enemies from afar, while Luka's weapon and attacks are heavy-hitting attacks. Upon arriving, walk up to the lobby section and you'll first encounter the Saws Paws, activate SAS: Clairvoyance to see it while it is invisible. There's a couple of Resource Caches in the area where you can find the following items such as the All: Light Jelly.

From the lobby, go right and around the corridor, then head outside the area that's overgrown by fauna. x1 Barrista Santa and another Saws Paws will appear here. Make sure to take out the Saws Paws first while using SAS: Clairvoyance, then shift towards the Barrista Santa and use Psychokinesis to break its shell, revealing its weak spot. After defeating it, in the same area, make sure to check the corner to find another resource cache containing x1 Famous Alcohol Set - also, if you go through the opposite door of the garden-like area, back inside the building, there's a gold cache containing x1 Mysterious Text Data.
Old OSF Hospital: 2nd Level

Next, head up the stairs to reach the second level and go towards the room on the left. You'll find a locked gate that you can get through with SAS: Teleportation. Upon teleporting to the other side, you'll be ambushed by a group of Others such as Scummy Pool, Saws Paws, followed by another Barrista Santa. Take out the Scummy Pool enemies with SAS: Pyrokinesis, and again, SAS: Clairvoyance for the Saws Paws so you can see them while they are invisible, then finish the Barrista Santa with Psychokinesis to break its shell and exploit its weak spot once it is revealed - clear all the enemies and proceed towards the gate that's unlocked.

Along the way, you'll encounter x1 Saws Paws just before reaching the next room where Satori the Archivist is. Interact with Satori to replenish your HP, save your progress, and check the shop if you need to. When you're done, head towards the large room that's on the left side of Satori and you'll again, be ambushed by another group of Others. You'll encounter a group of Scummy Pool, along a strong enemy, which is the Base Paws.

You need to take out the Scummy Pool enemies first so you can focus on the Base Paws on its own. This enemy shoots out oil, if you are inflicted with the Status Ailment: Oil, you won't be able to dash for a brief moment until the effect wears off. A good counter is to use SAS: Teleportation so that you can jump around the battlefield and use SAS: Pyrokinesis to set it on fire and cause the Burning Effect - the weak spot is its legs, so when it stands up, attack it immediately - shortly after, a group of Saws Paws will appear, use SAS: Clairvoyance to see the enemy when it goes invisible.

After defeating all of the enemies, teleport through the gate on the right side and head inside the room at the end where you'll find a resource cache containing x1 Max Jelly. Go back and then head towards the open gate on the left side of the large room to reach the patient's floor. Inside the room before the patient's floor, there's a resource cache behind a couch that has x1 All: Max Jelly.
Old OSF Hospital: Patient's Floor

When you reach the corridor, there's a patient room on the right side just by the entrance, go in and you'll find another resource cache by the shelf that has x1 Brain Field Gear. Go back outside and continue further, you'll see a gold resource cache containing x1 Mysterious Text Data by the makeshift barricade. Be cautious since a group of Scummy Pool enemies will spawn when you approach the item. After grabbing the data, continue further and you'll encounter another Saws Paws.

When you're on the other side of the floor, look to your right and you'll find another patient room that's locked. You can phase through with SAS: Teleportation and you'll find another Mysterious Text Data on the desk of the room, as well as a reosurce cache containing x1 Fire-Proof Barrier: Generic. Go back outside when you've grabbed the items and continue towards the quest objective - before reaching the room where Satori the Archivist is, you'll be ambushed again by a group of Others such as the Scummy Pool, Saws Paws, and Barrista Santa, you need to defeat them all so that you can proceed to the next section.

In the section across Satori's spot, go through the path on the right and then turn left, you'll see a hallway of cells, and at the end is another group of Others such as the Scummy Pool and Barrista Santa. Defeat the enemmies first and check the area to find the following items from resource caches: 2000 ![]() , Medium Jelly, and another Mysterious Text Data. Once you've grabbed all the items, retrace your steps and head towards the third level of the hospital
, Medium Jelly, and another Mysterious Text Data. Once you've grabbed all the items, retrace your steps and head towards the third level of the hospital
Old OSF Hospital: 3rd Level

When you reach the third level, turn left and you'll see another gate that you can phase through that's next to a hologram. On the other side, there's a Saws Paws enemy. Defeat it with SAS: Clairvoyance and then enter the room behind it to find a resource cache containing x1 All: Light Jelly and another Mysterious Text Data inside the operating room. After grabbing the items, head back to where you fought the Saws Paws and head towards the quest objective.

The path here is linear and you'll eventually come across a section of a room that's filled with TVs. When you reach the large room past the entrance with the multiple television, a Barrista Santa will spawn, followed by the Base Paws and Saws Paws. You will need to take out all of the enemies first before you can proceed any further. When you're done continue on towards the quest objective where you'll find Satori the Archivist nearby - make sure to save the game before continuing on, a cutscene will then trigger upon reaching the quest objective.
Boss Battle: Nagi Karman

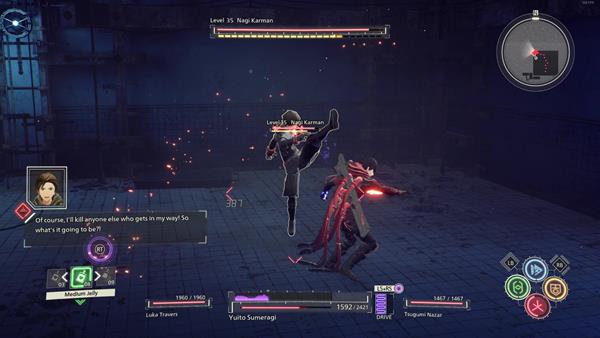
After the cutscene, you now have to fight against Nagi Karman who's now been changed by the effects of Personality Rehabilitation. In the initial phase of the fight, Nagi will first kite away to bait Yuito into chasing him down. As he approaches terrain, he will turn around to quickly throw a group of wind Shurikens that spreads out in a cone shape, damaging and knocking enemies back. As Yuito closes in on him, he will perform fast, upward kicks to interrupt incoming melee attacks, causing Yuito become airborne with him, followed by a downward wind smash which knocks down enemies. To summarize, Nagi's attack pattern during Phase 1 is as follows: Run away > Wind Shurikens > Uppercut Kicks > Wind Smash.

Since Nagi often executes this pattern as a chain of melee attacks Yuito can get overwhelmed, unable to stop the onslaught until the combo is complete. Therefore, to counter Nagi at this phase is to adopt a "Do or Die" tactic - the player must be alert and look for openings during Nagi's pattern, and once Yuito successfully lands an attack in melee, stay in the offense by chaining combos to keep Nagi pinned down. A skill that synergizes optimally with this strategy is SAS: Teleportation - stay at range so that Nagi is forced to throw Shurikens, and once he stands there idly, or randomly casts a melee attack, teleport in right when his attack completes and chain melee combos on him. As he is pinned down and your Psychokinesis bar is charged up, hurl adjacent objects at him to continue to dominate the fight.

At about 70% health, Nagi will deploy a smoke screen. Although this will buy him a few seconds to run away, it is a temporary distraction at best. Activate SAS: Clairvoyance to gain superior vision, which will enable you to see Nagi as a silhouette through the screen. At this stage, Nagi will once again stay back and spam singular wind Shurikens at you, in hopes to keep Yuito away. It will be difficult to directly run towards him as these Shurikens are very accurate and slightly track the target. Instead, hurl large objects at Nagi to momentarily shock him and close in steadily, then repeat until you finally reach him. He will repeat the same attack pattern until his health is reduced beyond half health.

At roughly 50% health (or below) phase 2 of the battle will begin. Nagi will suddenly perform his Tornado attack, which resembles his downward Wind Smash strike, but instead of an expanding gust of wind, it is followed by a large tornado that spins around him, knocking away any unit or objects nearby. Nagi will appear in a different outfit, where his head is hooded and his face covered by a mask. His Wind Shurikens will passively and steadily orbit around him, covering nearly the entire arena. All these AOE skills that extend out from Nagi himself makes Luka's teleportation SAS an even more effective counter. Whenever Nagi casts his tornado, he stays inside and remains stagnant for the entire duration. Simply dash in and chain combos in melee to knock him down. As he takes hits from you he will resort to his attack pattern from Phase 1 again. Blink away as he strikes, and blink back in to melee combo him. Rinse and repeat until he is defeated - a cutscene will then trigger after defeating him.
Escape the Hospital

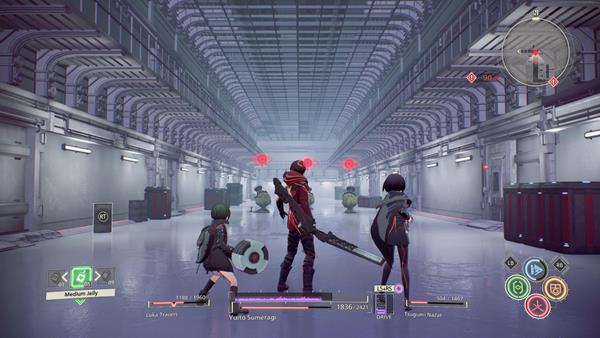
You'll now find yourself at a secret sacility of the Old OSF Hospital. Yuito learns that he was just a dud and used for experimentation when he was young but was later on rescued by Fubuki and regroups with the rest of his comrades. Upon gaining control of Yuito, you need to escape the facility, return back to the Old Ward, and reach the lobby area to escape. Simpy defeat any enemies you encounter, and retrace your steps back to the lobby which is the marked objective - a cutscene will trigger here where you encounter Karen Travers and you'll return back to the Hideout and enter the Standby Phase.
Trivia & Notes:
Trivia and notes go here
