To Get Back What's Important is a Quest in Scarlet Nexus. Following Kasane's time travel incident, she agrees to join Karen in Seiran, as a desperate means to save her sister, Naomi. After helping Karen investigate the anomaly which she and Yuito accidentally created on Kunad Highway, she decides to sneak into Seiran's Supernatural Life Research Facility to look for Naomi.

General Information
- Phase: Phase 6
- Character: Kasane Randall
- Previous: The Point of No Return
- Next: Intertwining Thoughts and Confusion
- Bosses: Rotunda Pagoda, Yuito Sumeragi (Boss)
NPCs & Characters
- Kasane Randall
- Kyoka Eden
- Arashi Spring
- Kagero Donne
- Shiden Ritter
- Satori the Archivist
- Haruka Frazer
- Karen Travers
- Naomi Randall
- Kodama Melone
Bosses
Items
Consumables and Other Items
- Light Jelly
- Medium Jelly
- Key Card No 0.
- Key Card No 1.
- Key Card No 2.
- Key Card No 3.
- Key Card No 4.
- Pound-type Suppression
- Other Ecology S
- Other Ecology B
- SAS Refueling Drink
- Research Facility Environment C
- Forcefield: Mk IV
- Rummy-type Suppression
- Battle Record A
- Pendu-type Suppression
Equipment & Upgrades
- N/A
Enemies
- Vase Paws
- Buddy Rummy
- Cushion Pound
- Fuel Pool
- Barrista Santa
- Filler Pillers
- Marabou Pendu
- Kitchen Rummy
- Base Paws
To Get Back What's Important Walkthrough
The platoon receives news from Haruka that Seiran has established its own OSF, now known as the Seiran OSF. Since they have all chosen to join, Major General Karen Travers has assigned them to be First Platoon, with Kasane being the commander this time. Determined to do whatever it takes to get her sister back, Kasane and her platoon travel to the Seiran OSF HQ to speak to Karen regarding their first mission. Karen shows the team of the gravitational anomaly on Kunad Highway, which he now calls the Kunad Gate. To further understand the Kunad Gate, Karen has decided to assign a group of investigators to look into it. As such, the Kasane Platoon's first mission is to escort the investigation team, along with Karen himself, to the Kunad Gate safely. When Kasane asks Karen about his promise to help her save Naomi, Karen conveniently states that it is of a higher urgency for Kasane and her team to prove themselves worthy of being part of the Seiran OSF first, as a means to gain the Seiran OSF's trust. Left with no other choice, Kasane reluctantly agrees to play along with Karen's plans for now.
The Kunad Gate
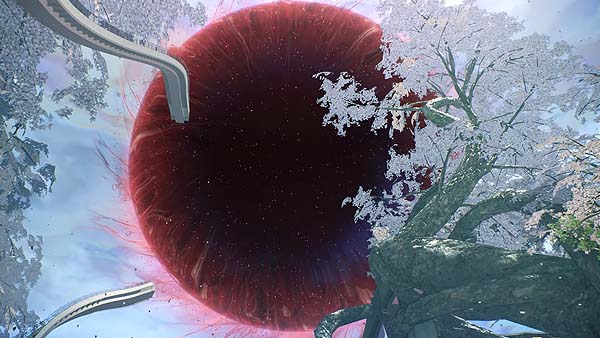
Travel to the Kunad Highway and head on straight to the objective marker. If needed, turn in at one of the U-turns to save the game and replenish items by speaking to Satori the Archivist. Once you arrive at the objective, the cutscene will show the Kunad Gate, hovering above the team. The scene will feature the conversation between Karen and Kasane. By reading Kasane's body language, Karen figured out that she had already known of the Kunad Gate before, and concludes that she must have time traveled to the future. Unable to hide the fact, Kasane tells Karen she met him in the future, and that he did not age at all. She also tells Karen the future version of him claimed that a cure for human-metamorphosed Others could have been discovered had she time travelled earlier. When asked about Naomi, Karen reveals that she is being held in Seiran's Others Research Lab, which is only accessible for strictly authorized personnel. Angered by having her sister held back from her, Kasane was about to lose her composure and snap at Karen, but fortunately, Arashi interrupts the conversation. After Arashi notifies the two that the investigation is over, Karen dismisses the team as the objective has been completed. After Karen walks away, Arashi reveals that she has been eves dropping, and notices Kasane letting her emotions get the better of her each time Naomi is brought up. Arashi suggests that they stay level-headed and fake compliance towards Karen, and come up with a plan to sneak into the lab instead. Kasane agrees and expresses gratitude for Arashi's help, and her apparent care towards Naomi. Following this plan, the team decides to head back to the Hideout.
Supernatural Life Research Facility - Concealed Atrocities
The plan between Arashi and Kasane to infiltrate the Seiran Others Lab has gotten to other teammates, and they opt to join in with the two on the secret mission. Throughout this scene in the Hideout, the team briefly pry Kagero for the reason behind his assassination of Chairman Sumeragi, but Kyoka suggests the team to focus on the mission as Kagero is not the type to tell the truth. She also warns Kagero that if he ever decides to sneak away with invisibility, she will take it as a sign of hostility and deal with him herself. Haruka joins in on the conversation through Psynet, and the team travels together to the Supernatual Life Research Facility, automatically unlocking the Location on the World Map.
At the Supernatural Life Research Facility, Arashi manages to hack one gate open, allow the team to break in. Explore the area and look for different paths to turn in, general following ways to lead to the objective marker. Right after the cutscene featuring Arashi hacking past the first door, follow the path to go right, left, then right again and you shall find another locked gate, requiring Key Card No 4 to be opened. Arashi will prompt you, stating that it will be faster to look for the keycard than to hack that gate, as it seems very secure. Trace your path back through the gate that Arashi hacked, and into the hall to clear off a few Buddy Rummies. Continue onwards to defeat several Cushion Pounds, more Buddy Rummies, and Fuel Pools; use SAS as needed. After clearing the Cushion Pounds, you shall find a door to your right, leading into a discreet square shaped room. Interact with the symbol to pick up the yellow glowing Key Card No 2., then head back on the path to continue towards the objective. Follow the path and continue onto the Museum Ruins of the facility. Defeat the Barrista Santas, Cushion Pounds, and Buddy Rummies in your path. Use Brain Field to speed up the process when the gauge has been filled up. Continue pickup Key Cards as you explore the area circling around the paths in Floor 1 and Floor 2 of the Museum Ruins, until you can open to closest gate with the respective card to progress into the facility's next area.
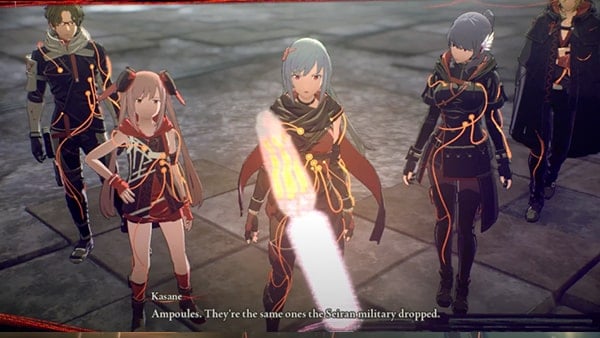
Once you enter into the Level 0 Experimental Division next to Satori the Archivist, a cutscene will show the panoramic viewpoint of the area, and all the factory-like equipment within it. While taking over a nearby control panel, Arashi discovers that the Seiran Others Research and Spring Pharmaceuticals (her family's company) has been collaborating to conduct experiments on turn humans with SAS powers into Others, in hopes to turn them into enhanced bio-weapons. Realizing that Seiran and New Himuka are both equally inhumane, Kasane realizes the urgent danger her sister might be in, and decides to check out an even larger, suspicious area that Arashi has found in the system. Following the cutscene, run to the nearby door on the right, where you will be prompted to first obtain Key Card No 0. Turn towards the left side and enter the other room by destroying the wall lamp next to it with SAS: Electrokinesis. At the end of this room is another door that again requires Key Card No 0. to open. Approach the large pillar in the middle of the room to trigger the next cutscene. This brief sequence will feature Arashi once again trying to hack into the control panel on this pillar, but as she interacts with it, the pillar suddenly turns into a sentient, gigantic Other in the form of a one-eyed tree. The boss battle will begin right away.
Boss Fight - Rotunda Pagoda
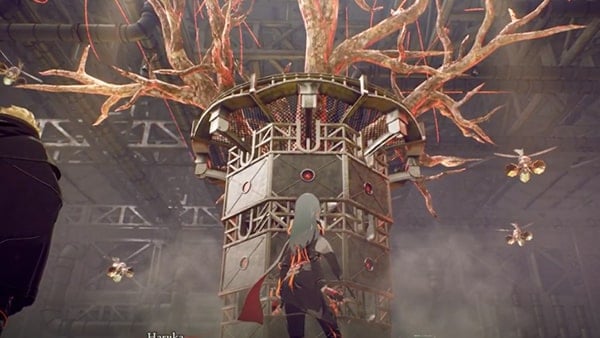
The Rotunda Pagoda will repeatedly cycle between two modes. In the first mode, it will drop down a wall of metal plates to cover itself, becoming immune to damage in this state. In this form, it will spawn swarms of Filler Pillers to attack the platoon. These are large, wasp-like Others that will fire aprojectiles at their targets, and fly near you to drop their detachable abdomen, which will explode and deal AOE damage. Once the Filler Pillers have all been cleared, the Rotunda Pagoda' will activate its second mode by retracting the armor, opening up its body to attacks. While closing in to attack in melee, the Rotunda Pagoda will scan the surrounding ground with projected yellow circles. Stepping into any of these moving circles will trigger the Rotunda Pagoda to close off its body with the metal plated shield again.
While fighting the first mode against the Filler Piller swarms, activate SAS: Invisibility to stay undetected to take them down. Note that when Filler Pillers are killed off, they drop to the floor, leaving behind an unexploded abdomen. When you notice several Filler Pillers flying next to each other, hurl one of the dropped abdomens at them to cause them to explode, eliminating the whole group.
To fight its second form, attack in melee. The Rotunda Pagoda will scan the surrounding ground with projected yellow circles. Stepping into these circles will trigger the Rotunda Pagoda to close off its body with the metal plated shield again. Use consecutive Aerial Attacks to stick to the Pagoda, targeting the circular bumps on its body, and specifically its large eyeball. If applicable, use Pyschokinesis to throw a Filler Piller abdomen at its eyeball to inflict burst damage. Repeat the cycle until the Rotunda Pagoda is defeated, which will cause it to drop the Key Card No 0.. Use the key card to progress through the locked gate behind.
Finding Naomi
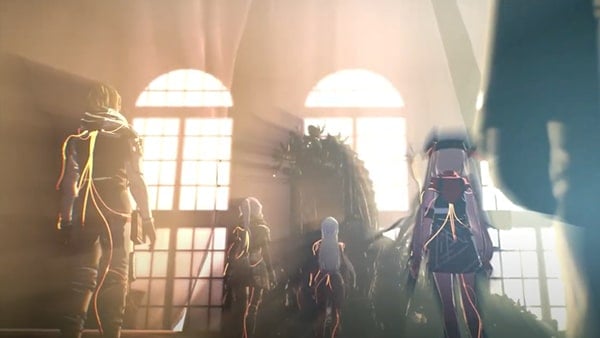
Follow the hallways, progressing towards the objective marker. You shall eventually reach the large suspicious area that Arashi had found in the system, which will feature a tall interior of a gigantic museum, with paintings hung on its wooden walls. As you reach the objective marker, the story will go on to reveal Kasane picking up the brain messages of Naomi's voice, They deduce that Naomi is just behind the golden door right in front of them at the end of the corridor, and Arashi promptly hacks the door's control panel to open it. Naomi is found to still be in her Others from behind the door, and she is glad to see that Kasane is well. She explains that there is no way for her to survive outside of this facility, as she will be simply killed off as an Other. She also explains that the only reason she is able to retain her personality is due to the ampoules that the Seiran Researchers have been feeding her, and without them she loses her mind due to the unbearable pain. Soon after, Naomi tells Kasane to leave as the ampoule chemicals in her body is beginning to run out. As the team exits the room, they find General Karen Travers waiting for them outside. He claims that this facility is actually meant to research on how to revert these Others back to their human form again, and from the findings, Naomi cannot be reverted without Kasane's powers. Determined, Kasane follows Karen's orders to head back to Seiran to suppress more Others in the mean time, while he prepares a plan to use Kasane's full power to eventually turn Naomi back. The platoon promptly follow Kasane back to the Town Center of Seiran City.
Seiran City - New Himuka's Second Capital
Head to the objective marker right away as you arrive into Seiran City. A cutscene will play, featuring a gentleman wearing glasses and a suit approach the team. He tells the team he is part of a group from Seiran, who do not see eye to eye with General Karen Travers. That is due to the fact that they have discovered a link between the Kunad Gate and Yuito Sumeragi, and have proposed to Karen the plan to assassinate Yuito as an attempt to close the gate. However, the general merely ignored their plans. Therefore, they have decided to delegate the task to the hero who killed the Chairman of Suoh - Kasane herself (at least, as far as the Seiran people know). Kasane accepts the mission, and the mysterious man directs Kasane to Kikuchiba, where Yuito can currently be found.
Travel to Kikuchiba, Mid-Level Shopping District. Follow the path to the objective, clearing Marabou Pendus, Kitchen Rummies, Base Paws and Barrista Santas in the way. Running into the objective marker will activate a short sequence, showing Yuito's Platoon in front, unaware of Kasane's presence. Kasane will take this opportunity to ambush Yuito, and the boss fight will begin.
Boss Battle - Yuito Sumeragi
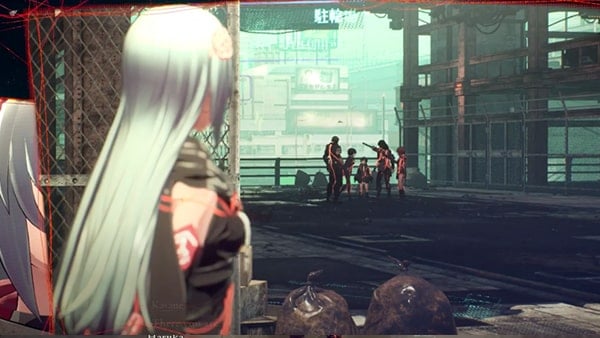
Luka and Tsugumi must first be individually defeated, before Kasane fights Yuito. This should be done with relative ease as Luka will merely teleport occasionally, and Tsugumi will fire gun shots as she slowly moves around. Simply outnumber and overwhelm them with chains of attacks and SAS.
When Yuito appears, use SAS: Velocity to get past his Psychokinesis attacks, and stay on the offense with melee combos once you close in. When he is at around 80% health, follow the prompt to trigger a cutscene where Kasane and Yuito will use psychokinesis to hurl a nearby lamp post at each other, identical to the one in their first fight. Again, spam the (B) button as fast as possible to fill up the guage below, and overpower Yuito with a slam attack. This will automatically chunk Yuito's health down to roughly 65%.
Continue to attack, and empower yourself with SAS: Duplicate to double down on damage. At 60% Yuito will enter into his cloaked form, counter attacking with fast melee slashes and aerial attacks. Dodge back to give yourself breathing room, then sneak in using SAS: Invisibility to land backstabs. With a depleted Crush Gauge, you should be able to burst Yuito's health down to 30% with a Brain Crush.
In response to this, Yuito will automatically enter into his Brain Field. A fairly long Brain Field that lasts a whopping 40 second, it is impractical to simply wait it out. Instead, sneak in with SAS: Invisibility again to land bursty backstabs, then dodge away and outrun his Psychokinesis onslaught with SAS: Velocity. Attack when you are able to close in. When Yuito exits his brainfield with his health at around 20%, you will be prompted to trigger another lamp-post psychokinesis mini-battle again. Overwhelm Yuito once more to automatically win the battle. The cutscene will then feature a brief dialogue between Yuito and Kasane, as well as the arrival of Kodama Melone, which prompted Kasane and her platoon to fall back to the Hideout.
Back at the Hideout, the team demands Kasane to tell them of everything that happened from the time they time traveled to the future. Although Kasane protested as she thought it was pointless to explain, the team insisted as they deemed that selfish of Kasane, and that they have the right to decide for themselves. They also think that this is could be too emotional for her to bare, and that she can use some of their perspectives as well. Kasane realizes her self-centeredness and quickly apologizes, and finally explains to the team of the explanations that future Yuito had told her about, leading up to her decision to assassinate Yuito. At long last, the team understands the reasons behind Kasane's actions, and comes to the conclusion that from this point on, all members shall stop holding reasons to themselves, and instead, openly discuss them with each other. Phase 6 will then progress onto the standby stage.
Trivia & Notes:
Trivia and notes go here
