Collecting Pieces of Unknown History is a Quest in Scarlet Nexus. The team has been labeled as traitors and has nowhere to go. Despite the situation, Yuito decides to head to the religious state Togetsu in search of new information, at the Hieno Mountain.

General Information
- Phase: Phase 8
- Character: Yuito Sumeragi
- Previous: Where Lost Memories Lead
- Next: Eternal Vow, Eternal Bond
- Bosses: Coil Moil
NPCs & Characters
- Wataru Frazer
- Nagi Karman
- Hanabi Ichijo
- Tsugumi Nazar
- Luka Travers
- Gemma Garrison
- Kasane Randall
- Shiden Ritter
- Arashi Spring
- Kyoka Eden
- Kagero Donne
- Satori the Archivist
Bosses
Items
Consumables and Other Items
- Medium Jelly
- Normalization Tablet
- All: Normalization Tablet
- Hieno Mountain Environment A
- Hieno Mountain Environment B
- Hieno Mountain Environment C
- Hieno Mountain Environment S
Equipment & Upgrades
- n/a
Enemies
Collecting Pieces of Unknown History Walkthrough
The team arrives at the Hieno Mountain to find out more information that can be used against Suoh and Seiran, and hopefully, to find more data after being labeled as traitors against the government. You'll arrive at the frosty mountains along with your platoon.
Title Placeholder

At the starting point, you'll find Satori the Archivist. If you need to shop or save your game, interact with the NPC. Head straight and you'll see a large block of ice blocking your path leading towards the quest objective which is on the east side. Go west first and you'll come across a new Pound-type enemy, the Session Pound. Wataru will warn you that the enemy explodes if you get too close, so use Psychokinesis first to throw an object at it and when it falls down to the ground, use Psychokinesis again to throw another object, don't get near it because it will explode. Another thing that you can also do is use SAS: Teleportation to bait it, when it's near you, be ready to teleport so that you can avoid the blast.

Continue further and you'll come across Rainy Rummy and Session Pound enemies, you can again, bait the Session Pound to get near you and when it explodes, teleport away. Enemies caught in the explosion will also deal damage. After defeating the enemies, proceed forward and you'll see another large block of ice blocking your way, attack it to break it. On the other side of the block of ice you destroyed, there will be another group of Rainy Rummy and Session Pound enemies, followed by x3 Rat Rut. You need to use Psychokinesis again to break its shell to reveal its weak spot - after defeating all enemies, head up the slope and just go around the large blocks of ice (you can also break it to find some resource caches)

You'll then trigger a cutscene when you reach an open area. Continue forward and you'll see Satori the Archivist again on the west side of the mini-map. On the east side, however, there's another large block of ice, break it to find x3 Hieno Mountain Environment B behind it. Head towards the next section where another group of Rainy Rummy and a Doppel Pool. Try to take out the Rainy Rummy enemies first because their lightning attacks can get quite annoying, especially when you get stunned, also taking them out first gives you the chance to focus on defeating the Doppel Pool because it duplicates itself when you attack it.

The path ahead is pretty linear where you'll come across another large block of ice blocking your path. Break it and head into a large open area where x2 Doppel Pool enemies will spawn, alongside those annoying Session Pound. A good tactic is to bait the Session Pound and use the explosion to take out the Doppel Pool enemies easily. Shortly after defeating it, a Winery Chinery will spawn, alongside another group of Doppel Pool and Rainy Rummy enemies.

Take out the two small enemies first before shifting your attention to the large one. Using SAS: Clairvoyance will help you spot the real enemy when the Doppel Pool duplicates itself. Try to attack its legs from behind to hit its weak spot - kill all the enemies, grab the resource caches in the area, and continue towards the quest objective.
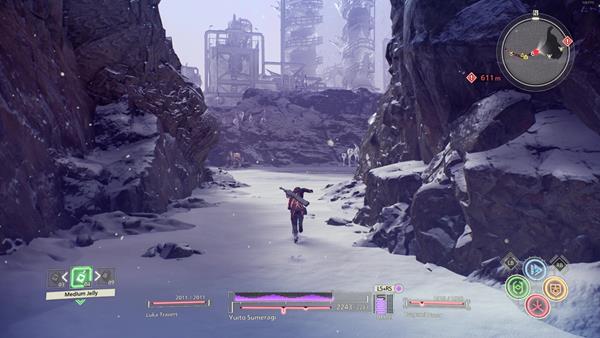
Next, you'll enter a cave where you'll again, find Satori the Archivist at the other end. Save your game or speak to Satori to replenish your HP and continue forward where you'll reach the outer section of an abandoned factory. x3 Rat Rut enemies will spawn here and there are a lot of objects that you can use to throw at them and to break their shells. You can even use the vehicles to run them down which instantly breaks the shell. Shortly after, another group of Doppel Pool enemies will spawn.

Head north from the mini-map and you'll come across Rainy Rummy enemies under a bridge. You can manipulate a metal object here and ride it to ram over the enemies and to break the blocks of ice blocking your path. You'll automatically get off when you reach the end of the path on the east side where you'll encounter another Winery Chinery enemy alongside other enemies, simply defeat all of the enemies retrace your steps, and take the path on the west where you'll come across a path that's by the edge of the mountain - you'll again, find Satori the Archivist at the end of the narrow path.

More enemies at the path ahead such as the Session Pound and Rainy Rummy, followed by the Doppel Pool and Rat Rut. Defeat all the enemies that appear in the arena in order to pass. From here the path is pretty much linear and you'll reach the entrance of the Church Headquarters which leads you to the next location, Togetsu
Hieno Mountain: Togetsu
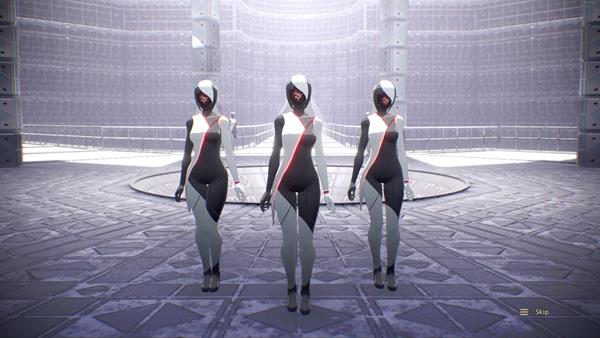
You'll be treated to another cutscene upon entering the sanctuary. Upon gaining control of Yuito, just proceed towards the quest objective into the other section where another cutscene will trigger. After so, interact with the holographic terminals to trigger more cutscenes with the "Vision".

After checking all terminals, open your brain messages and read the conversation bubble regarding the information that you've gathered on history so far. Next, speak to the Togetsu Faithful to seek more information about code name "BABE". And head inside the next section of the sanctuary.

You'll now come across a long bridge. Approach the Togetsu Faithful to trigger another dialogue cutscene where you'll find the "BABE" Terminal. You'll then receive an SOS from Kasane to disconnect from the terminal once Yuito plugs in. You now need to escape the sanctuary after the alarm sets off. Retrace your steps back to the entrance of the sanctuary and another cutscene where the team fights off the Togetsu Faithful will trigger - you'll eventually regain control of Yuito once they're out and back at Hieno Mountain's trailhead.
Boss Battle: Coil Moil
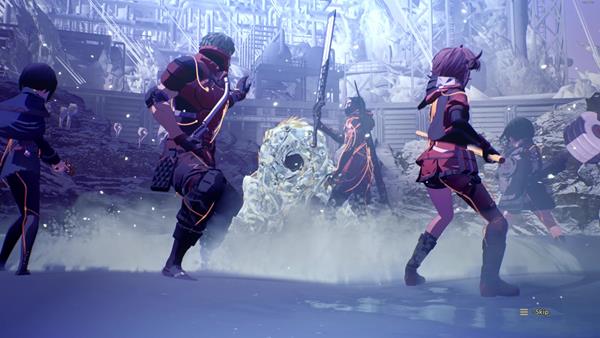
If you need to save, speak to Satori the Archivist who's just near you. Simply retrace your steps back and reach the marked objective. Be sure to save before approaching the objective since you'll fight against a boss here which is the Coil Moil. Instead of going progressing through different phases, the battle against the Coil Moil goes down in a cycle as it alternates between two different forms - its Frost Armor form, where it is protected by a layer of frost, and its Unarmored form, where it loses its protective layer but becomes more aggressive. Yuito will be accompanied by Hanabi, Luka and Tsugumi when he encounters the Coil Moil, granting him access to the SAS: Pyrokinesis, SAS: Teleportation, and SAS: Clairvoyance powers.
Frost Armor Form
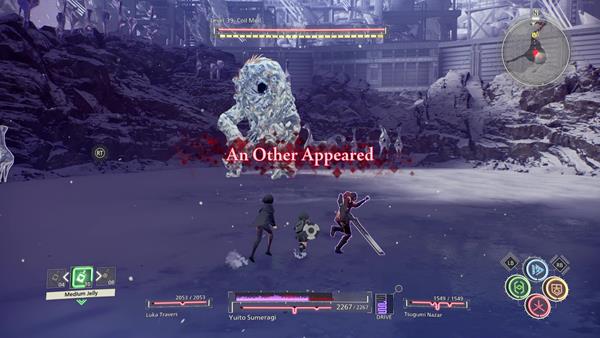
The battle will begin with the Coil Moil in its Frost Armor form. Although the armor limits its mobility, the Coil Moil will be granted the ability to execute ice attacks, such as firing barrages of Ice Boulders from its head and performing a smash that summons ice pillars to penetrate through the ground. Furthermore, it will be immune to all forms of damage, until Yuito and his teammates land enough attacks to destroy the thick layer of frost hide.
To counter the Coil Moil in this state, Yuito should move sideways to avoid the incoming shots of Ice Boulders, and run up to it in melee to spam a series of combo attacks. Continue to bombard with attacks unless you notice the Coil Moil lift its arms, in which case quickly runs out of range. This will allow you to avoid the smash attack, and the following large ice pillars piercing out of the floor. It is recommended for players to save up their SAS: Pyrokinesis for this form, as the fire damage from this power, will enable Yuito to cut down the Frost Armor much quicker.

Once the armor breaks, the Coil Moil will be exposed in its Unarmored Form, and will instantly fall to the ground from the sudden impact. Take advantage of its vulnerable position and chain as many attacks onto its weak spot - the bulbs on its back - to deal maximum damage and fill up the Crush Gauge. If you manage to break the Frost Armor before SAS: Pyrokinesis times out, this should allow Yuito to attack its weak spot with the blade ignited, further optimizing damage.
Unarmored Form
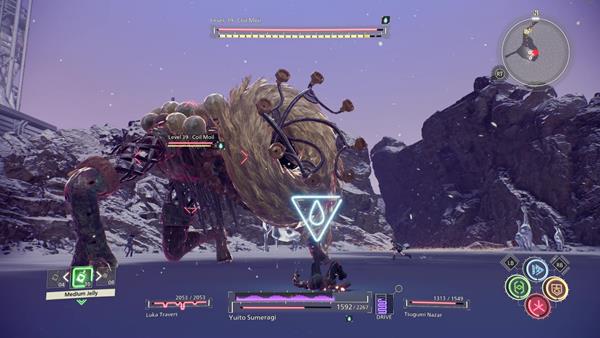
While in its Unarmored Form, the Coil Moil will attack more frequently and will use water-based attacks. When approached at melee, it will attempt to swat you aside with its closest arm, then proceed to turn towards you before firing jet streams of compressed water from the knobs surrounding its head. Avoid this by playing "dog fight" with the Coil Moil, chasing its hind legs from a distance while using Psychokinesis to throw surrounding ice sculptures at it.

If approached again, it will lift its arms to smash the ground to send out a shockwave, breaking the ice in a radius and creating five large pillars of water that spin around it. Although this attack covers a rather large area, it is always telegraphed with the arm-lifting motion. Avoid this skill by turning around and running out of range as quickly as possible as it deals massive damage and can stun targets for several seconds while applying the "Soaked" Status Ailment. While the pillars of water orbiting the Coil Moil, players can bypass them with the SAS: Teleportation power and attack the Others monstrosity in melee. Take note that after this attack, the Coil Moil will tunnel into the ground, before reemerging with rejuvenated Frost Armor again.
Tunneling

The Coil Moil will tunnel after it performs its ground smash attack in the Unarmored Form. While tunneling, the Coil Moil will track Yuito's footsteps, and leap out from under the ice floor in approximately 5 seconds. The impact from its reemergence can easily be avoided so long as Yuito continues to run without stopping. However, the Coil Moil will reappear with its Frost Armor rejuvenated, and the cycle repeats itself.
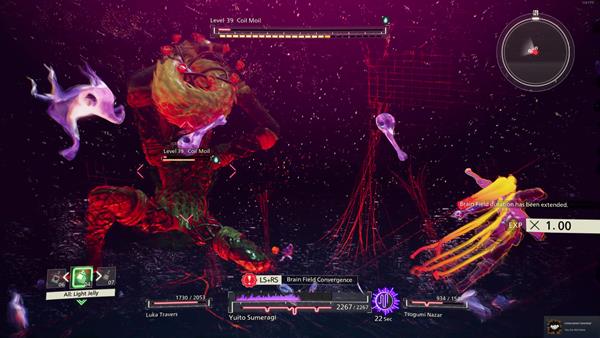
In summary, retain SAS: Pyrokinesis for quickly destroying the Coil Moil's Frost Armor and attack its back and underside in melee whenever it is in its unarmored state. Filling up the Crush Gauge can greatly speed up the fight as it can chunk roughly 20-25% of its health in one hit. Maintain mobility to avoid most of the Coil Moil's onslaught and keep pressure with Psychokinesis from time to time.
After defeating the Coil Moil, simply head towards the marked objective where you'll rendezvous with Kasane and her group. The two groups will then catch up and share the information that they've both learned. Next, fast travel back to the Hideout to end this quest and you'll enter the Standby Phase.
Trivia & Notes:
Trivia and notes go here
