Walkthrough for Scarlet Nexus covers information that aims to guide players with providing a detailed guide on how to complete various locations and the main quests of the game. The walkthrough will include a list of all important items that can be found, gear such as weapons and armor, as well as information regarding related NPCs, Enemies, and Bosses.
Helpful Links
- See Game Progress Route for an overview walkthrough guide.
- See Side Quests for a list of optional activites to complete your trophies and achievements.
- Visit our New Player Help page for Tips and Tricks for JRPG beginners.
- Check out our Combat page to find various guides on Combat, Exploration, and more.
- Learn more about the Companions of the game, what are their powers, weapons, and such.
Scarlet Nexus Walkthrough
Navigate:
Prologue: Tutorial
Prologue (Tutorial) is a Quest in Scarlet Nexus. The Prologue (Tutorial) focuses on showing the basic and some advanced combat mechanics of the game. We'll find Yuito Sumeragi or Kasane Randall passing the test of using SAS connection and completing the final test to becoming a member of the OSF.

General Information
- Phase: Phase 0
- Character: Yuito Sumeragi / Kasane Randall
- Previous: --
- Next: Prologue: Reunion / Prologue: Encounter
- Bosses: --
NPCs in the area
- Examiner
- Nagi Karman / Naomi Randall
Bosses
- n/a
Items
Consumables and Other Items
- n/a
Equipment & Upgrades
- n/a
Enemies
- Brawn Yawn
- Scummy Pool
- Buddy Rummy
- Scummy Pendu
Prologue (Tutorial) Walkthrough
This is the Prologue (Tutorial) section. The scene begins where you find Yuito or Kasane along with other new recruits who are being briefed by an examiner regarding SAS Cable Connection. Yuito or Kasane manages to withstand the connection and is thrown out into an aptitude test that determines their platoon assignment.
Tutorial
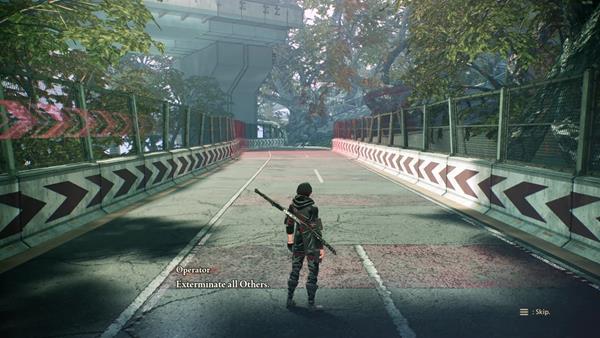
You'll now start The Other Suppression Force Aptitude test where it determines your platoon assignment. Your goal is to complete the tutorial and exterminate all Others. Upon starting, you'll first obtain a tutorial on how to move Yuito or Kasane around and to control the camera. Close the current tutorial that's indicated after reading it. Move forward and jump up onto the elevated platform. Keep going straight until you see the first enemy.
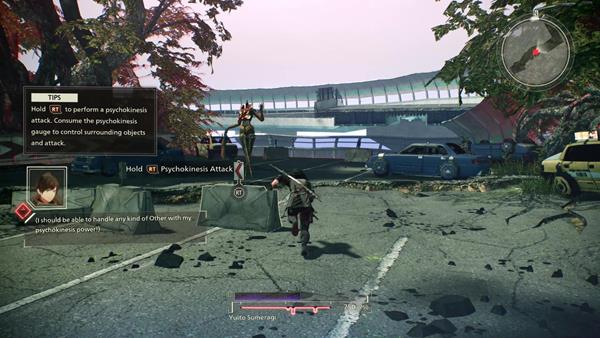
The first enemy you see is easy, just follow the prompt that pops out on the left side of the screen and try out the use of Psychokinesis. Psychokinesis is a Psycho-Kinetic Ability that is exclusive to the main characters Yuito Sumeragi and Kasane Randall, Psychokinesis allows Yuito and Kasane to unleash the power of the mind to lift, break, and throw pieces of their environment. You can try to lift a car and throw it on the enemy. Shortly after, two more enemies (x2 Scummy Pool) will appear and you'll be prompted a new tutorial on how to Lock-On an enemy, the Scummy Pool is a stationary type enemy that stays in one place and shoots bile at you - defeat the enemies and proceed to the next section.
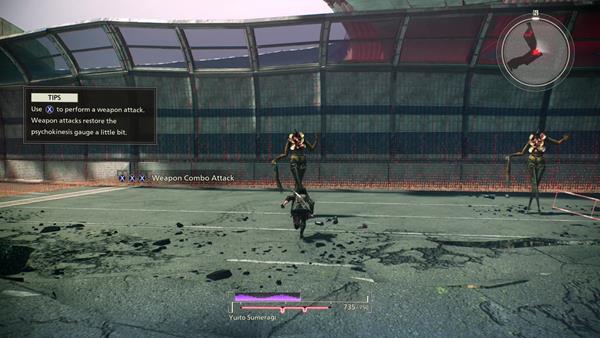
Next, you'll see two more enemies ahead (x2 Buddy Rummy) and you'll be given another tutorial regarding Yuito's or Kasane's battle style. Yuito fights using his power, Psychokinesis, and with his sword. The attack range of his sword is short, but he can overwhelm enemies with his fast attack. He attacks enemies one-by-one at close range. Take note that Weapon Attacks slightly charge the Psychokinesis Gauge, so this gives you the edge to use a mix of weapon and psychokinesis to take out your enemies - defeat both enemies to continue further.

Just a bit further, you'll encounter three enemies (x3 Scummy Pendu) which are airborne type enemies. You'll be shown tips on how to lock on enemies and switch between targets. Try it out and then use Rising Slash Attack to defeat the enemy. Head down the narrow path and use Psychokinesis to throw the rubble onto the enemies ahead.

When you reach the other side, you'll be prompted with another tutorial regarding Yuito's or Kasane's special attack. Press the corresponding button while moving to perform a sweeping Moving Spin Attack in the wide area. The psychokinesis gauge will recover greatly, so adding this to combos allows you to fight while sustaining the gauge. It can only be used once per combo, but learning other skills can increase the number of times it can be used. Two more Buddy Rummy enemies will appear here, followed by a Bran Yawn, and during your combat, you'll be prompted with more combat tips regarding Rush Follow-up Attack, Psychokinesis Follow-Up Attack, Enhancing Rush - defeat the enemies that spawn in the area to complete the tutorial and a cutscene triggers.
Trivia & Notes:
Trivia and notes go here
Prologue: Reunion
Prologue: Reunion is a Quest in Scarlet Nexus. The time has come for the end of the OSF Training, the enlistment qualification test. Cadet Yuito Sumeragi endured the pain of SAS cable connection and passed his test. Tomorrow, Yuito will be a real member of the Other Suppression Force. This quest introduces players to the world that Scarlet Nexus is in, you can free roam and check Suoh City Ryujin Ward.

General Information
- Phase: Phase 0
- Character: Yuito Sumeragi
- Previous: Prologue: Tutorial
- Next: Trusting the Path to the Future (Kikuchiba)
- Bosses: --
NPCs & Characters
- Kyoka Eden
- Luka Travers
- Nagi Karman
- Karen Travers
- Arashi Spring
- Fubuki Spring
- Naomi Randall
- Kasane Randall
- Satori the Archivist
Bosses
- n/a
Items
Consumables and Other Items
Equipment & Upgrades
- n/a
Enemies
Prologue: Reunion Walkthrough

After Yuito endures the pain of the SAS Cable Connection, and passing the final test, we find Yuito at Suoh City Ryujin Ward where players can free roam the area. You can explore the area first, or simply look at the mini-map and head towards the < ! > where the objective is.
Suoh City Ryujin Ward
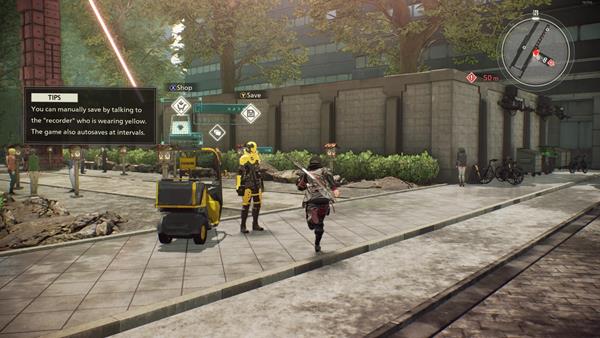
Upon gaining control of Kasane, head straight towards the streets and turn left and cross the street. Keep going straight and along the way, on the left side, you'll see a green glowing item, pick it up to receive 50 in-game currency. Walk up a bit and on the left side, you'll find the "Recorder" named, Satori the Archivist who is wearing yellow. Interacting with Satori will allow you to manually save your game, take note that the game will also autosave at intervals.
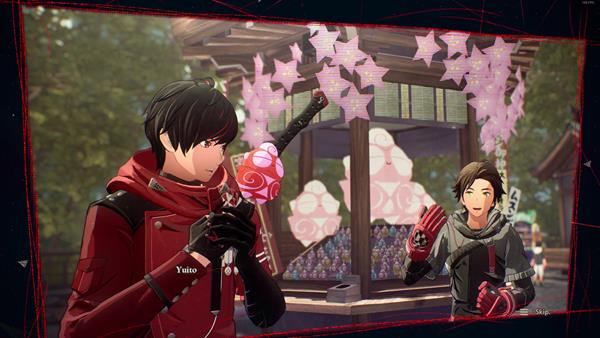
Apart from saving, you can also check his shop to purchase Items. If you have pre-order items, check the shop so you can redeem the items that are available. Your objective is just next to where Satori is which is Sumeragi Tomb Grounds. - a cutscene will then trigger, and you'll acquire x1 Baki Keychain, head back down to Main Street and proceed to Vision Town.
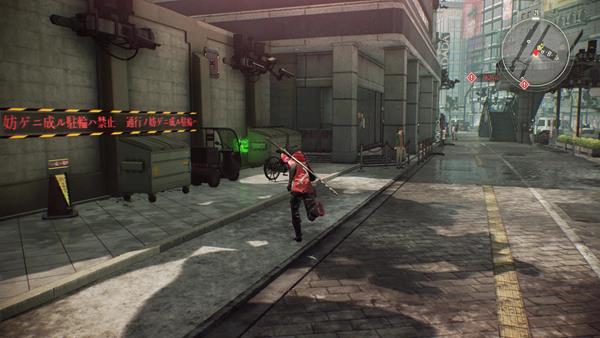
From Satori the Archivist, your objective is on the west side. Walk up a bit and look on the left side where the garbage bins and bikes are to find a green glowing item, pick it up to find x1 Light Jelly and head straight towards the quest objective - another cutscene will then trigger when you reach the cafe where an Others Alert will trigger at the city.
Head to the Shelter
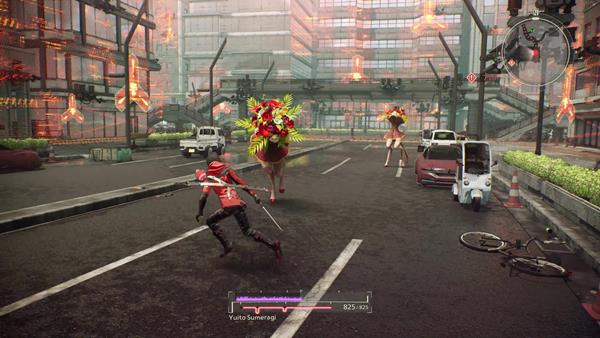
After the cutscene, head to the marked objective to reach the shelter. Along the way another cutscene will trigger where Yuito and Nagi spot a civilian who is under attack by the Others. A combat sequence will then follow where you'll fight x2 Vase Paws. Take them out one at a time with Weapon and Psychokinesis attacks, take out both enemies to trigger another cutscene. Take note of the battle log on the right side of the screen to find the amount of EXP and items you earn from killing an enemy.

After helping the civilians, you'll encounter more enemies ahead, x2 Vase Paws and x2 Scummy Pool. You can instantly kill the Scummy Pool enemies first with Psychokinesis, take them out so that you can stop them from shooting projectiles at you.
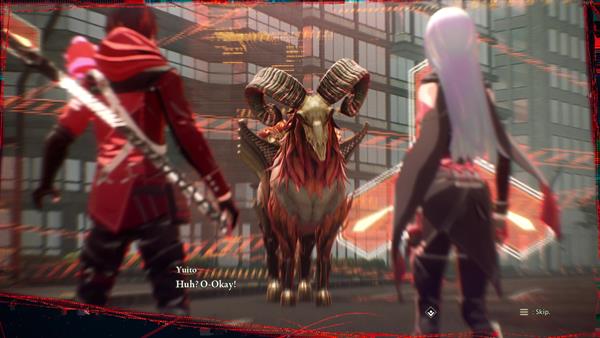
After defeating the enemies, proceed to the objective marker and a cutscene will trigger. After meeting Kasane Randall, you'll fight against a Wither Sabbat and Kasane will temporarily join as a companion. The Wither Sabbat moves similar to a bull, so avoid being behind it since it uses its hind legs to kick you. Also keep an eye when it starts to charge in for an attack. - simply defeat the enemy to trigger another cutscene.

After the cutscene, and meeting the rest of the members of OSF such as Kasane, Naomi Randall, Arashi Spring, and Luka Travers, you'll regain control of Yuito and have gathered enough EXP from killing the enemies earlier which increases your Level and yields Brain Points (BP). BP is used to unlock the different skills in the Brain Map (Skill Tree). To access the Brain Map, open the main menu and cycle to Brain Map. If you want to save, you can find Satori the Archivist nearby, along the path leading to the marked objective. On the mini-map, you can identify Satori's location which is marked with a yellow icon. Just a few steps forward where Satori is, you can spot a green glowing item on the left corner. Head up the foot bridge to cross the other side and approach the group of people to trigger another cutscene - this ends the quest.
Trivia & Notes:
Trivia and notes go here
Phase 1
Trusting the Path to the Future (Kikuchiba) is a Quest in Scarlet Nexus. Yuito formally enlists in the OSF and is assigned to Seto Platoon, commanded by the Septenrion Seto Narukami. He joins with his childhood friend Hanabi Ichijo and heads to Kikuchiba for their first mission and field training.

General Information
- Phase: Phase 1
- Character: Yuito Sumeragi
- Previous: Prologue: Reunion
- Next: Trusting the Path to the Future (Mizuhagawa District)
- Bosses: Gunkin Perry
NPCs & Characters
- Hanabi Ichijo
- Seto Narukami
- Nagi Karman
- Tsugumi Nazar
- Kagero Donne
- Wataru Frazer
- Satori the Archivist
Bosses
Items
Consumables and Other Items
- Light Jelly
- All: Light Jelly
- Battle Record B
- Other Ecology A
- Normalization Tablet
- Kikuchiba Environment A
- Kikuchiba Environment B
- Kikuchiba Environment C
Equipment & Upgrades
- n/a
Enemies
Trusting the Path to the Future (Kikuchiba) Walkthrough
Yuito finally is enlisted as an official member and cadet of the OSF. He is now part of the Seto Platoon that is lead by Seto Narukami. For his first mission, he is joined by his childhood friend Hanabi Ichijo to dispatch a threat of Others in the area. This is his first mission and field training as a cadet of the OSF.
To Kikuchiba

After the cutscenes during the events in the previous main quest, Prologue: Reunion, you return to Suoh City Ryujin Ward where you started, outside the OSF Training Facility, only this time, you are accompanied by a Companion character, Hanabi Ichijo. Throughout this quest, you will learn more advanced mechanics, such as the Struggle Arms System or SAS where the playable character is able to connect and manifest the power of the companion for a period of time. You can save your game first by interacting with Satori the Archivist who's just near where you start this quest - when you are ready, open the World Map and choose Kikuchiba as your next location to travel - upon arriving, head to the objective marker to rendezvous with Seto Platoon.
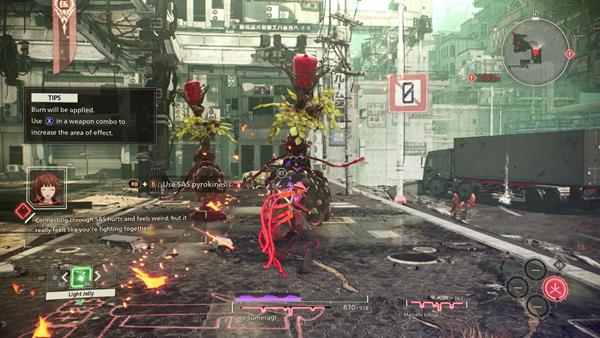
After the cutscene, head to the marked objective. In this first section, you'll encounter x2 Fuel Pool enemies. Here, you'll be given a tutorial on how the Struggle Arms System or SAS works, make sure to read it to fully understand the combat mechanic. By using SAS: Pyrokinesis, flames engulf Yuito's weapon and Psychokinesis objects for the attack, and weapon combos will have an increased area. it increases damage to the enemy and can also cause the Burned Status when repeatedly used. It is effective against enemies with the Oiled Status. Additional effects will be added as you strengthen your bond with Hanabi.

Continue further and you'll encounter x2 Vase Paws and x1 Fuel Pool enemies, clear the area and in this section, you'll see a glowing item on the right side where you can obtain x1 Light Jelly. Before going up the stairs towards the marked objective, check the corner at the northeast side of the mini-map, where you'll find another Fuel Pool enemy, kill it and keep going towards the end of the corner to find another green glowing item to find another Light Jelly and Kikuchiba Environment C, after grabbing it, go back, and head up the steps.
Shopping District: 2nd Level
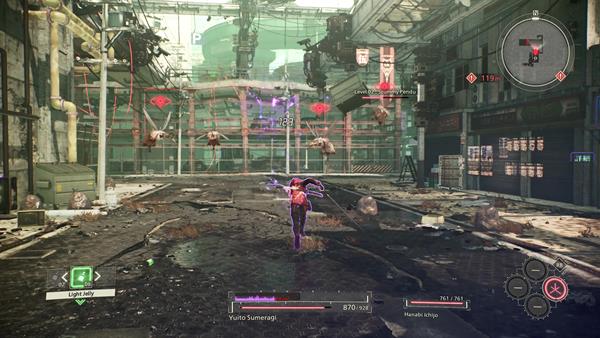
On the next level, you'll encounter a group of Scummy Pendu enemies. Use Rising Slash here to deal a large amount of damage and simultaneously use Psychokinesis to easily defeat these enemies. Quickly eliminate them since you'll most likely aggro x2 Vase Paws that are just around the corner where these airborne enemies are.

After defeating the enemies, check the right side to find Battle Record B. From where you picked up the item, there's a short narrow alleyway, go towards it and behind the buildings, you'll find Kikuchiba Environment B, keep going straight, and head towards the parking garage where you can find Kikuchiba Environment C. There's a gate that's open at the side. Also, still on the same level, there's a green glowing item where you can acquire x1 Normalization Tablet - when you're done grabbing all items, continue going up via the stairs.
Shopping District: 3rd Level
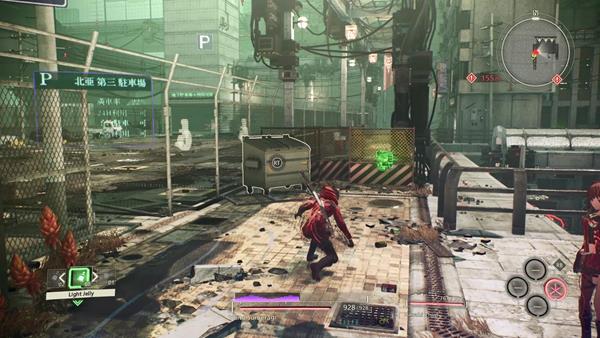
At the top of the second stairs, you'll find Satori the Archivist and the NPC's shop. You are free to interact to save your progress and check his shop to restock on items. Before you head towards the open parking lot, make sure to grab the green glowing item to acquire x1 All: Light Jelly.

When you're ready, head towards the parking lot, and x3 Vase Paws, followed by x1 Wither Sabbat enemies will spawn. You'll then be given another tutorial on how to trigger a Special Object Attack - after defeating the enemies, head up the steps to reach the fourth level and a dialogue cutscene will trigger.
Shopping District: 4th Level
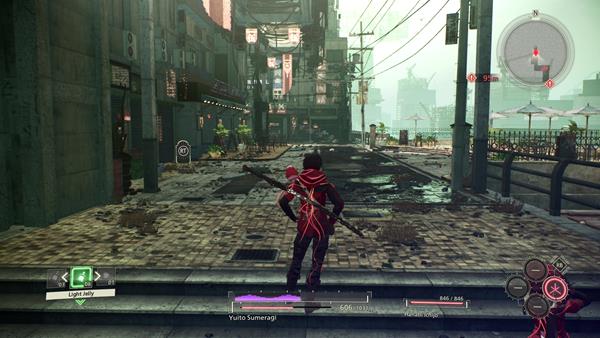
Proceed further into the shopping district where you'll encounter another swarm of Scummy Pendu around the corner. Defeat the enemies, and head up another set of steps to reach the 5th level, the Upper-Level Construction Site. There are no items lying around the 4th level, so just defeat the enemies and continue going up towards the next section of Kikuchiba.
Kikuchiba: Upper-Level Construction Site

As soon as you head up the short steps, you'll encounter x2 Scummy Pendu and x3 Vase Paws. Try taking out the airborne enemies first to stop them from shooting projectiles at you and so that it is easier to take out the Vase Paws enemies. Once you defeated the enemies, before going up the long steps, check the path on the right, at the end of it, you'll find x2 Kikuchiba Environment A.

At the top of the steps, you'll encounter x4 Fuel Pool roaming the area, remember that using SAS: Pyrokinesis is strong against this enemy, and continuously attacking it while the SAS ability is active causes it to be engulfed in flames. Where the Fuel Pools were, if you check the right side of the map, there's a large open field where it looks to be a place where a statue or monument was. There's x3 Kikuchiba Environment B on the ground next to a sitting bench. After grabbing the item, continue further and you'll encounter x2 Fuel Pool at the east side of the mini-map, opposite to where the next steps are, kill the enemies and approach the closed security grates to find x1 Normalization Tablet before going up the stairs.
Construction Site
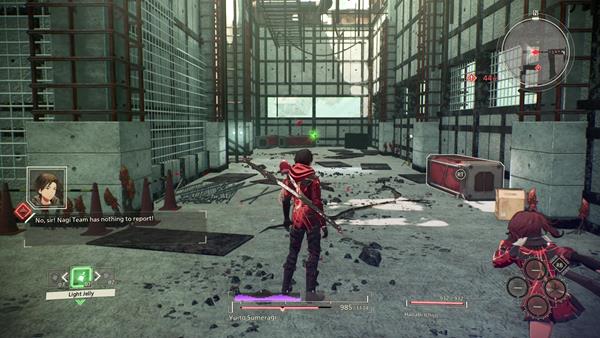
You'll now reach the construction site proper at the top of the stairs. Look to your left to find x1 Kikuchiba Environment B and straight ahead of you is a green glowing item that contains x1 Light Jelly. After grabbing both items, head up the metal slope that's on the left where you got the Light Jelly. At the top, you'll encounter x1 Fuel Pool enemy. Before you ride the lift on the left side, check the corner on the right side to find Kikuchiba Environment A.

Upon reaching the topmost level of the Construction Site, make sure to grab the items that are shown in the mini-map, you'll find those items are marked with a green icon. You'll find items such as x1 Normalization Tablet and x1 All: Light Jelly. Also, Satori the Archivist is here, so save your game at this point since you'll be entering a boss arena. When you're ready, head up the metal slope that's on the right side of Satori and approach the large area to trigger a cutscene.
Boss Battle: Gunkin Perry

You'll now fight against the first boss of the game, Gunkin Perry. The Gunkin Perry has two initial major attack types, a melee side slash and a ranged projectile attack that will shoot from its jar head. It only uses its right arm to perform the side swipe attacks, so avoid this area in general by remaining directly on its left or keeping behind its arm range.
Hanabi Ichijo will suggest using Psychokinesis on the surrounding objects to hurl them at the creature's head. Upon landing a successful hit, the glass layer will break and the Gunkin Perry is temporarily stunned which gives players an opening to perform combo attacks. Furthermore, hurling large objects at the Gunkin Perry's glass tank on its back by using Psychokinesis will cause it to explode, drenching it in oil. Hanabi will then prompt players to use her attack to follow up with SAS: Pyrokinesis which will cause the Gunkin Perry to ignite and burn, dealing additional damage. Continue with this combination along with using Psychokinesis to drain its HP bar.

During its next wave of attacks, the Gunkin Perry will execute two melee attacks, which consist of a stagnant spin attack and a smash attack by leaping high into the air. Both of these melee attacks are avoidable by running away from Gunkin Perry as they are telegraphed, and are slow to execute. Take note that the Gunkin Perry is grounded during his spin attack, rendering it stagnant and unable to travel. Hence players can use this as an opportunity to spam Psychokinesis skills to damage it during its spin attack, before alternating back to melee attacks when the skill is over. On the other hand, its leap attack is always followed up with stomps from all six of its legs, so make sure to wait until the Gunkin Perry stands up again before approaching it again.
Additionally, the Gunkin Perry is capable of a ranged attack where it will launch three oil bombs that spread out in different directions. These bombs apply the Status Ailment "Oil", which causes affected units to lose their footing, and burn when hit by fire attacks. Fortunately, these oil bombs are fired in large blobs that spread out in projectile motion, giving players enough time to move away in any direction to avoid them.
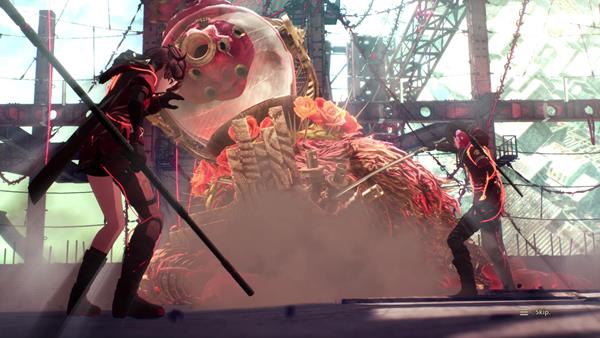
Platoon Leader Seto Narukami will also point out some environmental features including the hanging objects in the area. Lure the Gunkin Perry under the hanging materials and use Yuito's powers to knock it down over its head. A cutscene will then trigger after defeating this boss, you'll complete this quest, and return to Suoh City Ryujin Ward - defeating Gunkin Perry yields 400 EXP and 250 Currency, as well as the Gunkin Perry Analysis.
Trivia & Notes:
Trivia and notes go here
Trusting the Path to the Future (Mizuhagawa District) is a Quest in Scarlet Nexus. Yuito's platoon undertakes their mission in the abandoned city of Kikuchiba with support from Wataru Frazer, Seto Platoon's operator. They arrive first at the objective point, but a major Other suddenly appears. They defeat the Other with Seto's help, and Yuito becomes the focus of the media drones' attention. Yuito and Hanabi return to Suoh City to take on their next mission.

General Information
- Phase: Phase 1
- Character: Yuito Sumeragi
- Previous: Trusting the Path to the Future (Kikuchiba)
- Next: Days of Disquieting Stagnation
- Bosses: n/a
NPCs & Characters
- Nagi Karman
- Karen Travers
- Hanabi Ichijo
- Shiden Ritter
- Kyoka Eden
- Naomi Randall
- Kasane Randall
- Seto Narukami
- Wataru Frazer
- Arashi Spring
- Gemma Garrison
- Satori the Archivist
Bosses
- n/a
Items
Consumables and Other Items
- Light Jelly
- Normalization Tablet
- Other Ecology A
- Mizuhagawa Environment A
- Mizuhagawa Environment B
- Mizuhagawa Environment C
Equipment & Upgrades
Enemies
Trusting the Path to the Future (Mizuhagawa District) Walkthrough

Yuito and Hanabi were able to withstand and defeat an elite Other at the shopping district of Kikuchiba. The Seto Platoon returns to Suoh City Ryujin Ward where they regroup with Kyoka Eden's platoon and await their next orders from the OSF's HQ.
Suoh City Ryujin Ward
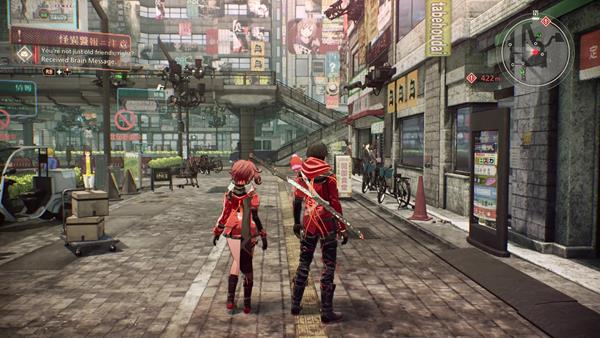
Upon regaining control of Yuito, you'll find yourself back at Suoh City, your goal is to head to the OSF Training Facility to obtain your next mission. But before doing so, you may want to go around the area first and collect the items that are marked on the mini-map. It's easier for you to find these since it is marked with a green icon on the mini-map. You can find items such as Power Enhance: MK I, Normalization Tablet, and Light Jelly. If you need to save the game, you can find Satori the Archivist at the entrance of the Sumeragi Tomb Grounds. When you arrive outside the OSF Training Facility, a dialogue cutscene will trigger.
To Mizuhagawa District
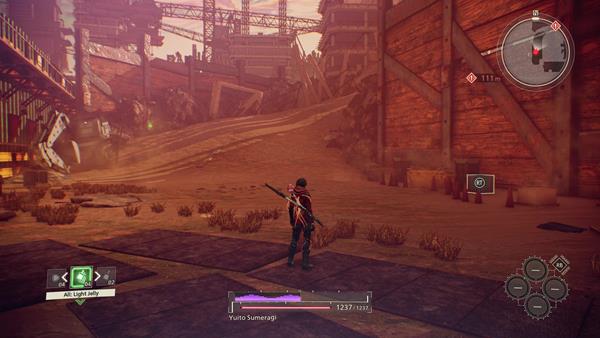
After the cutscene, you'll learn that the team received a distress signal pointing out to Mizuhagawa District. When you're ready, open the world map and travel to the mentioned location towards the Construction Site. For this quest, you'll be going in alone first. Upon arriving, proceed forward and you'll first encounter x2 Buddy Rummy that will spawn. You'll be prompted with a tutorial on how to trigger Brain Crush. Defeat both enemies and just a bit further, you'll find a green glowing item, interact with it to find x1 Light Jelly - head up the slope and head down the scaffolding where you'll reach the construction site proper.

Down at the open field, you can find the following items Mizuhagawa Environment B, Mizuhagawa Environment C, as well as encountering the following enemies, x2 Scummy Rummy, x2 Buddy Rummy. Continue towards the large open field where a triangle icon is indicated on the mini-map and you'll encounter more enemies, x3 Buddy Rummy, and once you kill all three, a Wither Sabbat will spawn.
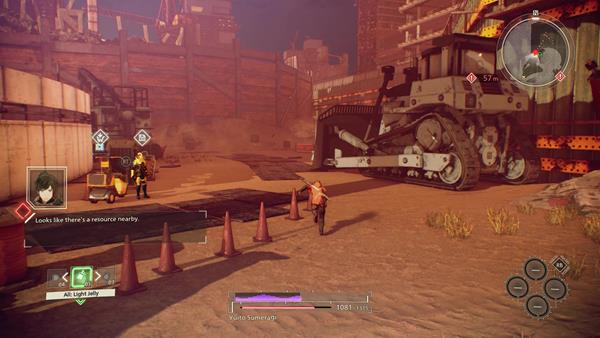
Defeat all enemies and proceed to the marked objective, near the open field on the west side, you can find Satori the Archivist. Interact with him if you want to save your progress or check his shop to restock on items. Make sure to check Satori's location to find some items such as Mizuhagawa Environment A, Mizuhagawa Environment B, Light Jelly, and SAS Refueling Drink - when you're ready, head down the metal slope that's next to Satori, and a dialogue cutscene will trigger where you'll find Arashi Spring and Gemma Garrison.
Arashi and Gemma

After the cutscene, Arashi and Gemma will join Yuito as Companions and you'll enter a battle against new Other enemies, the Bandeau Pendu. Apart from that, you'll also be prompted with new tutorials for the Struggle Arms System (SAS) abilities, SAS: Velocity. The Bandeau Pendu moves at a fast rate, so you need to connect with Arashi's power Hypervelocity to move at an exponentially fast rate which causes time to slow down. This way, your attacks will be able to hit the airborne enemy. But you need to take these enemies out before the skill timer runs out, when Hypervelocity ends, you need to wait for it to recharge so that you can hit the Bandeau Pendu.

You'll also gain a tutorial on how SAS: Sclerokinesis works when you connect with Gemma's power, Sclerokinesis. This triggers after you defeat the Bandeau Pendu, and an Auger Sabbat spawns on the battlefield. With SAS: Sclerokinesis, Yuito's body strengthens and hardens, which renders enemy attacks ineffective for a period of time. The Auger Sabbat is wearing a helmet that has a sharp end, so focus on destroying it to reveal its weak spot, the head. Using Psychokinesis will easily break it. Defeat the enemy and another cutscene will trigger.
Hideout

After helping Arashi and Gemma, you'll all leave the area and rendezvous back at the group's "Hideout", a site for rest and relaxation. The hideout used to be the Sumeragi Family evacuation unit but was later on converted into a hideout for the active members of the OSF. At the hideout, you can travel here whenever you want, just open the world map. Returning to the hideout will recover your HP. But take note that you will not be able to return here if location movement is limited.
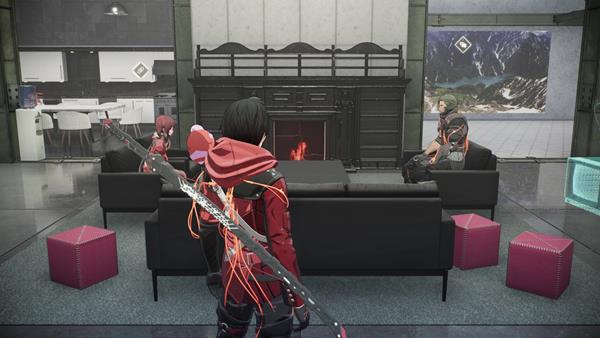
Apart from that, at the hideout, you can talk to your teammates and give them gifts to strengthen your bonds. The interval in between the main story is called the Standby Phase. Standby phases always start at the hideout and you are free to move and roam. If you want to progress the main story, check out the table in the center of the hideout's living room. Another thing is before heading out, you can organize your party. You can choose battle members (Companions) besides the main character and reserve members from the "party" in the main menu. You can set members' powers in the SAS menu. If you use battle member's powers through SAS, there will be a bonus added to the duration, and SAS gauge recovery speed.
Bond Episode: Hanabi Ichijo

Take this time during the Standby Phase to take on a few bond episodes. Speaking to Hanabi Ichijo will trigger your first bond episode with her. It will only consist of a dialogue cutscene with Yuito and Hanabi. By doing so, you can increase your bond level with her which increases the level of the SAS ability, SAS: Pyrokinesis. You'll acquire level 2 which provides a new combat tactic when you trigger SAS: Pyrokinesis - after the bond episode with Hanabi, approach the table in the center of the living room and you'll receive a brain message from Kasane Randall, replying to the message will trigger a bond episode with her, this time, you'll return to Kikuchiba in the field, accompanied by Kasane herself. It is recommended that you answer her message before you progress the story. Interacting with the table will end Phase 1 and begin Phase 2.
Trivia & Notes:
Trivia and notes go here
Phase 2
Days of Disquieting Stagnation is a Quest in Scarlet Nexus. Yuito was shown a Hideout where the active members of the OSF spend time to take a breath, rest and even catch up with one another. But Yuito struggles on the daily missions for the OSF. Yuito decides to take a nap at the hideout to rest but finds himself waking up at Sumeragi Tomb.

General Information
- Phase: Phase 2
- Character: Yuito Sumeragi
- Previous: Trusting the Path to the Future (Mizuhagawa District)
- Next: Days of Disquieting Stagnation (Abandoned Subway)
- Bosses: Kasane Randall
NPCs & Characters
- Shiden Ritter
- Kagero Donne
- Naomi Randall
- Tsugumi Nazar
- Nagi Karman
- Hanabi Ichiko
- Naomi Randall
- Gemma Garrison
- Satori the Archivist
Bosses
Items
Consumables and Other Items
- Light Jelly
- Normalization Tablet
- Kikuchiba Envrionment A
- Kikuchiba Envrionment B
- Kikuchiba Environment C
Equipment & Upgrades
- n/a
Enemies
Days of Disquieting Stagnation Walkthrough

Yuito takes a rest at the Hideout but later on wakes up at the Sumeragi Tomb in Suoh City. Conflicted with what just happened, Nagi Karman contacts Yuito and tells him that Kagero is running military exercises in the training area and that they both should join. Yuito leaves the mystery at the side and heads back to the OSF Training Facility to rendezvous with the rest of the OSF officers.
Virtual Training
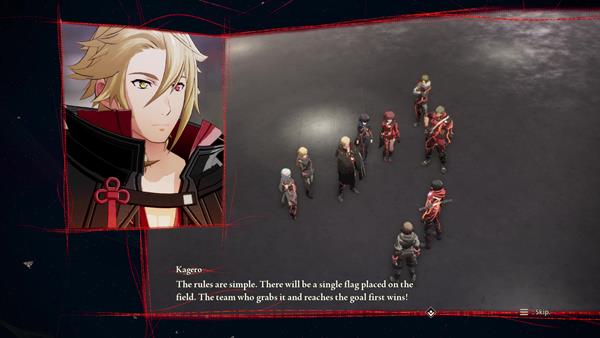
Upon arriving at the OSF Training Facility, a cutscene will trigger. You'll learn that Kagero has set up a competitive training exercise where each and everyone will be in a group of three members and will try reach the goal and grab the flag. You'll team up with Kagero Donne and Shidden Ritter and will start off the virtual exercise within a holographic setting of Kikuchiba. Upon regaining control of Yuito, you'll be prompted with a tutorial on how to change and set tactics/behavior for your active Companions. If you need to save, Satori the Archivist is just on your right at the starting point.
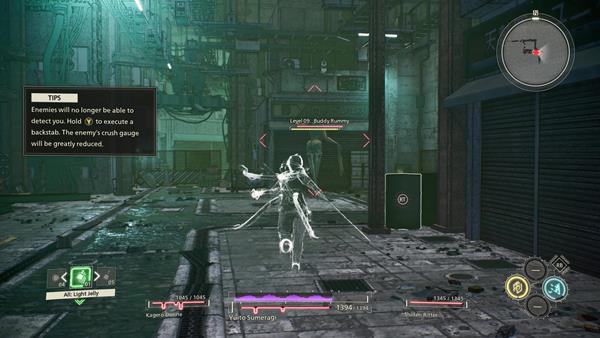
When you're ready, head towards the alley, follow the path indicated on the mini-map and along the way you'll find x2 Kikuchiba Environment C and eventually, come across the first enemy of the area, the Buddy Rummy. You'll then be prompted another tutorial on how SAS: Invisibility works. Use this to your advantage so that you can sneak up behind an enemy undetected and you can execute a powerful backstab. After trying out the new SAS attack, head up the long set of stairs to continue forward.
Kikuchiba: Second Level

At the top, go left first so that you can find x2 Kikuchiba Envrionment A. After grabbing the material item, go the opposite side down the alleyway until you reach an open area where you'll encounter x2 Bile Pool. The Bile Pool can shoot out water-based projectiles that can apply the Soaked Status on you, if you are soaked, this limits your mobility. Luckily, you can now trigger SAS: Electrokinesis. By borrowing electrokinesis, the attacks and Psychokinesis objects will have electricity that increases the damage and can cause the Shocked Status when repeatedly used. It is effective against enemies with the Soaked Status. Lightning attacks from Electrokinesis is the weakness of the Bile Pool - before heading up another set of stairs, you'll encounter x2 Buddy Rummy and another Bile Pool.
Kikuchiba: Third Level
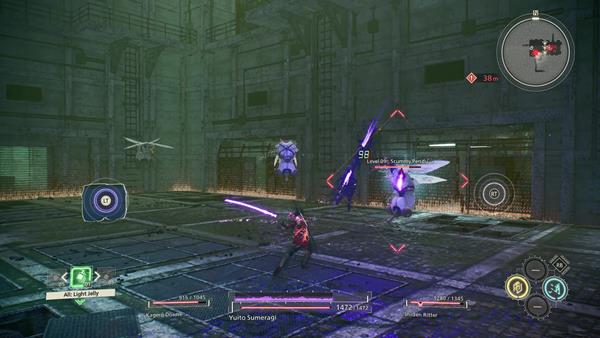
Upon reaching the third level, you'll find the location of the flag but you need to find another way around to reach it. A swarm of Scummy Pendu airborne enemies will spawn here, remeber to use Rising Slash to deal a significant amount of damage to the enemies. After defeating the swarm, x3 Buddy Rummy will spawn next. After killing all enemies, you'll find an open gate in front of where you just fought the enemies. Go around the alley and head up the next set of stairs to reach the fourth level, at the top of the fourth level, you'll find Kikuchiba Envrionment C. Next go up another set of steps to reach the fifth level.
Kikuchiba: Fifth Level

When you're on the fifth level, x3 Buddy Rummy enemies will spawn here. Using SAS: Electrokinesis will take them out easily since the shockwaves from your weapon attacks can easily hit two of the enemies at once. Shortly after defeating the Buddy Rummy enemies, x4 Plateau Pendu will appear. These are another airborned type enemies, so use Rising Slash so that you can temporarily stun them and attack it while its on the ground.
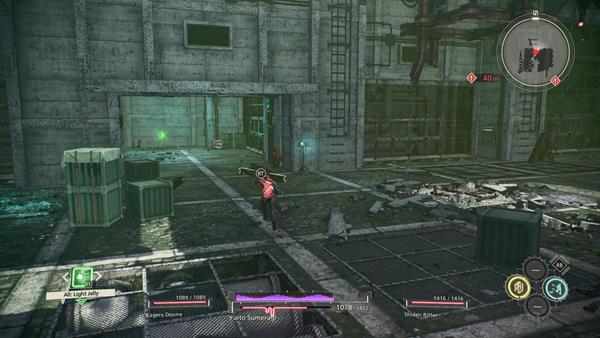
Once you've killed all enemies, go west and you'll find the following items, x2 Kikuchiba Environment B and Light Jelly. You'll then find the next set of stairs leading to the Mid-Level Shopping District where the goal area is, ignore that first since you need to find the flag.

Go back to where you fought the Buddy Rummy and Plateau Pendu (still on the fifth level), you'll find a path on the north side of the mini-map, go around it and you'll find a separate set of stairs that goes back down to the other side of the third level where the flag is. It is being protected by a group of Buddy Rummy enemies, so use SAS: Invisibility and backstab an enemy to gain the upper-hand. Take out all of the enemies, grab the flag that's in the middle of the area and go back up to the fifth level and take the set of steps that leads to the Mid-Level Shopping District where the goal is. But beware, along the way, more enemies are waiting for you.
Mid-Level Shopping District
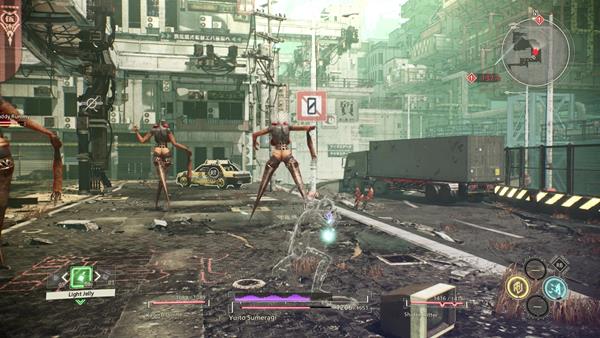
From here, the goal is simple, fight your way through the enemies that are swarming around the shopping disctrict and reach the top level where you'll find Satori the Archivist. The goal area is the open parking lot of Kikuchiba where Satori is. Along the way before reaching the goal area, you'll encounter enemies such as the Buddy Rummy, Bile Pool, and Scummy Pendu. Make sure to save the game before entering the parking lot because you'll have a showdown against Kasane Randall.
Battle: Kasane Randall

Upon entering the parking lot, you'll bump into Kasane's team and you'll have to fight against her one-on-one. Remember that Kasane uses the same power as you do, the only difference is she has quite an advantage when using her weapon since she using throwing knives that are fast and can hit you at mid-range. So be ready to dodge a lot. Kasane will throw objects at you when she uses Psychokinesis, so the best way to counter her is to "Intercept" her attacks. If timed right after dodging any object or projectile is thrown at you, you can press the designated button to send those objects or projectiles back at her.
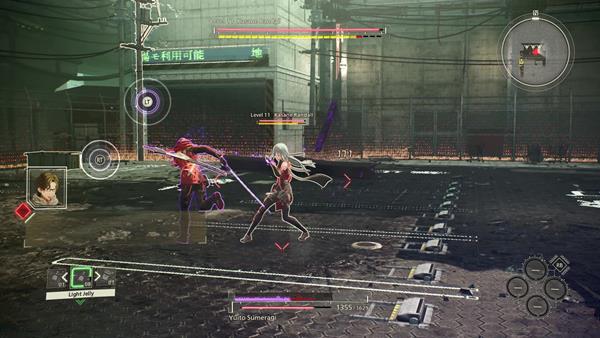
You'll know when Kasane will use Psychokinesis and throw objects at you when she stays put and focuses on grabbing and flinging that object at you. You can't stop her when she tries to throw objects at you so you need to either dodge or intercept her attack by throwing the object back at her. You can also use Psychokinesis attacks when she's not trying to focus, and occasionally, you'll stun her for a brief moment, allowing for follow-up attacks. Again, you just want to watch out for her weapon attacks since those are the ones that take a lot of damage. Focus on breaking her crush gauge so that she falls down to the ground and you can trigger a Brain Crush attack.
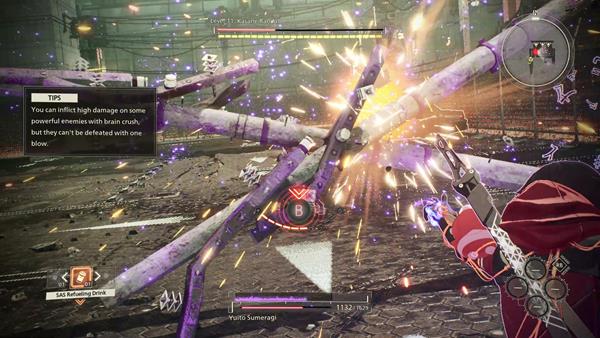
When Kasane's health is at 40%, you'll see a prompt to use Psychokinesis to pull out a pole and throw it at her. Trigger it and a showdown will happen between Yuito and Kasane, quickly mash the button indicated so that you win against the sequence. You'll inflict a lot of damage against her, so all that's left to do is keep attacking her. Defeating her will complete this quest or if you're health reaches zero, you'll lose the battle against her but you'll still complete this quest. To trigger the next story quest, your next destination is to travel to the Abandoned Subway: Suoh Line 9 - simply open the world map when you're back at Suoh City Ryujin Ward and choose the subway location.
Trivia & Notes:
Trivia and notes go here
Days of Disquieting Stagnation (Abandoned Subway) is a Quest in Scarlet Nexus. After the intense training with the active members of the OSF, as well as the showdown against Kasane Randall, Yuito and the rest of the members of Seto Platoon has been given orders to head over to the Abandoned Subway: Suoh Line 9 and to exterminate a large pack of Others.

General Information
- Phase: Phase 2
- Character: Yuito Sumeragi
- Previous: Days of Disquieting Stagnation
- Next: Inside Upside Down Reality
- Bosses: Naomi Randall
NPCs & Characters
- Seto Narukami
- Tsugumi Nazar
- Nagi Karman
- Kagero Donne
- Hanabi Ichijo
- Wataru Frazer
- Naomi Randall
- Kasane Randall
- Fubuki Spring
- Karen Travers
- Satori the Archivist
Bosses
Items
Consumables and Other Items
- Light Jelly
- Medium Jelly
- All: Light Jelly
- SAS Refueling Drink
- Saws Paws Analysis
- Green Curtain: Fresh Verdure
- Fashion Magazine "RUMOR"
- Abandoned Subway Environment B
- Abandoned Subway Environment C
Equipment & Upgrades
- Baki Doll with Ampoule
- OSF Standard Issue Pack [Black]
Enemies
Days of Disquieting Stagnation (Abandoned Subway) Walkthrough
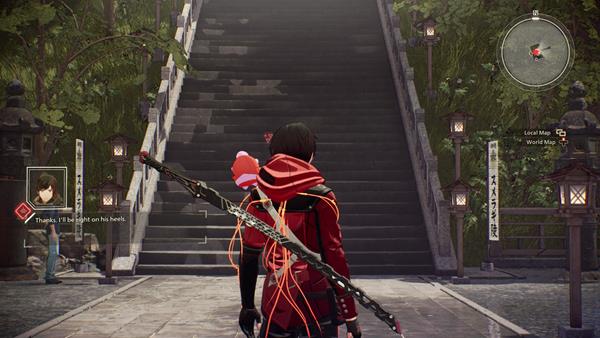
After the intense training with the active members of the OSF, as well as the showdown against Kasane Randall, Yuito and the rest of the members of Seto Platoon has been given orders to head over to the Abandoned Subway: Suoh Line 9 and to exterminate a large pack of Others. When you're ready to head out, open the wporld map and choose the Abandoned Subway to begin the quest.
The Abandoned Subway
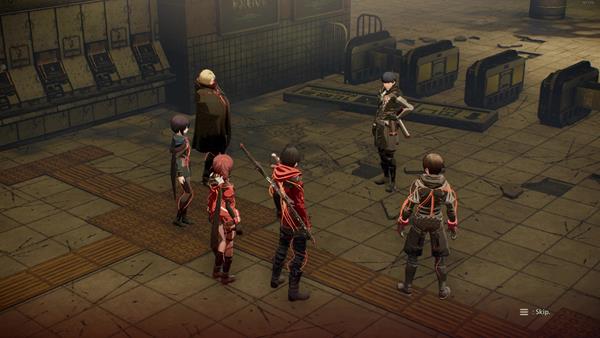
Upon arriving, you'll start off with a cutscene where the Seto Platoon is having a briefing regarding the mission. You'll be teamed up with Kagero Donne and Tsugumi Nazar. You've already experienced how SAS: Invisibility works during the previous quest, this time, you'll gain access to use SAS: Clairvoyance by connecting to Tsugumi's power, Clairvoyance. Upon starting, you'll be given a tutorial regarding Brain Drive, read it and if you need to save, you can find Satori the Archivist who's near the starting point.
In front of Satori, you can find x1 Abandoned Subway Environment C. Jump over the destroyed train and behind it there's a resource containing x1 SAS Refueling Drink. Now, head towards the train tracks and you'll encounter a new variation of an Other, the Saws Paws. This enemy can turn invisible, so you need to use SAS: Clairvoyance to be able to spot it even if it turns invisible. Defeat the enemy, and enter the next room that's on the left and you'll trigger a tutorial prompt on how to use the train car with Psychokinesis as a special object attack.

There are some Scummy Pool enemies that are on the train tracks, so all you need to do is to look at the train car and when the button prompt appears, press it down to use Psychokinesis and Yuito will have the train car ram over the enemies. After killing the enemies, look behind and there's a dead-end tunnel where you can find another resource item containing x1 Light Jelly. Go back to the train tracks where the enemies were and pick up the items that it dropped such as Battle Record A, Scummy Pool Analysis, and Pool-type Suppression - head over to the open area of the station and x2 Rain Rummy along with a couple of Scummy Pool enemies will spawn - take out the Scummy Pool enemies first since it has low health and you can stop it from shooting biles at you.
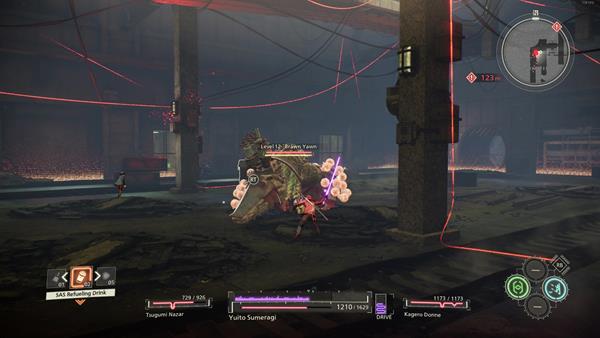
Shortly after you clear the area, a Brawn Yawn will pop out from the ground, but in order for you to damage it, you need to use SAS: Invisibility to deceive it. The enemy will only pop out from the ground if you are undetected. If you come out of being invisibile, it will burrow into the ground and try to ambush you from below. While you're invisible don't forget to use a backstab attack to take a big chunk out of its Crush Gauge. Keep moving around to avoid it's laser beam attack, you can also use this to your advantage and land a couple of hits since it stays in place when it shoots the laser from its mouth.
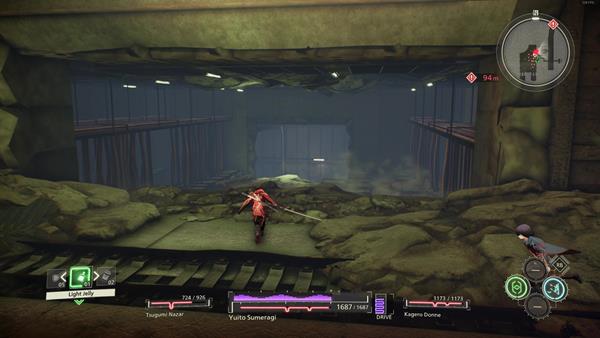
After defeating the enemy, head east from the mini-map where you'll find a slope leading into the inactive subway lines. On the right side, there's a resource item containing x1 Light Jelly and on the left is x1 Abandoned Subway Envrionment C. Grab the items and head towards the subway line proper. Go right first and you'll see a stack of crates blocking a path leading to small room, jump over it and grab the Abandoned Subway Envrionment B. On the oppsite side of the room ther's another path that's blocked by some stacked crates, jump over it and head up the steps to find x1 All: Light Jelly - go back down and proceed towards the train line where you'll encounter x2 Rainy Rummy.
Inside Abandoned Line

You'll now reach the second section of the abandoned subway, the Inside Abandoned Line. Continue forward and you'll find a group of enemies standing in front of a wrecked train car. Trigger SAS: Invisibility as soon as you approach them and then walk up to the train car so that you can use Psychokinesis to run them over, instantly killing them. If you wanna grab an item and farm some exp, head towards the tunnel on the right side and x3 Rainy Rummy will spawn followed by a Brawn Yawn. Remember to use SAS: Invisibility to bait and ambush the enemy. After clearing the area, grab the resource item to obtain Green Curtain: Fresh Verdure - go back to the train tracks and follow the objective marker.
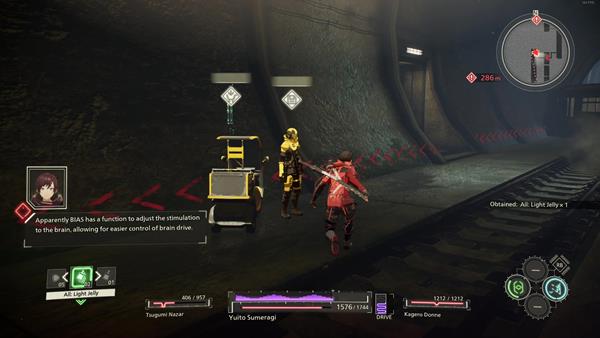
The path ahead is pretty much straightforward where you'll encounter x2 Rainy Rummy and x1 Saws Paws. Remember to use SAS: Clairvoyance so that you can see the enemy when it's invisible. At the end of the path, you can find Satori the Archivist to save and use the shop if you want. There's also a resource item near Satori which gives you x1 All: Light Jelly.

Next, head towards the lower section of the abandoned line. Along the way, you'll encounter x1 Saws Paws with x2 Scummy Pool, while at the lower section, there's a group of Rainy Rummy standing on the train tracks. Again, use SAS: Invisibility so you can sneak past the enemies and use Psychokinesis to throw the train car at them, don't forget to grab the All: Light Jelly item that's ahead. Now the objective is at the west side, but if you want to farm some EXP, you can fight the Auger Sabbat that's on the east side of the map and grab the item Light Jelly.
At the west side, there are x2 Saws Paws roaming. Use SAS: Clairvoyance to spot these enemies when they turn invisible, simply kill them and proceed further to the next section of the abandoned line. You can find Satori the Archivist again. When you're ready, head down the steps next to Satori and a cutscene dialogue will trigger where you'll bump into Naomi Randall.
Head to Point Alpha
After the cutscene, be ready to fight the enemies in the area, you'll be ambushed by a Brawn Yawn while x2 Rainy Rummy will attack as well. Immeditately go invisible with SAS: Invisibility and take out the Rainy Rummy enemies first before shifting your attention towards the Brawn Yawn.
After defeating all three enemies, head into the next section and make your way to point alpha. But before doing so, make sure to check the section on the east side of the mini-map, there are x2 Saws Paws, defeat both enemies and pick up the resouce item that's nearby to find x1 Fashion Magazine "RUMOR".
On the west section of the lower section of the abandoned line, leading to the marked objective, you'll find another resource item containing x1 Medium Jelly, grab it and head towards the marked objective that leads to Osukuni Station.
Osukuni Station
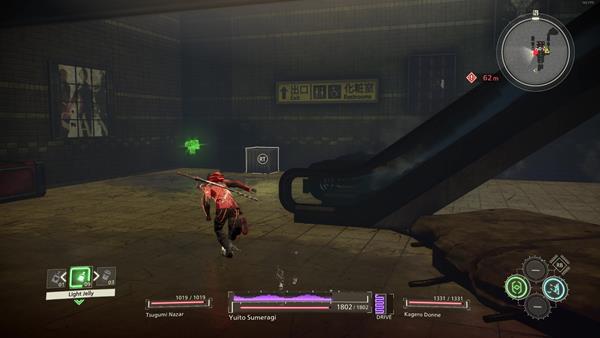
You'll now arrive at Osukuni Station. If you need to save, you'll find Satori the Archivist here as well. Before heading up the escalator on the right of Satori, check the escaltor on the left to find the following items, x1 Medium Jelly at the ground level and at the top is x1 All: Light Jelly. Head back down and proceed to the marked objecive where a cutscene will trigger.
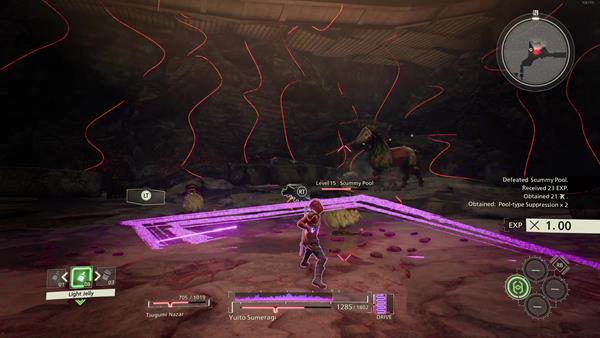
After the cutscene, you'll fight against the Others who ambushes you along with Tsugumi Nazar. Be ready upon gaining control and defeat the Auger Sabbat and Scummy Pool. Another cutscene will trigger after defeating the enemies and during the cutscene, Naomi Randall in an attempt to save her sister Kasane gets shot with a component that mutates her into an Other.
Boss Battle: Naomi Randall
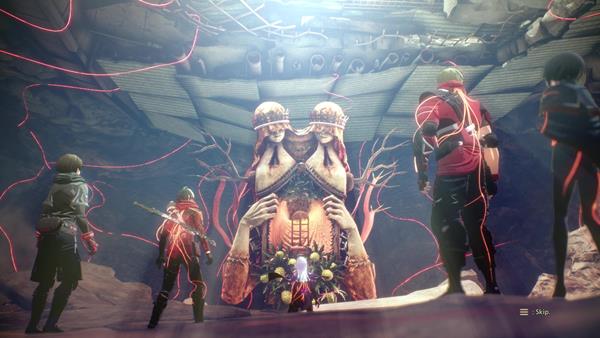
You'll now fight the mutated Naomi Randall alongside Tsugimi Nazar and Gemma Garrison. With Gemma in your party, you can now use SAS: Sclerokinesis which strengthens Yuito's defenses. Naomi will initially spawn as a giant twisted rag-doll, with her legs facing up (knees up) and her torso facing down (belly and elbows down) . During this phase, she will merely release an occasional tremor attack that damages targets standing below her or within her immediate vicinity. However, aside from this attack it seems that at this beginning phase Naomi is not an active threat, as she will stay put after crawling into a wall. This gives the player an opportunity to quickly damage her by hack-n-slashing her with melee combo attacks.
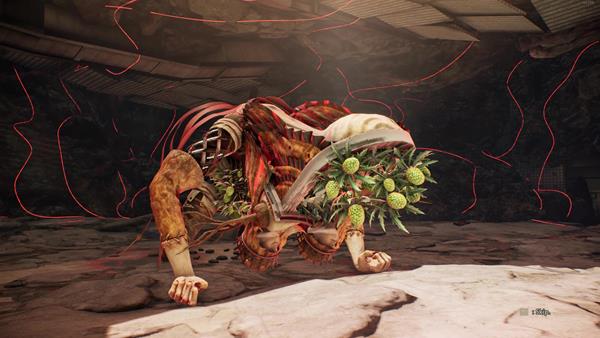
Once Naomi's HP has been reduced to roughly 70%, a cutscene will play, showing her form twisting into the opposite orientation - with her lower body facing down (knees down) and torso facing up (elbows up). Naomi will reemerge in this form with her HP bar refilled. A far more formidable threat compared to the last stage, Naomi will execute a series of damaging melee attacks. Although these moves cover large areas, they come with the cost of self-induced crowd controls.
For example, Naomi will begin with a sweeping attack, turning in 180 degrees with one arm extended, but the after cast of the skill will expose her side to attacks. Another such move features her firing ribbons from her back, which pierces into the ground and extends out from below her target, dealing moderate damage.
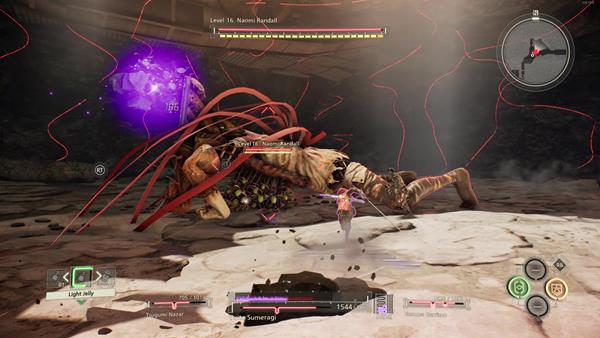
However, as her ribbons are rooted into the ground she will be snared for the entire duration. A more obvious sacrifice attack is when Naomi performs her forward lunge, which deals damage to units in her path, though she will faceplant onto the ground, knocking herself down. A more threatening move during this stage is her greater tremor, where she arches back as she kneels and lets out a roar, knocking down all units in a large radius.
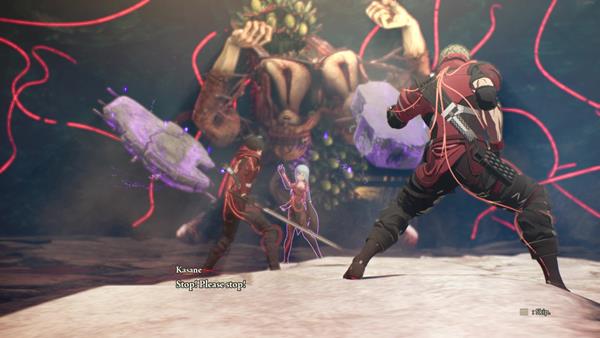
Since most of Naomi's attack comes with self-inhibiting effects, players can adopt a "peek-a-boo" pattern when performing melee attacks. Maintain distance or dodge as you notice Naomi preparing to strike, and once she has crowd-controlled herself, move back in to chain melee combos. Rinse and repeat, and perform psychokinesis attacks when the psychokinesis bar hsa charged up. When Naomi Randall's health is fully depeted, press the button that is prompted and a cutscene will trigger.
Chase After Kasane
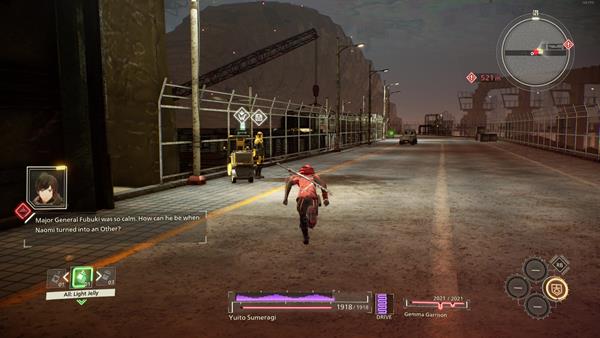
Ater the cutscene, you'll need to chase after Kasane alongside Gemma. The objective here is pretty straightforward, work your way through the abandoned station to reach the otuside section. Along the way of the first section outside the station, you will of course encounter enemies such as the Rainy Rummy, Scummy Pool. By the exit as well, you can find Satori the Archivist.

When you reach an intersection of two paths, on the mini-map, check the right side to find an OSF Standard Issue Pack [Black] that's at a dead-end. After grabbing the item, head towards the marked objective to trigger another cutscene where you'll find Kasane speaking to Major Karen - watch the cutscene and at the end you'll complete it and return to the Hideout.
Trivia & Notes:
Trivia and notes go here
Phase 3
Inside Upside Down Reality is a Quest in Scarlet Nexus. After Naomi's unfortunate event of metamorphing into one of the Others, Yuito and the rest of the members of Seto Platoon has been called out for their next mission to eradicate the Others that are terrorizing Kunad Highway.

General Information
- Phase: Phase 3
- Character: Yuito Sumeragi
- Previous: Days of Disquieting Stagnation (Abandoned Subway)
- Next: Fate Split in Two
- Bosses: Karen Travers
NPCs & Characters
- Seto Narukami
- Nagi Karman
- Hanabi Ichijo
- Kagero Donne
- Tsugumi Nazar
- Kasane Randall
- Gemma Garrison
- Shiden Ritter
- Luka Travers
- Karen Travers
- Satori the Archivist
Bosses
Items
Consumables and Other Items
- Light Jelly
- All: Light Jelly
- First Aid Kit
- Medium Jelly
- SAS Refueling Drink
- Normalization Tablet
- All: Normalization Tablet
- Other Ecology A
- Kunad Highway Environment A
- Kunad Highway Environment B
- Kunad Highway Environment C
Equipment & Upgrades
- n/a
Enemies
Inside Upside Down Reality Walkthrough
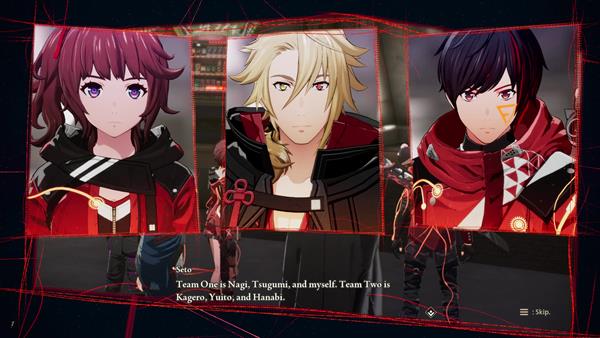
Tensions were high after being ambushed by Others at the Abandoned Subway: Suoh Line 9, as well as the unfortunate event of Naomi Randall's metamorphosis of turning into one of the Others after being shot by an unknown substance while saving her sister, Kasane. As Seto Platoon rests at the Hideout, orders from Major General Karen were issued for Seto Platoon to reach Kunad Highway and exterminate the Others sighted in the area. Yuito sets out to Kunad Highway who is accompanioed by Kagero and Hanabi.
Kunad Highway
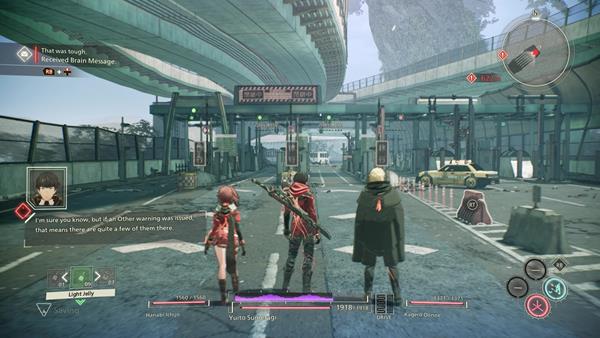
When you're ready to start the quest, open the world map and choose Kunad Highway for the next location. Head straight towards the abandoned highway and you'll encounter the first group of enemies, a swarm of Scummy Pendu. Remember to use Rising Slash to inflict a large amount of damage and to stun them momentarily. Apart from the Scummy Pendu, there is also x2 Kitchen Rummy enemies. Keep going straight towards an instersection of the highway bridge to find x3 more Kitchen Rummy. On the right side of the bridge form the intersection, you can find an item, while on the left is x1 Light Jelly - keep going staright and you'll encounter another swarm of Scummy Pendu.

Before heading down the path on the right side, make sure to walk up to the dead-end ahead to find x1 Normalization Tablet on the right, and next to a wrecked van on the left is x3 Kunad Highway Environment C.

After grabbing the items head down the path on the right side from the main bridge where you'll come across a group of Kitchen Rummy, continue down the path and you'll encounter another group of Kitchen Rummy. Kill all the enemies and proceed to the marked objective that is being guarded by x2 more Kitchen Rummy and x2 Rat Rut. The Rat Rut has a very hard shell protecting its weak spot so use Psychokinesis to throw objects at its shell to break it. Upon its shell breaking, you can use SAS: Pyrokinesis to deal more damage while it is temporarily down - you can find Satori the Archivist ahead near the marked objective, you can also find x3 Kunad Highway Environment A near Satori's position.

Continue towards the bridge and just about midway there will be a group of Others that will spawn. You'll find a large oil truck on the left side of the bridge, look at it while maintaining your distance to prompt the button to use Psychokinesis to make it explode. Shortly after defeating the first group of enemies, a Brawn Yawn will also spawn here, look at the right side and you'll find another Oil Truck that you can destroy and make it explode - make sure to grab the All: Light Jelly that's on the right side at the dead end, next to the large vines before you head to the next section, the Junction.
Kunad Highway: Junction

Jump up onto the broken road and look to your right to find a resource cache, next to the tree branches of the cherry blossom trees, which cotnains x1 All: Light Jelly. Just a bit forward, there's another resource cache that holds x1 All: Normalization Tablet.

Continue further and you'll find a group of Kitchen Rummy on both sides of the bridge and infront of you is a bus, use Psychokinesis so that you can ride on top and control it to run over the enemies. You can instantly kill all of the Kitchen Rummy, but you won't be able to take out the Brawn Yawn that's on the right side of the bridge. Remember that you need to use SAS: Invisibility so that you can have it appear from underground and ambush it.

After defeating the Brawn Yawn, head towards the direction that leads to the marked objective. You can ride on a bus again using Psychokinesis to run over the Kitchen Rummy that's blocking the path ahead. Be prepared to take out another batch of Rat Rut enemies here and another Brawn Yawn - kill all the enemies in order to continue forward towards the parking Area where you'll find Satori the Archivist again to save your game or to shop.
Kunad Highway: Parking Area
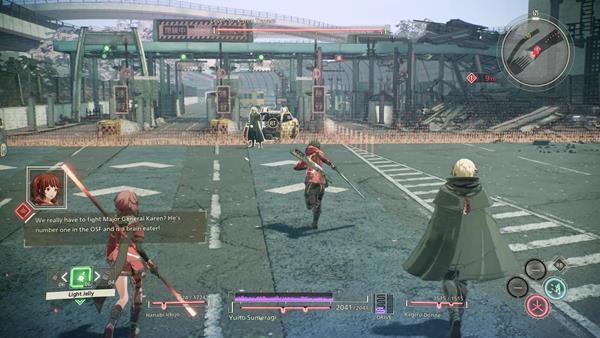
Upon reaching the Parking Area, head straight towards the marked objective and a cutscene dialogue will trigger. Prepare to fight against Karen Travers, be aware of his lightning-based attacks since getting hit multiple times will cause the Shocked Status which immobilizes Yuito for a brief moment until the effect wears off. Apart from his lightning attacks, he fights in melee and can teleport around the battlefield. So make sure you are always aware and ready to dodge when he appears next to you and tries to attack. Just keep withstanding his attacks but eventually, you are bound to lose this first encounter to progress the quest.
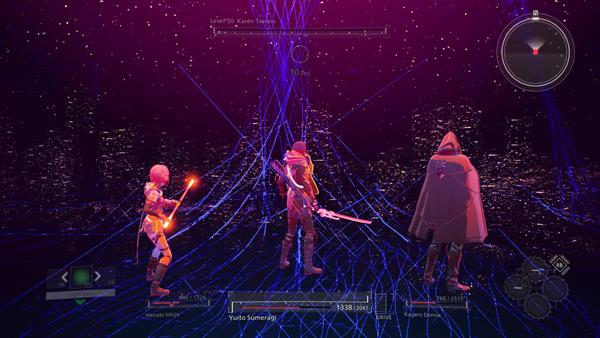
Again, no matter how what you do you are suppose to lose this battle against him, once you've landed a couple of hits, he'll trigger his Brain Drive and at this point, there really is no way you can win against him. When your health reaches zero, a cutscene will trigger where Karen triggers a large explosion that separates everyone from each other. You'll gain conciousness shortly after, only this time, you're alone and you need to someone from your team/platoon - Satori the Archivist can be found nearby, save your game and use the shop if necessary.

When you're ready, continue further and you'll come across an enemy that looks like soldiers. These are the Seiran NDF, they move quite slow and use a heavy weapon and a ranged weapon, so you can quickly attack them from behind to take them out easily. Keep going straight and you'll encounter more NDF soldiers, eventually, you'll reach the area that's surrounded by nature and you'll find Nagi Karman - approach him and another cutscene will trigger.
Elite Enemy: Winery Chinery
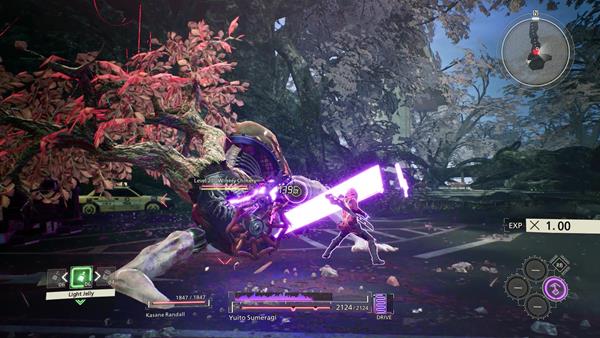
During the cutscene a large Other enemy will appear, the Winery Chinery. As strong as it looks, Kasane Randall will find you and accompany you in battle. Avoid being infront of the Winery Chinery since it can shoot a spray-type attack. Aim for attacking its hind legs and also maintain your distance behind it to avoid getting hit by its long tail. Use Psychokinesis to throw objects at its hind legs and try to bait it near the Oil Truck. When it's near, use Psychokinesis to make the oil truck explode. The explosion from the truck will cause the large enemy to fall on the ground and beceoms immbile for a brief period - simply defeat the enemy to trigger another cutscene and you'll complete this quest and return to the Hideout, as well as entering the Standby Phase of Phase 3.
Trivia & Notes:
Trivia and notes go here
Phase 4
Fate Split in Two is a Quest in Scarlet Nexus. After the encounter with Karen Travers in Kunad Highway, as well as the unfortunate event that turned out with Seto Platoon leader, Seto Narukami, the rest of the OSF cadets return to the Hideout for hospice not knowing that there are more terrors spiraling around Suoh.

General Information
- Phase: Phase 4
- Character: Yuito Sumeragi
- Previous: Inside Upside Down Reality
- Next: A Changed World and Creeping Unease
- Bosses: Kasane Randall
NPCs & Characters
- Hanabi Ichijo
- Wataru Frazer
- Gemma Garrison
- Tsugumi Nazar
- Fubuki Spring
- Kasane Randall
- Joe Sumeragi
- Karen Travers
- Satori the Archivist
Bosses
Items
Consumables and Other Items
Equipment & Upgrades
- n/a
Enemies
Fate Split in Two Walkthrough
Not knowing what to do next after the encounter with Septentrion, Karen Travers in Kunad Highway, as well as the unfortunate event that turned out with Seto Platoon leader, Seto Narukami, the rest of the members try to investigate about what is happening, only to find out that there are Others terrorizing Suoh City due to the city's defenses being shut down.
Suoh City Infested
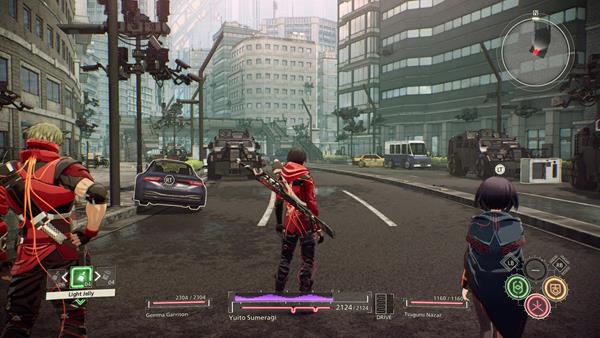
After the cutscene, you'll regain control of Yuito and you will be accompanied by Tsugumi Nazar and Gemma Garrison, and you'll also have Hanabi Ichijo on reserve. Even if a companion is at the reserve section of the party, you can still gain access to SAS: Pyrokinesis. Proceed through the streets of Suoh and you'll first encounter x2 Rat Rut enemies. Use Psychokinesis and throw objects at it to break its outer shell. A cutscene will then trigger after defeating the two enemies where Tsugumi identifies that Fubuki Spring is within the vicinity, knowing that Fubuki is on your side.
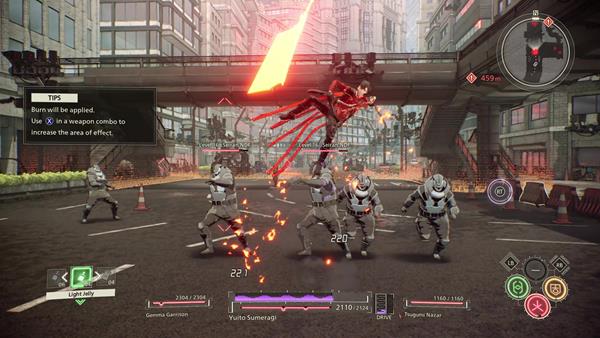
When the cutscene ends, continue forward towards the group of Seiran NDF enemies. Use SAS: Pyrokinesis so that you inflict more damage and you can hit multiple enemies at once. Continue moving straight towards the main road and you'll encounter x2 Rat Rut and a new Other enemy, the Missin Pound. The Missin Pound moves around fast while it's airborne so time your attack at the right moment with Rising Slash so you can land a large amount of damage, causing it to fall on the ground.

Shortly after defeating the three enemies, a Grin Yawn and another Missin Pound enemy will spawn, at some point while you are fighting, the area will be covered in smoke. When this happens, activate SAS: Clairvoyance so that you can see through it - you need to defeat all enemies before you can continue further, also make sure to check the corners of the city and look at the mini-map to find items, resource caches are marked with a green icon on the mini-map.
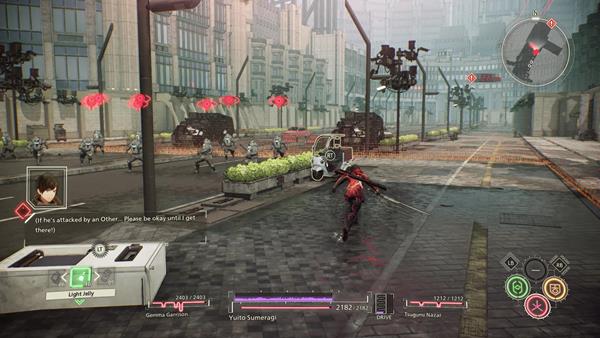
When you're near the OSF Training Facility/HQ, you'll encounter another large group of Seiran NDF soldiers. Dispatch all of the enemies so that you can proceed. Since there's a large group here and most of the time you'll be bombarded with their firearms, a good counter is to use SAS: Sclerokinesis so that you can negate their attacks, but be mindful of its cooldown, the effect will wear off if you cancel it and it the the time shortens whenever you get hit while hardened by SAS: Sclerokinesis. Another cutscene will trigger when you are near the headquarters of OSF, before you approach the entrance of OSF HQ, make sure to save the game - you can find Satori the Archivist just by the front gate.
Boss Battle: Kasane Randall
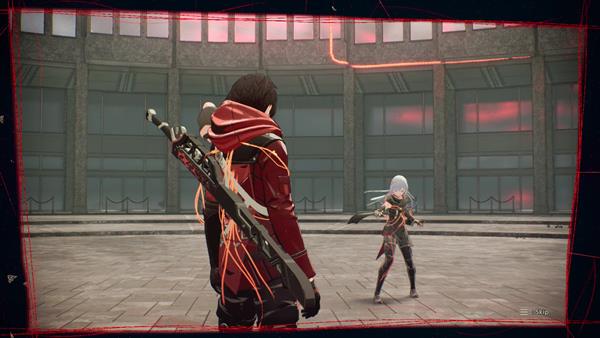
After the cutscene, you'll now have to fight against Kasane Randall for the second time around. Luckily, you've already fought against her once during the field training exercise in Phase 2, Days of Disquieting Stagnation. Remember that Kasane uses the same power as you do, the only difference is she has quite an advantage when using her weapon since she using throwing knives that are fast and can hit you at mid-range. So be ready to dodge a lot. Kasane will throw objects at you when she uses Psychokinesis, so the best way to counter her is to "Intercept" her attacks. If timed right after dodging any object or projectile is thrown at you, you can press the designated button to send those objects or projectiles back at her.
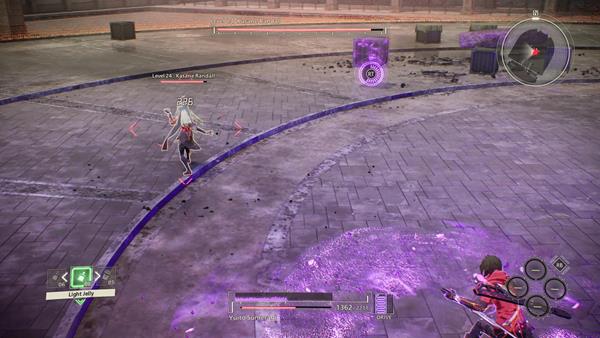
You'll know when Kasane will use Psychokinesis and throw objects at you when she stays put and focuses on grabbing and flinging that object at you. You can't stop her when she tries to throw objects at you so you need to either dodge or intercept her attack by throwing the object back at her. Another good tactic is to time your dodges at the right moment to trigger a Perfect Dodge, this way you can also counterattack.
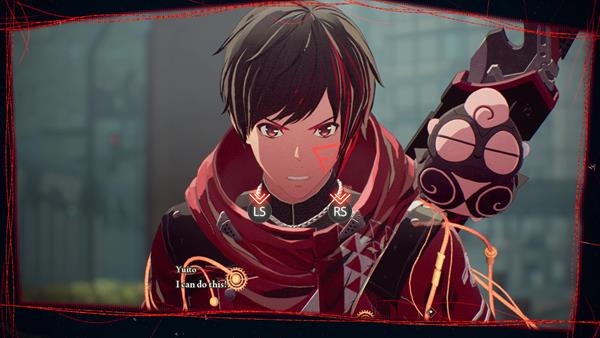
Your goal here is to keep attacking her until you've inflicted about 30-40% of damage to her health. When this happens, another cutscene will trigger and you'll be prompted to press the Left and Right analog sticks of your controller to trigger Brain Field. At this point, Yuito enters Brain Field. During this frenzy phase, you can't use any weapon attacks, but you can go crazy with using Psychokinesis attacks. Keep spamming your Psychokinesis attacks and maintain a safe distance from Kasane's attacks. At some point, you'll hear Gemma telling you to close the Brain Field to avoid losing control of Yuito's brain, if you don't close it, it leads to a game over.

When the tutorial window pops out, ress the Left and Right analog sticks of your controller to disable the brain field before it leads to your death. By doing so, you'll trigger another cutscene, end this quest, and enter the Standby Phase for Phase 4 - you'll also return back to the Hideout.
Trivia & Notes:
Trivia and notes go here
Phase 5
A Changed World and Creeping Unease is a Quest in Scarlet Nexus. The Suoh Incident shocked the people. Yuito is then summoned by the chief, his brother Kaito Sumeragi. Hea heads to the OSF Headuarters which ha lost half its members.

General Information
- Phase: Phase 5
- Character: Yuito Sumeragi
- Previous: Fate Split in Two
- Next: A Changed World and Creeping Unease (Kikuchiba)
- Bosses: Gunkin Fisher
NPCs & Characters
- Gemma Garrison
- Hanabi Ichijo
- Wataru Frazer
- Tsugumi Nazar
- Luka Travers
- Nagi Karman
- Fubuki Spring
- Satori the Archivist
Bosses
Items
Consumables and Other Items
- Medium Jelly
- All: Light Jelly
- All: Medium Jelly
- Normalization Tablet
- All: Normalization Tablet
- SAS Refueling Drink
- Fire-Proof Barrier: Generic
- Other Ecolocy C
- Hero Figure Vol. 1
Equipment & Upgrades
- n/a
Enemies
A Changed World and Creeping Unease Walkthrough

Yuito doesn't seem to remember the events of meeting Fubuki Spring and being reassinged to OSF First Platoon and him being designetad as the leader. You'll start off at the OSF Hospital where Yuito finds out the reason for him not remembering things. He find out that after the events of using Brain Field, an excess of psionic hormones have began to leak into his brain, causing temporary confusion. Upon gaining control of Yuito, head to the hospital's lobby and another cutscene will trigger - after the cutscene open the world map and travel to the Old OSF Hospital to begin the quest, also make sure to reply to any pending messages in the Brain Messages section when you can.
The Old OSF Hospital

For this quest, you'll be accompanied by Luka Travers and Tsugumi Nazar but you will also have Gemma Garrison and Hanabi Ichijo on reserve, you can also gain access to their powers such as SAS: Sclerokinesis and SAS: Pyrokinesis. Proceed to the lobby section and you'll find x2 Resource Caches on the left and right side of the lobby, pick it up to obtain x1 Medium Jelly and x1 All: Light Jelly. Before going straight towards the marked objective, check the west ward from the lobby to find x1 Normalization Tablet and then along the way towards the marked objective, you'll find x1 All: Medium Jelly.
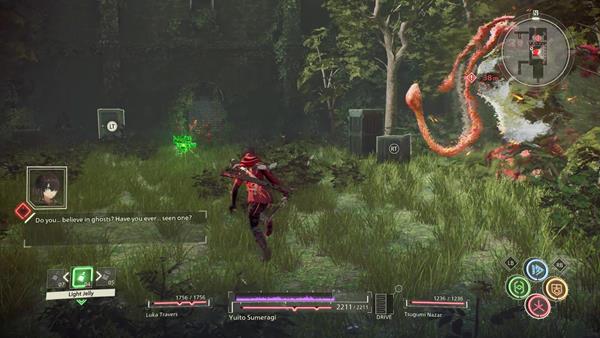
Now, proceed further and you'll find yourself outside the hospital where you'll encounter a new Other enemy, the Barrista Santa. You can also find an item here at the center of the outside area which is x1 Hero Figure Vol. 1. Be mindful of the Barrista Santa since it spins multiple times and uses its tentacles to hit you. Use Psychokinesis to throw objects at it and to stun it for a brief moment. Focus on breaking its shell so that you can deal more damage - after defeating the enemy, head back inside and go up the second level of the hospital.
Old OSF Hospital: 2nd Level

From the second level, go left towards a room where you'll see a large gate that's locked. Approach it and you'll be prompted with a new tutorial on how to use SAS: Teleportation. By borrowing Luka Travers' power, Teleportation, while the SAS is active, you can be able to teleport and phase through walls, and for this case, you can phase through the locked gate so that you can reach the other side of it. Upon teleporting inside the large room, you'll be ambushed by a group of Scummy Rummy enemies, followed by a new Other enemy, the Base Paws.

After defeating the enemies, head towards the unlocked gate and you'll find some items ahead such as Light Jelly in the room beside it and if you phase through another locked gate to reach the room infront, you can find x1 Fire-Proof Barrier: Generic. After grabbing the items, phase back and proceed to the marked objective where you'll find Satori the Archivist. By the entrance of the room, there's a divider on the left and behind is in a Resource Cache where you can find x1 All: Light Jelly. There's also an operation room next to him, inside the room, there's another Resource Cache containing x1 Medium Jelly.

When you're ready, proceed towards the open gate leading to a large room infront of Satori. A group of Scummy Rummy will spawn here followed by a Barrista Santa. Remember to use Psychokinesis so that you can break its shell, allowing for more critical and stronger attacks while it is immobile. Once you've killed all enemies, use SAS: Teleportation to phase thorugh the locked gate, to identify if you can phase through a gate or wall, the environment will be highlighted in green. First, phase through the gate on the right side, inside that room, there's a resource cache that has x1 SAS Refueling Drink, go back and proceed further by going through the metal door that's on the left side of the locked gate - on the other side, make sure to check the large room on the right to find x1 Normalization Tablet.

Now, you'll reach the corridor level of the patient's floor of the Old OSF Hospital. First, check the room on the right to find 200 Funds and then continue going straight back outside the corridor, there's another resource cache containing x1 Light Jelly by a dead-end. Turn around, go right, and you'll find another resource cache by a large grated door containing x1 All: Normalization Tablet.

Next, continue along the corridors and on the right side, you'll see a room that's locked. You can use SAS: Teleportation here to get to the other side where you'll find 500 Funds on top of a table inside a patient's room. Go back to the corridor and head towards the marked objective where you'll be ambushed by another group of Scummy Rummy, followed by x2 Base Paws. You need to defeat all the enemies so that you can pass into the next room where you can find Satori the Archivist again, and the marked objective - a cutscene will trigger upon reaching the marked objective.
Escape the Old Hospital

You'll learn from Luka that you will need to escape the area to avoid being caught up in between a large number of Others swarming the area. Upon gaining control, head towards the corridor section of the patient's floor that's on your right. Grab the Light Jelly that's straight ahead from where Satori is and enter the large room next to it where you'll encounter x1 Barrista Santa and x1 Base Paws. You need to use Psychokinesis first to break its shell, then you can throw an oil barrel at it to drench it with oil and follow up with SAS: Pyrokinesis to cover it in flames - after defeating the two enemies, continue forward towards the long hallway where you'll enter another large room that is guarded by a group of Scummy Rummy.

You'll now reach the opposite side of the patient's floor. Make sure to check the floor level first before continuing further to find items. Eventually, you'll enter a room where a pile of televison will turn on and inside the large room ahead of it is where you'll encounter a large Other, the Slippy Chinery. This Other can turn inbisible, so you will need to use SAS: Clairvoyance so that you can see it. Be careful of its AoE attack where it breathes out flames from its stomach. Defeat the large enemy to continue onto the next section. Before you reach the marked objective, you'll find Satori the Archivist inside a room before the marked objective, as well as 2 Resource Cache containing x1 Light Jelly and x1 Medium Jelly - we recommend that you save your game to prepare yourself for the boss ahead.
Boss Battle: Gunkin Fisher

You will now fight against the Gunkin Fisher. Much like the Gunkin Perry, the Gunkin Fisher is a resilient yet nimble beast, capable of attack at range and in melee. During the battle, the Gunkin Fisher will spill oil around itself in a radius, damaging and impairing enemies who approach it at melee. It will also regularly knock enemies back with a powerful swing from its left arm, similar to that of the Gunkin Perry's. When at its range, the Gunkin Fisher will hold one of the metal hoses hanging from its head, then aim it at its target to shoot it with a compressed beam of oil.

By far the most unique feature that differentiates the Gunkin Fisher from the Gunkin Perry is its superior ability to climb walls. From time to time, the Gunkin Fisher will retreat from Yuito and climb up the wall and onto the ceiling, hanging upside down in a spider-like fashion. This position is advantageous for the Gunkin Fisher as it can continue to execute targets with the Oil Spill and Oil Beam attack while staying away from upfront melee damage.

To counter the Gunkin Fisher in its "upside-down" position, the player can attack it at range using Psychokinesis while evading damage, and more importantly, pull down the tarp from the ceiling with Psychokinesis by holding down the "LT" button. Although this might take a few attempts as the Gunkin Perry will continuously bombard the player with oil attacks, once the panels above it falls, the Gunkin Perry will crash down, breaking its glass tank, rendering it stunned and vulnerable for several seconds. This window gives players a golden opportunity to chain combos and melee burst attacks.

With so many oil-based attacks coming from the large oil reserve on its back, the Gunkin Fisher's weak spot is naturally the glass casing of its tank. However, unlike the Gunkin Perry, its oil tank is caged by a series of large poles that surround the sides of the tank, making it a little more difficult to hit than the Gunkin Perry's. When using Psychokinesis to hurl objects at the Gunkin Perry, always aim for the top of the tank, or side in between the poles. Destroying the oil tank will give the player a plethora of advantages.

First, it will expose an even weaker, more vital organ encased inside, allowing players to deal heavy damage. Secondly, the Gunkin Fisher will consequently become drenched in its own oil, which will cause its body to ignite and burn when players utilize fire-based attacks. Most importantly, before the oil tank respawns the Gunkin Fisher will be unable to use any of its oil attacks.

Since the Gunkin Perry will alternate between fighting on ground and kiting from the ceiling, it is recommended for players to start charging and conserving the Psychokinesis gauge by attacking it in melee shortly before it crawls up. Having sufficient Psychokinesis energy in the Psychokinesis bar will ensure the player maintains a relevant damage output at all stages, even when the Gunkin Perry is untouchable by melee attacks. You'll then return to Suoh City Ryujin Ward after defeating the boss and after the cutscene - this ends this quest.
Trivia & Notes:
Trivia and notes go here
A Changed World and Creeping Unease (Kikuchiba) is a Quest in Scarlet Nexus. Yuito and his team were able to escape the swarm of Others in the Old OSF Hospital with the help of Fubuki Spring. Yuito's team return to the safe zone of Suoh City and learns more about the mutation of Naomi, the team then sets forth on patrol towards Kikuchiba.

General Information
- Phase: Phase 5
- Character: Yuito Sumeragi
- Previous: A Changed World and Creeping Unease
- Next: Choice to Face it, Eyes Open
- Bosses: Kasane Randall (Boss)
NPCs & Characters
- Gemma Garrison
- Hanabi Ichijo
- Wataru Frazer
- Tsugumi Nazar
- Luka Travers
- Fubuki Spring
- Shiden Ritter
- Arashi Spring
- Kagero Donne
- Kyoka Eden
- Kasane Randall
- Kodama Melone
- Satori the Archivist
Bosses
Items
Consumables and Other Items
- Medium Jelly
- Squash Racket
- Other Ecology A
- Pendu-type Suppression
- Marabou Pendu Analysis
- Kikuchiba Environment A
- Kikuchiba Environment B
- Kikuchiba Environment C
- Pool-type Suppression +
- Rummy-type Suppression +
- OSF Hospital Prescription Drug
Equipment & Upgrades
Enemies
A Changed World and Creeping Unease (Kikuchiba) Walkthrough

Being able to escape the Others at the Old OSF Hospital with the help of Fubuki Spring, Yuito and the rest of his team rendezvous at a safe zone within Suoh City Ryujin Ward. They learn more from Fubuki about the experiments that were held in the Old OSF Hospital which resulted in the creatuon of byproducts which tunes the brains of people, resulting in brainwaishing. They also learn about this new byproduct that was used against Naomi Randall which caused her to mutate into an Other - the team then continues on their patrol, hoping to find the rest of the team, and make haste towards Kikuchiba.
Return to Kikuchiba

Upon gaining control of Yuito, at the safe zone, look to your left to find a resource cache containing 600 Kin. And behind is another, containing x1 Forcefield Mk I. After grabbing the items, open the world map and travel to the Mid-Level Shopping District of Kikuchiba to formally begin the quest. (You can also roam around Suoh City if you want, before heading to Kikuchiba).

Upon arriving, you'll notice that it's the same layout of the map that you've encountered during the quest, Trusting the Path to the Future (Kikuchiba).

Proceed to the main street and you'll encounter the first group of enemies, the Marabou Pendu. Use Rising Slash to attack it in the air, or you can also use SAS: Teleportation to execute a teleport attack at it. Take out the enemies and then look to your right, there's a resource cache next to a truck to find x1 Squash Racket.

Continue further and you'll be ambushed by a group of Scummy Rummy enemies, using SAS: Pyrokinesis against the group will easily take them out - after you take out the group, x2 Doppel Pool will spawn next.

The Doppel Pool enemy is quite tricky since it has the power to duplicate itself. So you need to take out the real Doppel Pool so that its duplicates will disappear. Using SAS: Pyrokinesis against this enemy is good since the AoE effect can attack all of them at once - after defeating the enemies, head up the stairs to reach the second level.
Shopping District: 2nd Level

By the top of the stairs, you'll find Satori the Archivist. Save your game to replenish your HP or check the shop to restock on items. A cutscene will then trigger when you walk up towards the marked objective. This will now be your third boss encounter against Kasane Randall, only this thime, she is accompanied by Arashi Spring and Kagero Donne. The goal here is to take out the two first before you can fight Kasane.
Boss Battle: Kasasne, Arashi, Kagero

Fortunately for this battle, Yuito is amongst his team members, who, during this battle can support him with their unique SAS abilities. This will allow Yuito to go toe to toe with Kasane when trading blows in melee, as Yuito's powerful sword combos enhanced with Hanabi's SAS: Pyrokinesis should deal far superior damage in comparison.

In this particular instance, Yuito and his team must first eliminate Arashi and Kagero before battling Kasane. These two accomplices will only attack in melee, and are capable of performing very quick dashes across the battleground. Focus on them one at a time and chain as many melee attacks on them as possible to keep them pinned down, preventing them using their mobility. Quickly eliminate them in this fashion to kickstart the battle against Kasane.

An additional power that Kasane brings to the battle during this encounter is her Brain Field. Identical to Yuito's, this power will trap all units inside the caster's Brain Field realm, enhancing their Psychokinesis powers while disabling others capable of it from using it. While in this state, players must overcome Kasane with only melee attacks and SAS. Numerous large objects will also conveniently appear around Kasane, allowing her to continuously damage and knockdown targets with devastating throws.

A good way to avoid damage and close the gap is to empower Yuito with SAS: Teleportation, allowing him to blink in and out while damaging Kasane with melee slashes, and avoiding some of Kasane's Psychokinesis attacks. With this strategy the overwhelming amount of Psychokinesis throws from Kasane will become more manageable, allowing Yuito to wait out her Brain Field power. On the flip side, players should use Yuito's own Brain Field power against Kasane when it becomes available when Kasane's health has been reduced to roughly 30-20%. This will greatly speed up the fight and possibly defeat her with heavy damage from augmented Psychokinesis - a cutscene will then trigger after defeating the Kasane.
Standby Phase 5

At the end of the cutscene in Kikuchiba, you'll meet Kodama Melone and you'll receive the OSF Hospital Prescription Drug. From here, you'll return to the Hideout and complete the second quest for Phase 5. During the Stanby Phase, take your time to speak to your allies and check Brain Messages for possible Bond Episodes with the Companions.
Trivia & Notes:
Trivia and notes go here
Phase 6
Choice to Face it, Eyes Open is a Quest in Scarlet Nexus. Fubuki Spring arrives at the hideout and tells everyone that he investigated the government's motives for forcibly progressing power research from the inside and trying to make New Himuka better in a dfferent way than Karen, Yuito offers to help and leaves for Muzihagawa to gather information.

General Information
- Phase: Phase 6
- Character: Yuito Sumeragi
- Previous: A Changed World and Creeping Unease
- Next: Choice to Face it, Eyes Open (Research Facility)
- Bosses: Kagero Donne
NPCs & Characters
- Gemma Garrison
- Wataru Frazer
- Luka Travers
- Tsugumi Nazar
- Hanabi Ichijo
- Fubuki Spring
- Satori the Archivist
Bosses
Items
Consumables and Other Items
- Light Jelly
- All: Light Jelly
- Medium Jelly
- All: Medium Jelly
- Plateau Pendu Analysis
- Mizuhagawa Environment A
- Mizuhagawa Environment B
- Mizuhagawa Environment C
Equipment & Upgrades
- n/a
Enemies
Choice to Face it, Eyes Open Walkthrough
After learning from Fubuki Spring regarding the government's motives of trying to make a better New Himuka, Yuito Sumeragi and his platoon go on patrol towards Mizuhagawa District to gather information. You start off back at Suoh City Ryujin Ward where you are free to roam, and when you are ready to start, open the world map and travel to Mizuhagawa District.
Return to Mizuhagawa District

Upon gaining control of Yuito, open the world map and travel to the Construction Site of Mizuhagawa District. Run up the slope and head down the scaffolding to reach the construction site proper. When you head down, look to your left to find a resource cache containing x1 All: Light Jelly. After grabbing the item, proceed to the marked objective and a cutscene will trigger. After the cutscene, you'll be ambushed by a group of Buddy Rummy followed by an Auger Sabbat - remember to use Psychokinesis to break the shell covering its head so that the weak spot is revealed, a cutscene will trigger again after killing all enemies.
Site: Lower Section

After the cutscene, you'll learn that Yuito had another episode where he seemed to have blacked out. You'll find yourself at the lower section of the construction site and you'll again, encounter another Auger Sabbat. This time, your screen will glitch a bit since Yuito's brain is starting to get damaged. Despite this, you can still fight but from time to time, Yuito will stop when his head starts to hurt, eventually, another cutscene will trigger here where Yuito drinks the medication he obtained earlie. After the cutscene you'll resume battle against the Auger Sabbat as well as a group of Scummy Pool without any problems - another cutscene will trigger after defeating all enemies.

Next, head up the metal slope to reach back to the top of the construction site. You'll find Satori the Archivist there. Look to your left from Satori's position and you'll find a group of Plateau Pendu flying around. Defeat the enemies and grab the following resource cache to find the items such as x1 Medium Jelly, x1 All: Medium Jelly. After grabbing the items, retrace your steps back to the open field of the site where a group of Scummy Pool enemies will spawn, as well as another batch of Plateau Pendu, and x2 Auger Sabbat, Psychokinesis will be advantageous here since there are a lot of objects and vehicles that you can manipulate and throw at the enemies - when you're done, proceed to the marked objective, leading towards the south section of the construction site.
Construction Site: South Section
When you reach the runway of the south section, check behind the backhoe loader vehicle on your left to find x1 Medium Jelly, and just ahead of the runway is another resource cache containing x1 Light Jelly. Continue straight and at the midsection, you'll encounter a group of Plateau Pendu. Make sure to watch out for its projectiles since if you get hit multiple times, you can get shocked, making you immobile for a brief period. Using SAS: Teleportation is a good tactic to dance around them and to attack. Continue going straight until you reach the other end where you'll again, find Satori the Archivist. Just in front of Satori's spot is a resource cache containing All: Medium Jelly - make sure to save your game before heading to the marked obective.
Encounter: Kagero Donne

After the cutscene, you'll now face against Kagero Donne who is accompanied by Kyoka Eden, the goal here is to deal as much as damage until his health reaches about 60-70% so that you can progress the story. Kyoka Eden's power is Duplication and it can be quite annoying since she can create duplicates of herself which also attacks with her. So using SAS: Sclerokinesis is a good tactic so that you can increase your defenses while you fight Kagero. On the other hand, if Kagero tries to go invisible with his power, Invisibility, use SAS: Clairvoyance to counter it - simply deal about 40% damage to Kagero's health to tirgger another cutscene and to progress onto the next location, the Supernatural Life Research Facility.
Trivia & Notes:
Trivia and notes go here
Choice to Face it, Eyes Open (Research Facility) is a Quest in Scarlet Nexus. After their encounter with Kagero Donne and Kyoka Eden, they figure that they were only buying time. Tsugumi spots an OSF transport vehicle heading toward Seiran and Yuito's group decides to go where they think the two fled to, which is at the Supernatural Life Research Facility.

General Information
- Phase: Phase 6
- Character: Yuito Sumeragi
- Previous: Choice to Face it, Eyes Open
- Next: Where Lost Memories Lead
- Bosses: Arashi, Shiden, and Kasane
NPCs & Characters
Bosses
Items
Consumables and Other Items
- Light Jelly
- Medium Jelly
- All: Medium Jelly
- Normalization Tablet
- All: Normalization Tablet
- Keycard No. 1
- Keycard No. 2
- Keycard No. 3
- Keycard No. 4
- Research Facility Environment A
- Research Facility Environment B
- Research Facility Environment C
Equipment & Upgrades
- n/a
Enemies
Choice to Face it, Eyes Open (Research Facility) Walkthrough
Yuito loses his memory again on a mission at Mizuhagawa District and begins losing his ability to speak. When Others attack, Yuito realizes he's in danger. He takes the medicine in the ampoule he got from the hospital and recovers. As they continue their mission, Tsugumi spots an OSF transport vehicle heading toward Seiran. Kyoka and Kagero attack suddenly, but their attack seems meant to only buy time, and they retreat. Yuito's group decides to go where they think the two fled to, which is at the Supernatural Life Research Facility.
The Research Facility

The team arrives at the facility upon following the transport vehicle. Upon gaining control, look behind and you'll see a path ahead, as well as a locked door. Interact with the panel to trigger a cutscene. Tsugumi finds a keycard and you'll be able to enter. The locked doors around the area are indicated with a number of bars that require a certain keycard number, if you look to the right side next to the door panel number 1 which you just unlocked, you'll find another locked door that requires a keycard no. 4. - Keycard No. 1 is automatically now in your possession during the cutscene upon interacting with door number 1 earlier.
Where to Find Keycard No. 2
Click on the map image above to enlarge it.

Head up to the second level of the Museum Ruins area of the Research Facility. When you're there, you'll find a gate that is locked and blocked by a large shelf that you can teleport and phase through to reach the other side. Use SAS: Teleportation to do so. You'll easily identify the item since there's a number indicated at the top of the gold-colored cube. Grab the cube to obtain Keycard No. 2
Where to Find Keycard No. 3
Click on the map image above to enlarge it.

Upon getting, Keycard No. 2, head back and use it at door number II that's opposite of Satori the Archivist. Pass through and head towards the path on the right where you'll come across Others such as the Missin Pound and Cushion Pound at a narrow corridor. You'll again, find a gate that is locked and blocked by a large shelf that you can teleport and phase through to reach the other side. Use SAS: Teleportation and grab the cube to find Keycard No. 3.
Where to Find Keycard No. 4
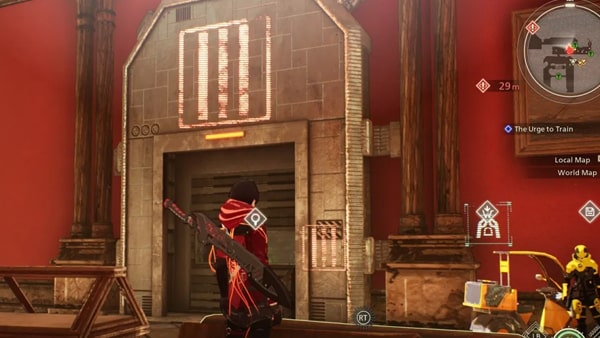

Backtrack to the second floor and use Keycard No. 3 on Door no. 3. Go through the door and turn left to find a room where it is guarded by enemies such as the Fuel Pool, Missin Pound, Cushion Pound, and Spawn Yawn. You need to defeat all enemies in order to disable the arena barrier - Keycard No. 4 is just by the corner of the room, on the ground. After grabbing the last keycard, simply head towards the section that has red walls, leading to Door no. 4 which is the marked objective, you'll also find Satori the Archivist next to it to save your game - a cutscene will trigger when you arrive at a hidden facility.
Encounter: Kasane, Shiden, Arashi

After the cutscene, you'll now fight against Shiden Ritter, Arashi, and Kasane. Focus on taking out Shiden first since his attacks are lightning-based and it can get quite annoying when you get hit multiple times and get shocked. Remember that when are inflicted with the Shocked Status, you'll fall to the ground and become immobile for a brief moment, making you vulnerable to their attacks. A good counter to protect yourself is using SAS: Sclerokinesis.

Once you've dealt with Shiden, switch to Arashi and just keep spamming your weapon attacks. Only use Psychokinesis attacks when she gets stunned for a brief moment since her Hypervelocity power allows her to move around quickly. Using SAS: Pyrokinesis since you get AoE attacks from Hanabi's power Pyrokinesis. If you want to dance around the battlefield as well, use SAS: Teleportation. Apart from that SAS: Sclerokinesis is a good ability to negate attacks for a brief period of time.

Last of course, will be Kasane Randall, and you should by now, know her tactics since this is your fourth encounter fighting her. Remember that Kasane uses the same power as you do, the only difference is she has quite an advantage when using her weapon since she using throwing knives that are fast and can hit you at mid-range. So be ready to dodge a lot. Kasane will throw objects at you when she uses Psychokinesis, so the best way to counter her is to "Intercept" her attacks. If timed right after dodging any object or projectile is thrown at you, you can press the designated button to send those objects or projectiles back at her.

You'll know when Kasane will use Psychokinesis and throw objects at you when she stays put and focuses on grabbing and flinging that object at you. You can't stop her when she tries to throw objects at you so you need to either dodge or intercept her attack by throwing the object back at her. Another good tactic is to time your dodges at the right moment to trigger a Perfect Dodge, this way you can also counterattack. Also, you can use Brain Field here but keep in mind to not prolong it since overusing it causes brain damage to Yuito and it can lead to a Game Over if he loses control, so be sure to deactivate it midway.

When Kasane is at 40-50% HP, she'll trigger Brain Field, when this happens, maintain your distance and keep running around her until her Brain Field timer runs out - a cutscene triggers when her health is at 20% and you'll return to the Hideout, as well as entering the Standby Phase for Phase 6.
Trivia & Notes:
Trivia and notes go here
Phase 7
Where Lost Memories Lead is a Quest in Scarlet Nexus. Fubuki tells Yuito that both sides are trying to develop weapons against the Others. Fubuki suggests using the city computer Arahabaki to transmit the memory data of the moment Naomi became an Other to all the citizens' minds. This will create doubts in the minds of the people and break the government's control. Yuito decides to infiltrate the Old OSF Hospital again to search for the memory data that should have been taken from Nagi during his personality rehabilitation.

General Information
- Phase: Phase 7
- Character: Yuito Sumeragi
- Previous: Choice to Face it, Eyes Open (Research Facility)
- Next: Collecting Pieces of Unknown History
- Bosses: Nagi Karman
NPCs & Characters
- Wataru Frazer
- Nagi Karman
- Karen Travers
- Fubuki Spring
- Hanabi Ichijo
- Tsugumi Nazar
- Luka Travers
- Gemma Garrison
- Satori the Archivist
Bosses
Items
Consumables and Other Items
- Max Jelly
- Light Jelly
- Medium Jelly
- All: Light Jelly
- All: Medium Jelly
- All: Max Jelly
- Brain Field Gear
- Normalization Tablet
- SAS Refueling Drink
- Fire-Proof Barrier: Generic
- Famous Alcohol Set
Equipment & Upgrades
- n/a
Enemies
Where Lost Memories Lead Walkthrough
Yuito and his platoon return back to the Old OSF Hospital in search of data that needs to be used and transmitted into the minds of the citizens of New Himuka in order for them to break free from the government's hold. Yuito knows he must find his old friend, Nagi, hoping that it's not too late for him.
Old OSF Hospital: Lobby
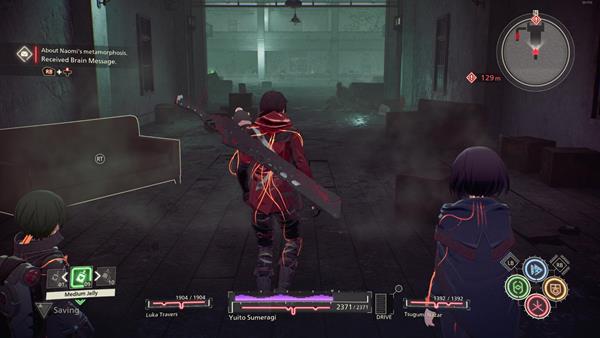
You'll arrive at the Old OSF Hospital along with your platoon, Tsugumi Nazar, Luka Travers, Hanabi Ichijo, and Gemma Garrison, also with Wataru Frazer who is assisting the team via comms. It's best to have at least Luka and Tsugumi in your active party since Tsugumi can attack enemies from afar, while Luka's weapon and attacks are heavy-hitting attacks. Upon arriving, walk up to the lobby section and you'll first encounter the Saws Paws, activate SAS: Clairvoyance to see it while it is invisible. There's a couple of Resource Caches in the area where you can find the following items such as the All: Light Jelly.

From the lobby, go right and around the corridor, then head outside the area that's overgrown by fauna. x1 Barrista Santa and another Saws Paws will appear here. Make sure to take out the Saws Paws first while using SAS: Clairvoyance, then shift towards the Barrista Santa and use Psychokinesis to break its shell, revealing its weak spot. After defeating it, in the same area, make sure to check the corner to find another resource cache containing x1 Famous Alcohol Set - also, if you go through the opposite door of the garden-like area, back inside the building, there's a gold cache containing x1 Mysterious Text Data.
Old OSF Hospital: 2nd Level

Next, head up the stairs to reach the second level and go towards the room on the left. You'll find a locked gate that you can get through with SAS: Teleportation. Upon teleporting to the other side, you'll be ambushed by a group of Others such as Scummy Pool, Saws Paws, followed by another Barrista Santa. Take out the Scummy Pool enemies with SAS: Pyrokinesis, and again, SAS: Clairvoyance for the Saws Paws so you can see them while they are invisible, then finish the Barrista Santa with Psychokinesis to break its shell and exploit its weak spot once it is revealed - clear all the enemies and proceed towards the gate that's unlocked.

Along the way, you'll encounter x1 Saws Paws just before reaching the next room where Satori the Archivist is. Interact with Satori to replenish your HP, save your progress, and check the shop if you need to. When you're done, head towards the large room that's on the left side of Satori and you'll again, be ambushed by another group of Others. You'll encounter a group of Scummy Pool, along a strong enemy, which is the Base Paws.

You need to take out the Scummy Pool enemies first so you can focus on the Base Paws on its own. This enemy shoots out oil, if you are inflicted with the Status Ailment: Oil, you won't be able to dash for a brief moment until the effect wears off. A good counter is to use SAS: Teleportation so that you can jump around the battlefield and use SAS: Pyrokinesis to set it on fire and cause the Burning Effect - the weak spot is its legs, so when it stands up, attack it immediately - shortly after, a group of Saws Paws will appear, use SAS: Clairvoyance to see the enemy when it goes invisible.

After defeating all of the enemies, teleport through the gate on the right side and head inside the room at the end where you'll find a resource cache containing x1 Max Jelly. Go back and then head towards the open gate on the left side of the large room to reach the patient's floor. Inside the room before the patient's floor, there's a resource cache behind a couch that has x1 All: Max Jelly.
Old OSF Hospital: Patient's Floor

When you reach the corridor, there's a patient room on the right side just by the entrance, go in and you'll find another resource cache by the shelf that has x1 Brain Field Gear. Go back outside and continue further, you'll see a gold resource cache containing x1 Mysterious Text Data by the makeshift barricade. Be cautious since a group of Scummy Pool enemies will spawn when you approach the item. After grabbing the data, continue further and you'll encounter another Saws Paws.

When you're on the other side of the floor, look to your right and you'll find another patient room that's locked. You can phase through with SAS: Teleportation and you'll find another Mysterious Text Data on the desk of the room, as well as a reosurce cache containing x1 Fire-Proof Barrier: Generic. Go back outside when you've grabbed the items and continue towards the quest objective - before reaching the room where Satori the Archivist is, you'll be ambushed again by a group of Others such as the Scummy Pool, Saws Paws, and Barrista Santa, you need to defeat them all so that you can proceed to the next section.

In the section across Satori's spot, go through the path on the right and then turn left, you'll see a hallway of cells, and at the end is another group of Others such as the Scummy Pool and Barrista Santa. Defeat the enemmies first and check the area to find the following items from resource caches: 2000 ![]() , Medium Jelly, and another Mysterious Text Data. Once you've grabbed all the items, retrace your steps and head towards the third level of the hospital
, Medium Jelly, and another Mysterious Text Data. Once you've grabbed all the items, retrace your steps and head towards the third level of the hospital
Old OSF Hospital: 3rd Level

When you reach the third level, turn left and you'll see another gate that you can phase through that's next to a hologram. On the other side, there's a Saws Paws enemy. Defeat it with SAS: Clairvoyance and then enter the room behind it to find a resource cache containing x1 All: Light Jelly and another Mysterious Text Data inside the operating room. After grabbing the items, head back to where you fought the Saws Paws and head towards the quest objective.

The path here is linear and you'll eventually come across a section of a room that's filled with TVs. When you reach the large room past the entrance with the multiple television, a Barrista Santa will spawn, followed by the Base Paws and Saws Paws. You will need to take out all of the enemies first before you can proceed any further. When you're done continue on towards the quest objective where you'll find Satori the Archivist nearby - make sure to save the game before continuing on, a cutscene will then trigger upon reaching the quest objective.
Boss Battle: Nagi Karman

After the cutscene, you now have to fight against Nagi Karman who's now been changed by the effects of Personality Rehabilitation. In the initial phase of the fight, Nagi will first kite away to bait Yuito into chasing him down. As he approaches terrain, he will turn around to quickly throw a group of wind Shurikens that spreads out in a cone shape, damaging and knocking enemies back. As Yuito closes in on him, he will perform fast, upward kicks to interrupt incoming melee attacks, causing Yuito become airborne with him, followed by a downward wind smash which knocks down enemies. To summarize, Nagi's attack pattern during Phase 1 is as follows: Run away > Wind Shurikens > Uppercut Kicks > Wind Smash.
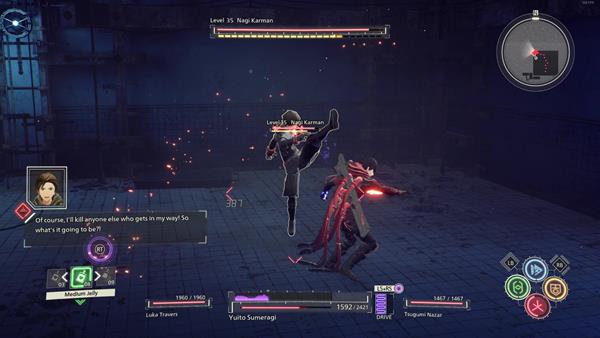
Since Nagi often executes this pattern as a chain of melee attacks Yuito can get overwhelmed, unable to stop the onslaught until the combo is complete. Therefore, to counter Nagi at this phase is to adopt a "Do or Die" tactic - the player must be alert and look for openings during Nagi's pattern, and once Yuito successfully lands an attack in melee, stay in the offense by chaining combos to keep Nagi pinned down. A skill that synergizes optimally with this strategy is SAS: Teleportation - stay at range so that Nagi is forced to throw Shurikens, and once he stands there idly, or randomly casts a melee attack, teleport in right when his attack completes and chain melee combos on him. As he is pinned down and your Psychokinesis bar is charged up, hurl adjacent objects at him to continue to dominate the fight.

At about 70% health, Nagi will deploy a smoke screen. Although this will buy him a few seconds to run away, it is a temporary distraction at best. Activate SAS: Clairvoyance to gain superior vision, which will enable you to see Nagi as a silhouette through the screen. At this stage, Nagi will once again stay back and spam singular wind Shurikens at you, in hopes to keep Yuito away. It will be difficult to directly run towards him as these Shurikens are very accurate and slightly track the target. Instead, hurl large objects at Nagi to momentarily shock him and close in steadily, then repeat until you finally reach him. He will repeat the same attack pattern until his health is reduced beyond half health.

At roughly 50% health (or below) phase 2 of the battle will begin. Nagi will suddenly perform his Tornado attack, which resembles his downward Wind Smash strike, but instead of an expanding gust of wind, it is followed by a large tornado that spins around him, knocking away any unit or objects nearby. Nagi will appear in a different outfit, where his head is hooded and his face covered by a mask. His Wind Shurikens will passively and steadily orbit around him, covering nearly the entire arena. All these AOE skills that extend out from Nagi himself makes Luka's teleportation SAS an even more effective counter. Whenever Nagi casts his tornado, he stays inside and remains stagnant for the entire duration. Simply dash in and chain combos in melee to knock him down. As he takes hits from you he will resort to his attack pattern from Phase 1 again. Blink away as he strikes, and blink back in to melee combo him. Rinse and repeat until he is defeated - a cutscene will then trigger after defeating him.
Escape the Hospital
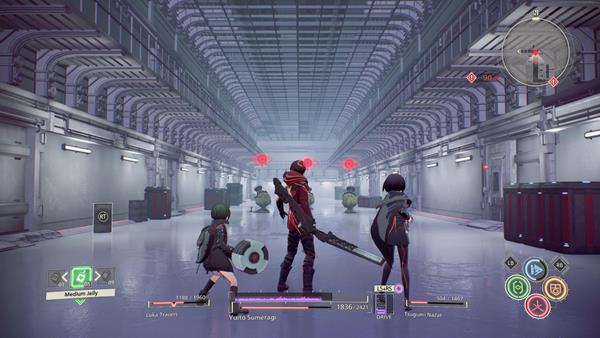
You'll now find yourself at a secret sacility of the Old OSF Hospital. Yuito learns that he was just a dud and used for experimentation when he was young but was later on rescued by Fubuki and regroups with the rest of his comrades. Upon gaining control of Yuito, you need to escape the facility, return back to the Old Ward, and reach the lobby area to escape. Simpy defeat any enemies you encounter, and retrace your steps back to the lobby which is the marked objective - a cutscene will trigger here where you encounter Karen Travers and you'll return back to the Hideout and enter the Standby Phase.
Trivia & Notes:
Trivia and notes go here
Phase 8
Collecting Pieces of Unknown History is a Quest in Scarlet Nexus. The team has been labeled as traitors and has nowhere to go. Despite the situation, Yuito decides to head to the religious state Togetsu in search of new information, at the Hieno Mountain.

General Information
- Phase: Phase 8
- Character: Yuito Sumeragi
- Previous: Where Lost Memories Lead
- Next: Eternal Vow, Eternal Bond
- Bosses: Coil Moil
NPCs & Characters
- Wataru Frazer
- Nagi Karman
- Hanabi Ichijo
- Tsugumi Nazar
- Luka Travers
- Gemma Garrison
- Kasane Randall
- Shiden Ritter
- Arashi Spring
- Kyoka Eden
- Kagero Donne
- Satori the Archivist
Bosses
Items
Consumables and Other Items
- Medium Jelly
- Normalization Tablet
- All: Normalization Tablet
- Hieno Mountain Environment A
- Hieno Mountain Environment B
- Hieno Mountain Environment C
- Hieno Mountain Environment S
Equipment & Upgrades
- n/a
Enemies
Collecting Pieces of Unknown History Walkthrough
The team arrives at the Hieno Mountain to find out more information that can be used against Suoh and Seiran, and hopefully, to find more data after being labeled as traitors against the government. You'll arrive at the frosty mountains along with your platoon.
Title Placeholder

At the starting point, you'll find Satori the Archivist. If you need to shop or save your game, interact with the NPC. Head straight and you'll see a large block of ice blocking your path leading towards the quest objective which is on the east side. Go west first and you'll come across a new Pound-type enemy, the Session Pound. Wataru will warn you that the enemy explodes if you get too close, so use Psychokinesis first to throw an object at it and when it falls down to the ground, use Psychokinesis again to throw another object, don't get near it because it will explode. Another thing that you can also do is use SAS: Teleportation to bait it, when it's near you, be ready to teleport so that you can avoid the blast.

Continue further and you'll come across Rainy Rummy and Session Pound enemies, you can again, bait the Session Pound to get near you and when it explodes, teleport away. Enemies caught in the explosion will also deal damage. After defeating the enemies, proceed forward and you'll see another large block of ice blocking your way, attack it to break it. On the other side of the block of ice you destroyed, there will be another group of Rainy Rummy and Session Pound enemies, followed by x3 Rat Rut. You need to use Psychokinesis again to break its shell to reveal its weak spot - after defeating all enemies, head up the slope and just go around the large blocks of ice (you can also break it to find some resource caches)

You'll then trigger a cutscene when you reach an open area. Continue forward and you'll see Satori the Archivist again on the west side of the mini-map. On the east side, however, there's another large block of ice, break it to find x3 Hieno Mountain Environment B behind it. Head towards the next section where another group of Rainy Rummy and a Doppel Pool. Try to take out the Rainy Rummy enemies first because their lightning attacks can get quite annoying, especially when you get stunned, also taking them out first gives you the chance to focus on defeating the Doppel Pool because it duplicates itself when you attack it.

The path ahead is pretty linear where you'll come across another large block of ice blocking your path. Break it and head into a large open area where x2 Doppel Pool enemies will spawn, alongside those annoying Session Pound. A good tactic is to bait the Session Pound and use the explosion to take out the Doppel Pool enemies easily. Shortly after defeating it, a Winery Chinery will spawn, alongside another group of Doppel Pool and Rainy Rummy enemies.

Take out the two small enemies first before shifting your attention to the large one. Using SAS: Clairvoyance will help you spot the real enemy when the Doppel Pool duplicates itself. Try to attack its legs from behind to hit its weak spot - kill all the enemies, grab the resource caches in the area, and continue towards the quest objective.
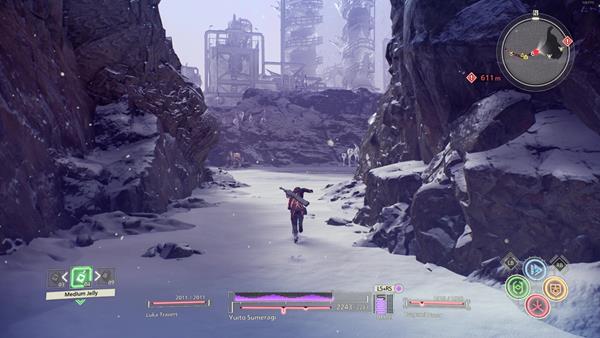
Next, you'll enter a cave where you'll again, find Satori the Archivist at the other end. Save your game or speak to Satori to replenish your HP and continue forward where you'll reach the outer section of an abandoned factory. x3 Rat Rut enemies will spawn here and there are a lot of objects that you can use to throw at them and to break their shells. You can even use the vehicles to run them down which instantly breaks the shell. Shortly after, another group of Doppel Pool enemies will spawn.

Head north from the mini-map and you'll come across Rainy Rummy enemies under a bridge. You can manipulate a metal object here and ride it to ram over the enemies and to break the blocks of ice blocking your path. You'll automatically get off when you reach the end of the path on the east side where you'll encounter another Winery Chinery enemy alongside other enemies, simply defeat all of the enemies retrace your steps, and take the path on the west where you'll come across a path that's by the edge of the mountain - you'll again, find Satori the Archivist at the end of the narrow path.

More enemies at the path ahead such as the Session Pound and Rainy Rummy, followed by the Doppel Pool and Rat Rut. Defeat all the enemies that appear in the arena in order to pass. From here the path is pretty much linear and you'll reach the entrance of the Church Headquarters which leads you to the next location, Togetsu
Hieno Mountain: Togetsu
You'll be treated to another cutscene upon entering the sanctuary. Upon gaining control of Yuito, just proceed towards the quest objective into the other section where another cutscene will trigger. After so, interact with the holographic terminals to trigger more cutscenes with the "Vision".

After checking all terminals, open your brain messages and read the conversation bubble regarding the information that you've gathered on history so far. Next, speak to the Togetsu Faithful to seek more information about code name "BABE". And head inside the next section of the sanctuary.

You'll now come across a long bridge. Approach the Togetsu Faithful to trigger another dialogue cutscene where you'll find the "BABE" Terminal. You'll then receive an SOS from Kasane to disconnect from the terminal once Yuito plugs in. You now need to escape the sanctuary after the alarm sets off. Retrace your steps back to the entrance of the sanctuary and another cutscene where the team fights off the Togetsu Faithful will trigger - you'll eventually regain control of Yuito once they're out and back at Hieno Mountain's trailhead.
Boss Battle: Coil Moil
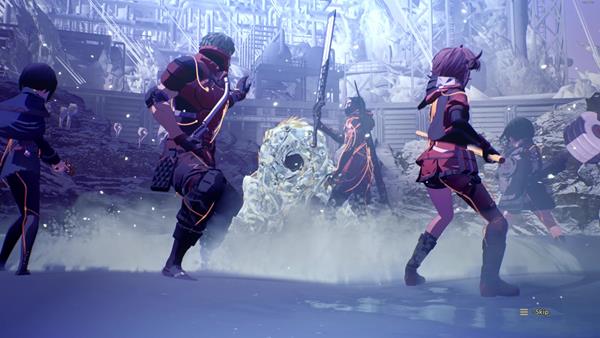
If you need to save, speak to Satori the Archivist who's just near you. Simply retrace your steps back and reach the marked objective. Be sure to save before approaching the objective since you'll fight against a boss here which is the Coil Moil. Instead of going progressing through different phases, the battle against the Coil Moil goes down in a cycle as it alternates between two different forms - its Frost Armor form, where it is protected by a layer of frost, and its Unarmored form, where it loses its protective layer but becomes more aggressive. Yuito will be accompanied by Hanabi, Luka and Tsugumi when he encounters the Coil Moil, granting him access to the SAS: Pyrokinesis, SAS: Teleportation, and SAS: Clairvoyance powers.
Frost Armor Form
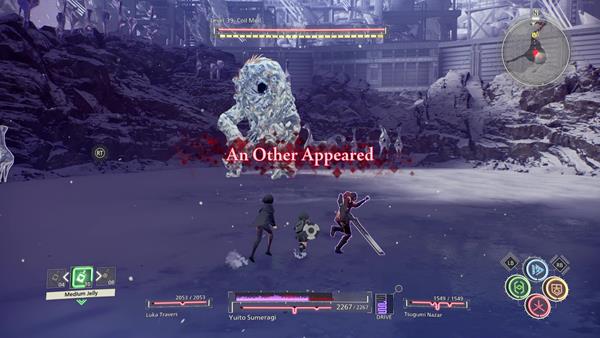
The battle will begin with the Coil Moil in its Frost Armor form. Although the armor limits its mobility, the Coil Moil will be granted the ability to execute ice attacks, such as firing barrages of Ice Boulders from its head and performing a smash that summons ice pillars to penetrate through the ground. Furthermore, it will be immune to all forms of damage, until Yuito and his teammates land enough attacks to destroy the thick layer of frost hide.
To counter the Coil Moil in this state, Yuito should move sideways to avoid the incoming shots of Ice Boulders, and run up to it in melee to spam a series of combo attacks. Continue to bombard with attacks unless you notice the Coil Moil lift its arms, in which case quickly runs out of range. This will allow you to avoid the smash attack, and the following large ice pillars piercing out of the floor. It is recommended for players to save up their SAS: Pyrokinesis for this form, as the fire damage from this power, will enable Yuito to cut down the Frost Armor much quicker.

Once the armor breaks, the Coil Moil will be exposed in its Unarmored Form, and will instantly fall to the ground from the sudden impact. Take advantage of its vulnerable position and chain as many attacks onto its weak spot - the bulbs on its back - to deal maximum damage and fill up the Crush Gauge. If you manage to break the Frost Armor before SAS: Pyrokinesis times out, this should allow Yuito to attack its weak spot with the blade ignited, further optimizing damage.
Unarmored Form
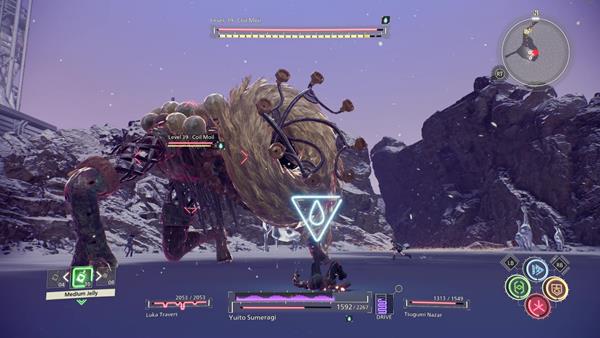
While in its Unarmored Form, the Coil Moil will attack more frequently and will use water-based attacks. When approached at melee, it will attempt to swat you aside with its closest arm, then proceed to turn towards you before firing jet streams of compressed water from the knobs surrounding its head. Avoid this by playing "dog fight" with the Coil Moil, chasing its hind legs from a distance while using Psychokinesis to throw surrounding ice sculptures at it.

If approached again, it will lift its arms to smash the ground to send out a shockwave, breaking the ice in a radius and creating five large pillars of water that spin around it. Although this attack covers a rather large area, it is always telegraphed with the arm-lifting motion. Avoid this skill by turning around and running out of range as quickly as possible as it deals massive damage and can stun targets for several seconds while applying the "Soaked" Status Ailment. While the pillars of water orbiting the Coil Moil, players can bypass them with the SAS: Teleportation power and attack the Others monstrosity in melee. Take note that after this attack, the Coil Moil will tunnel into the ground, before reemerging with rejuvenated Frost Armor again.
Tunneling

The Coil Moil will tunnel after it performs its ground smash attack in the Unarmored Form. While tunneling, the Coil Moil will track Yuito's footsteps, and leap out from under the ice floor in approximately 5 seconds. The impact from its reemergence can easily be avoided so long as Yuito continues to run without stopping. However, the Coil Moil will reappear with its Frost Armor rejuvenated, and the cycle repeats itself.
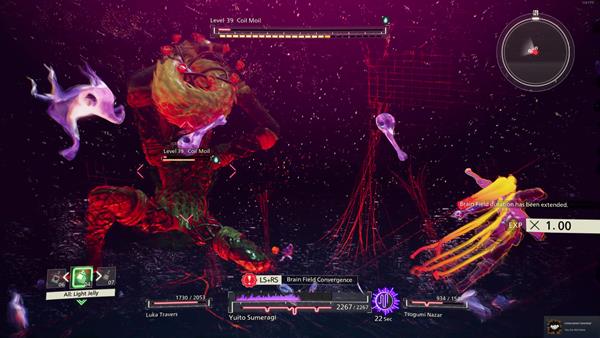
In summary, retain SAS: Pyrokinesis for quickly destroying the Coil Moil's Frost Armor and attack its back and underside in melee whenever it is in its unarmored state. Filling up the Crush Gauge can greatly speed up the fight as it can chunk roughly 20-25% of its health in one hit. Maintain mobility to avoid most of the Coil Moil's onslaught and keep pressure with Psychokinesis from time to time.
After defeating the Coil Moil, simply head towards the marked objective where you'll rendezvous with Kasane and her group. The two groups will then catch up and share the information that they've both learned. Next, fast travel back to the Hideout to end this quest and you'll enter the Standby Phase.
Trivia & Notes:
Trivia and notes go here
Phase 9
Eternal Vow, Eternal Bond is a Quest in Scarlet Nexus. Cooperating with Kasane and her team, Yuito and his team decide to pressure the New Himuka government to help them stop Togetsu's plan. Well aware of the danger, they head to Suoh in order to talk to Yuito's older brother, Kaito.

General Information
- Phase: Phase 9
- Character: Yuito Sumeragi
- Previous: Collecting Pieces of Unknown History
- Next: Conclusion and an Accidental Meeting
- Bosses: Nagi Karman, Karen Travers
NPCs & Characters
- Luka Travers
- Hanabi Ichijo
- Gemma Garrison
- Tsugumi Nazar
- Wataru Frazer
- Kaito Sumeragi
- Kasane Randall
- Shiden Ritter
- Arashi Spring
- Kagero Donne
- Kyoka Eden
- Fubuki Spring
- Satori the Archivist
Bosses
Items
Consumables and Other Items
- Max Jelly
- Medium Jelly
- SAS Refueling Drink
- Arahabaki Environment A
- Arahabaki Environment B
- Arahabaki Environment C
Equipment & Upgrades
- n/a
Enemies
Eternal Vow, Eternal Bond Walkthrough
Yuito's team cooperates with Kasasne's team to put some pressure on the New Himuka Government. Well aware of being labeled as rebels and of the danger, the team returns to Suoh City to meet with Yuito's older brother, Kaito. As they walk the streets of Suoh, they bump into a personality rehabilitated Nagi Karman
Boss Battle: Nagi Karman
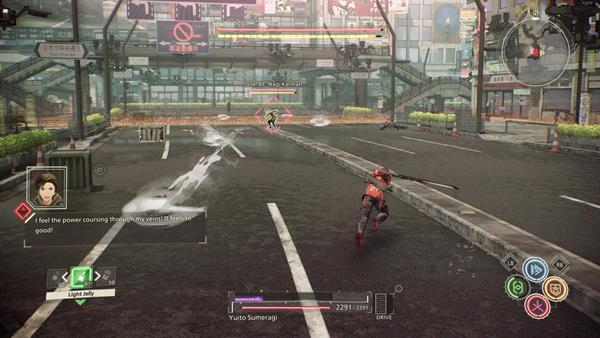
To start things off with this quest, you'll be going up against Nagi Karman for the second time around. This battle is different from the first in multiple ways. First, if Yuito has a strong enough Team Bond with his platoon, his teammates will call to him from time to time, and when the player responds to the call (by pressing ![]() +
+ ![]() ), an Assault Vision of his teammates will take his place, executing a powerful attack combo. Secondly, this fight will be against an augmented version of Nagi, who will deploy new attack moves and display new powers such as brain field during the battle.
), an Assault Vision of his teammates will take his place, executing a powerful attack combo. Secondly, this fight will be against an augmented version of Nagi, who will deploy new attack moves and display new powers such as brain field during the battle.

In the initial phase, Nagi will maintain the same melee attack pattern but will use it less than before, as they are partially replaced by a new ranged attack which he will deploy frequently. With this attack, Nagi will summon a barrage of wind Shurikens to levitate around himself, before throwing them at his target in rapid succession. These Shurikens are incredibly fast, are accurate, and deal high spike damage, such that they can burst down Yuito at full health with 7 or fewer hits. They will even stun the target upon landing consecutive hits, easily leading to a quick death as the target will be unable to avoid the following Shurikens.

Nagi can be stopped during this attack if Yuito manages to close in and pin him down first with a chain of melee attacks. This can be achieved either with a will timed leap, a Perfect Dodge, or with SAS: Teleportation. During this fight, it also seems that Nagi has a tendency to stand still after gaining distance, and will only execute his melee wind combos if approached. If Yuito can land multiple Psychokinesis hits on Nagi before he winds up his wind Shurikens, Yuito will have an opportunity to charge at Nagi and maul him down with melee attacks.

When Nagi is at around 70% health, phase 2 will begin with a cutscene featuring Nagi screaming in pain as he holds his head, before he releases a burst of a strong wind at Yuito and his allies, chunking 30% of Yuito's health. In this form, Nagi will gain increased movement speed and can perform a quick charge at Yuito he surrounds himself with wind, and occasionally hurl tornadoes. Keep moving and wait for Nagi to stand behind a lamp post or bus shelter, and use Psychokinesis attacks on him. As he throws Shurikens or attacks in melee, attempt to perform Perfect Dodges to counter burst Nagi. Attacking Nagi with a few more cycles of melee combos should deplete his Crush Gauge completely, allowing Yuito to burst his health down beyond 50%.
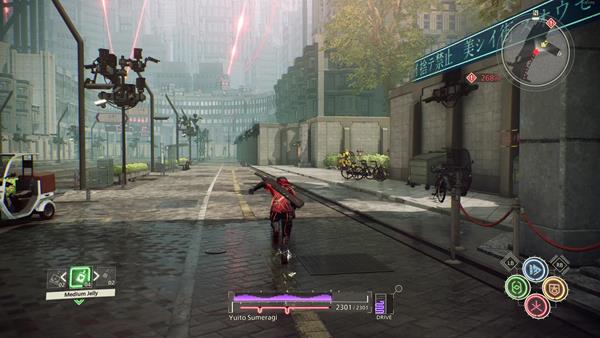
Once Nagi's health is reduced beyond 50%, the final phase will begin, and Nagi will instantly enter his Brain Field state as he appears in his hooded form. Ironically, since Nagi is somewhat limited to throwing slow-moving Tornadoes in the brain field realm, he will not pose much of a threat so long as the player maintains movement by running to the side continuously, so try to hold your ground and wait for the 40-second timer. Do this until the brain field state ends, and be cautious of melee attacks from behind as Nagi deploys his smokescreen. Use SAS: Clairvoyance to see through it, and continue to stay on the offense and pressure with attacks. Time your Assualt Vision right when Nagi attacks as your teammates should be calling out to you more frequently in this phase. Keep up with pressure relentlessly to defeat Nagi - you'll continue the quest after defeating him.
Head to OSF HQ

Your task is pretty much linear, reach the OSF Headquarters and look for Kaito. If you need to save the game, replenish your HP, restock on items, then you can find Satori the Archivist outside the entrance of Sumeragi Tomb Grounds. You'll now arrive at Suoh OSF Chief's office. Head to the entrance of the office and a cutscene will trigger - you'll return back to the streets of Suoh after the alarm sets off, simply follow the waymarker and reach for the Safe Zone to trigger another cutscene.
Arahabaki Secure Site
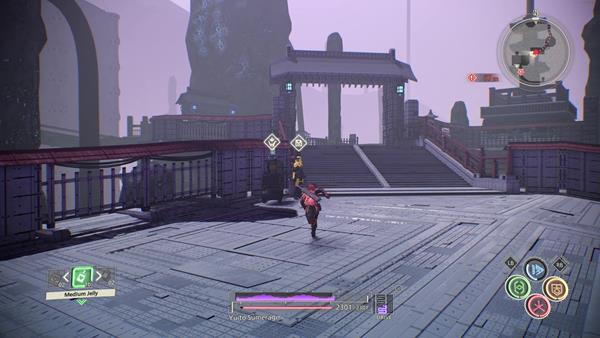
After the cutscene, open the World Map and travel to your next location, the Bridge of Purity in Arahabaki Secure Site. Now, upon gaining control of Yuito, approach the large bridge and use Psychokinesis so that you can push it down. For the early section of this location you'll be fighting on your own, but, you still have access to using the powers of your allies via Struggle Arms System (SAS). On the other side of the bridge, you'll encounter a group of Vase Paws and Bandeau Pendu. You don't have Arashi here, so to counter the Bandeau Pendu, use SAS: Teleportation to teleport to it and land a counterattack - there's a locked gate nearby as well that you can teleport to phase through, and you can find a material cache containing x3 Arahabaki Environment C.
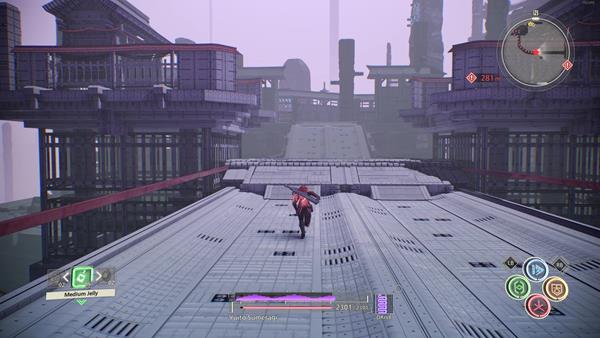
Head to the quest objective where you'll find Satori the Archivist near the objective area. When you're ready, proceed forward towards an arena and you'll encounter a group of Vase Paws, followed by Bandeau Pendu. After defeating the enemies, you'll see a switch that's glowing with blue light, interact with it to open the gate that's in front.
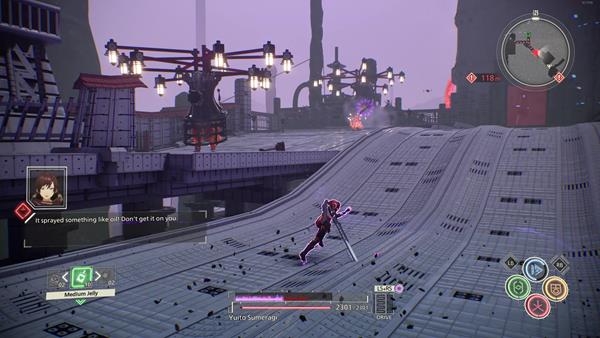
Run towards the conveyor-belt path and mid-way, you'll find a resource cache on the left. Double jump to reach the platform and grab it to find x1 Medium Jelly. On the opposite side, however, is a material cache containing x3 Arahabaki Environment B. After grabbing the items continue further where you'll reach another open area where Others will spawn such as a group of Vase Paws and Bandeau Pendu, followed by a Booger Sabbat - simply kill all the enemies to continue onto the next section.
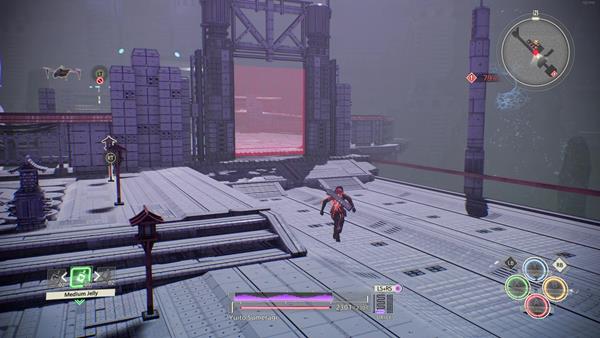
Head up the steps, turn left first and jump onto the platform above to find items such as x1 SAS Refueling Drink and x2 Arahabaki Environment A. Jump back down and continue towards the quest marker. Along the way though, when you are running on the conveyor-belt path that's moving backward, you'll encounter x2 Base Paws that will shoot biles of oil at you. Use SAS: Teleportation so that you can quickly teleport onto the platform where the enemies are and then take them out as you move forward.

Now, go through the door that is blocked with a red barrier on it, you need to use SAS: Teleportation to get through. On the other side, turn left first and you'll find a resource cache containing x1 Max Jelly. Grab the item and proceed towards the next area of the site, the Hallowed Grounds.
Arahabaki: Hollowed Grounds
By the starting point of this sub-area, you'll find Satori the Archivist, save your game, restore your HP, and restock on items if you need. Head up the steps next to Satori and you'll be ambushed by another group of Others in the open area. You'll fight against Vase Paws and the Booger Sabbat. Once they've been dealt with, you need to look for the switch that's located on a different section to unlock Gate 2. There's a large bridge nearby that you can push down with Psychokinesis, do that and you'll find the switch on the other side.

Activate the switch, go back and go through Gate 2 where you'll find another locked gate, which is Gate 3, and again, you need to find the switch that can be found by going up the stairs that's on the left side of the gate. Upon activating the switch, you'll encounter x2 Booger Sabbat that will spawn by the gate once it is unlocked and when you approach the gate. Kill both enemies to unlock the barrier and proceed through gate 3. Run up towards the door with the red barrier and use SAS: Teleportation to phase through, Satori the Archivist will be on the other side - the path ahead will have some detours as you proceed, but most of it will just have dead-ends where you fight more Others and find resource caches. The goal of course is to reach the top section of the site where you'll encounter Karen Travers.
Boss Battle: Karen Travers
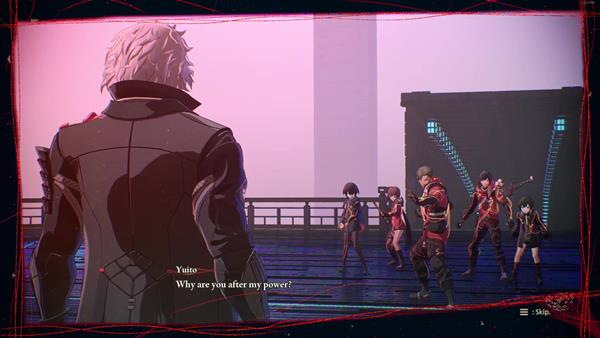
This will be your second encounter against Karen Travers. Although still an inevitable loss, this encounter will be an actual battle against Karen. Karen differs from other Bosses in that he does not have Crush Gauge, leaving the player no chance to chunk his health with with the Brain Crush move. However, during this phase the player will have access to Assault Vision, which can greatly enhance the effectiveness of Yuito's combat capabilities against Karen.
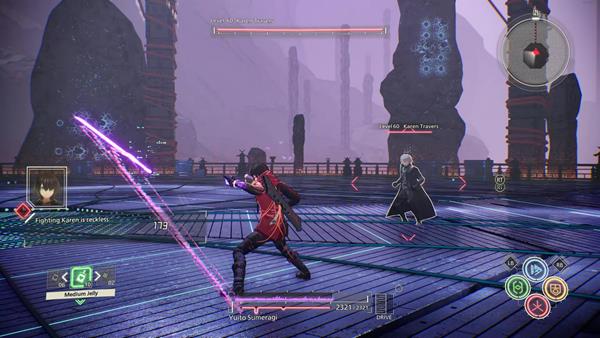
Karen will blink around the arena even more frequently than the first fight, making it near impossible to land any melee hits on him. The only window of opportunity to land a few hits on Karen is after he uses his mid-air Electrical Discharge skill, where he will kneel on the ground for a few seconds as he lands. Leap onto him and land a few slashes if in range, or throw nearby crates at him with Psychokinesis. If possible, answer to Tsugumi Nazar's call right away to fire her Assault Vision gunshots at him, which will further stun him, allowing the player to follow with more attacks.
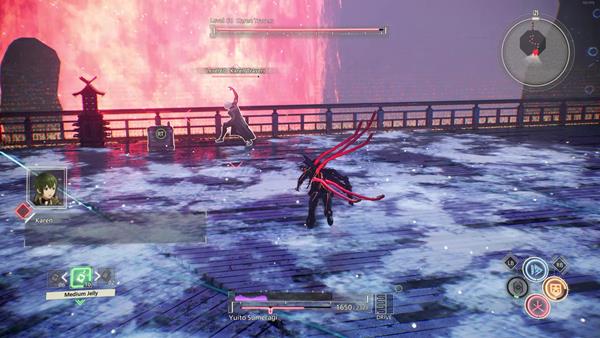
Shortly after landing, Karen will blink near Yuito to execute an ice-based attack, freezing the ground over a huge area that grows underneath you, then summoning giant ice spikes to pierce out from the ground. The only way to evade the incoming ice spikes is if you can start running sideways right away when you spot Karen freezing the ground with his hand. You can achieve this by keeping an eye on him once you finish attacking him after his Electrical Discharge attack.

At roughly 80% health, Karen will enter into his Brain Field state. Not much is different about Karen's attacks in this state, as he merely teleports and chases you down even more. Continuously dodge his attacks with side dodges and Perfect Dodge, and chunk his health a little at a time with regular attacks and Tsugumi's vision. Eventually, when Karen's health is reduced to 50%, the battle will end and the cutscene will reveal Yuito and his platoon's complete defeat in Karen's hands yet again - after the battle, travel to Main Street of Suoh City Ryujin Ward to progress the story, and eventually, you'll return to the Hideout.
Trivia & Notes:
Trivia and notes go here
Phase 10
Conclusion and an Accidental Meeting is a Quest in Scarlet Nexus. Yuito and Kasane are working together now. The injured and unconscious Fubuki wakes up, and they all share the information they have, discussing what to do moving forward.

General Information
- Phase: Phase 10
- Character: Yuito Sumeragi
- Previous: Eternal Vow, Eternal Bond
- Next: Feeling Unraveled Time Together
- Bosses: Kagero Donne, Court Mort
NPCs & Characters
- Luka Travers
- Hanabi Ichijo
- Gemma Garrison
- Tsugumi Nazar
- Wataru Frazer
- Kaito Sumeragi
- Kasane Randall
- Haruka Frazer
- Shiden Ritter
- Arashi Spring
- Kagero Donne
- Kyoka Eden
- Fubuki Spring
- Satori the Archivist
Bosses
Items
Consumables and Other Items
Equipment & Upgrades
Enemies
- Vase Paws
- Scummy Pendu
- Rat Rut
- Doppel Pool
- Rainy Rummy
- Cut Rat
- Auger Sabbat
- Saliva Santa
- Grin Yawn
- Slippy Chinery
Conclusion and an Accidental Meeting Walkthrough

Fubuki recovers from his injuries and Kasane's team, as well as Yuito's, work together. Their plan now is to focus on stopping Togetsu before they make their move to send someone after the team or even worse, hurting the citizens. Before setting off to infiltrate Togetsu, Kagero Donne asks Yuito to speak and meet him at Kikuchiba.
Boss Battle: Kagero Donne

You'll arrive at Kikuchiba on your own, and your goal is to head to the top of the construction site where you previously fought the Gunkin Perry in Phase 1. You'll start at the shops' section so you need to work your way through the Others until you reach the marked objective. You'll come across enemies such as the Vase Paws, Scummy Pendu, and Fuel Pool. When you ride the elevator to reach the objective area, you can find Satori the Archivist there - save your game progress before approaching Kagero.
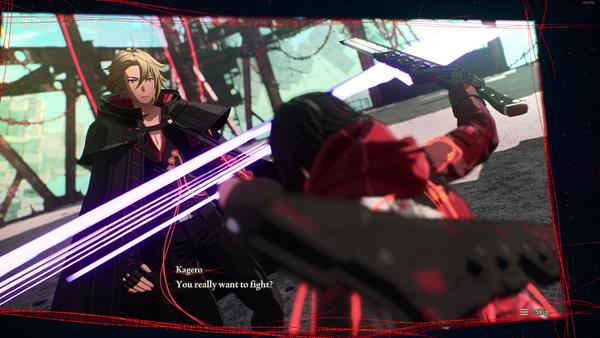
After the cutscene, you'll trigger a boss battle against Kagero Donne. Kagero uses a pair of daggers made of special alloy to cut down opponents while in stealth. Although not the most mobile enemy, he often cloaks himself with invisibility to sneak up on his target and execute spinning attacks. However, the weakness with this tactic is that his cloak ability still shows a silhouette of him as he is traveling. Hence, as Yuito the player should be able to easily out-kite Kagero with Aerial Attacks and Perfect Dodges, countering with a blitz of Katana slashes.

While fighting Kagero in melee, he would regularly jump up and throw his daggers at you. These daggers deal high damage and cause the target to bleed, applying DoT damage after a successful hit. Dodge the throw if possible, if hit, consume a Light Jelly or Medium Jelly right away to heal and remove the bleeding. Damage and interrupt at range with Psychokinesis attacks, and continue to pressure with melee slashes.
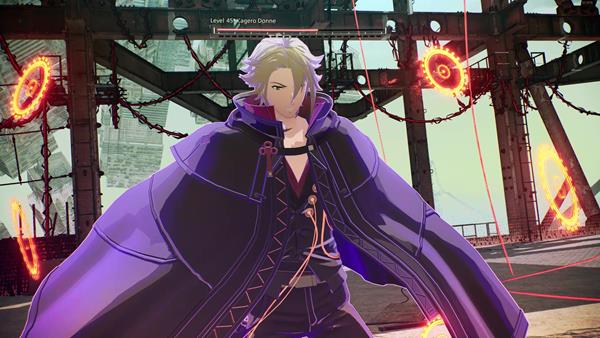
Kagero's Crush Gauge depletes fairly rapidly when attacked by consecutive strikes. At around 60% health, Kagero's Crush Gauge will completely deplete. Use Brain Crush to chunk off roughly 30% of his health, forcing Kagro to enter into his hooded form. However, since no noticeable difference in Kagero's combat while he is hooded, simply keep up the pressure until his Crush Gauge is completely depleted once again to defeat Kagero in battle. Another cutscene will then trigger and you'll travel to the next location, Hieno Mountain - moving forward, you can now switch up your Companions along with Kasane's team, while the rest who are on reserve, you will gain access to Psycho-kinetic Abilities via Struggle Arms System (SAS).
Hieno Mountain: Around Togetsu
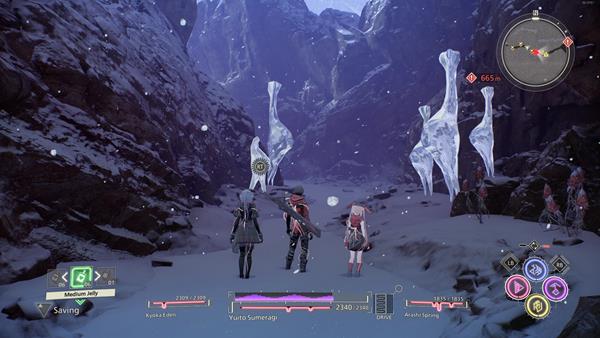
You'll first find Satori the Archivist at the starting point of the area. Save your game, replenish your HP, or check the shop if you need to. The path here is pretty linear and all you need to do is reach the mountainside path where the entrance of Togetsu is. Along the way, you'll encounter enemies such as the Rat Rut, Doppel Pool, and Rainy Rummy. A cutscene will then trigger when you're near the entrance of Togetsu.
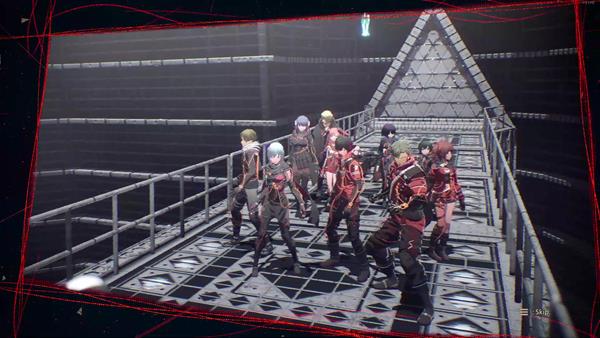
Simply head inside and another cutscene will follow where we find the team ambushed but is able to teleport with the help of Luka to BABE, a hidden sanctuary within Togetsu. Upon arriving, you'll immediately be ambushed by enemies such as the Cut Rat which is a tougher variation of the Rat Rut. Use Psychokinesis to throw objects at it in order for its shell to break, revealing its weak spot - a cutscene will again, trigger after defeating the two enemies.
BABE: Stairway to the "One and Only" Future
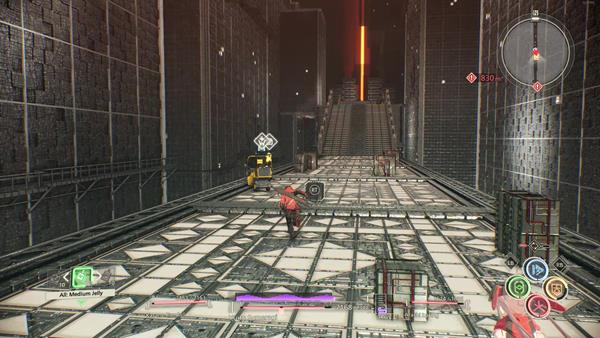
After the cutscene, proceed forward towards the long bridge where you'll, again, find Satori the Archivist. Continue on, past Satori, and you'll first encounter the Doppel Pool. Defeat the enemies and continue to the next area where you'll come across a group of Cut Rat. The next enemy you'll encounter is an Auger Sabbat, make sure to break the shell protecting its face to reveal the weak spot.
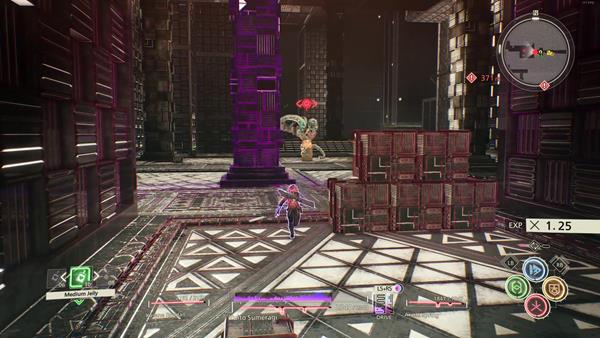
In the uppermost section where you'll again, bump into Satori the Archivist, you'll encounter the Saliva Santa. This enemy will try to hide inside its box, so using Psychokinesis to throw objects at it will break its shell, or using SAS: Invisibility will help in baiting it to pop out of its box. You'll encounter more of this enemy in the same area. Head up two stairs and you'll encounter another Cut Rat and Doppel Pool enemies. There is actually a lot of enemies that are roaming the area but you can choose to just run away unless you walk into an area that blocks your path which requires you to defeat the enemies so that you can proceed - simply head towards the marked objective that will take you to the BABE - Floor of Emotion.
BABE: Floor of Emotion

Continue towards the objective where you'll encounter more enemies. But luckily, along the way, you can use Psychokinesis to ride on a metal platform to use it to run over enemies along the way, and easily maneuver your way around. You'll automatically get off when you reach the limit of the area you can travel to, and you'll find Satori the Archivist again. Be cautious when you're near the objective because you will encounter a strong enemy, the Slippy Chinery. Head towards the marked objective to the Floor of Instinct and a cutscene will trigger when you reach it.
Court Mort Battle
For this boss encounter, the Court Mort Battle, it's more of maneuvering and trying to escape it and not get caught up behind the floor that's collapsing behind. This monumental behemoth is simply not meant to be fought. The goal of the battle is for the platoon to get past the narrow bridge as it collapses, while this unnamed Others hovers nearby, chasing the team down as it summons vast groups of Plateau Pendus. Lagging behind will cause the player to fall and instantly lead to game over, so make sure to use any skills at your disposal, such as jumps, dashing, or SAS to stay ahead of the collapsing bricks. The entire duration of the chase is roughly 2 minutes.
The summoned Plateau Pendus will continuously fly forwards in groups. Double jump right before they hit you from behind to evade. Alternatively, use SAS: Slerokinesis to become immune to attacks if the incoming Plateau Pendus are too fast to evade Take note that each Plateau Pendu flies at varying speeds, so each jump must be timed differently. Being hit will not only deal damage but more importantly, severely slow down the character, allowing bricks to catch up, possibly resulting in a fall to death.
At around 1 minute in, the massive unnamed Boss will release a powerful beam of Others energy from its head, eating away half of the bridge's width. Run to the right edge of the bridge as this happens to avoid being hit by the beam and falling. Soon after this attack, you will receive prompts from teammates that the platoon is approaching what seems to be the exit leading to BABE's center. The Others leviathan will begin to catch up from right behind, as it mauls down the bridge with its head. This is why it is important for the player to save up the SAS: Velocity for this moment, as it might be difficult to outright the unnamed boss otherwise. Continue to run ahead for a few more seconds for the chase to end with the next cutscene.
Kunad Highway
After the encounter with the gigantic Other, open the World Map and travel to the Parking Area of Kunad Highway where you'll see the Kunad Gate expanding. You won't encounter enemies here, just proceed to the marked objective to trigger another cutscene that involves a flashback of Yuito. You'll all return to the Hideout, as well as Wakana Sumeragi, who's recovering - from here, you'll enter the Standby Phase for Phase 10.
Trivia & Notes:
Trivia and notes go here
Phase 11
Feeling Unraveled Time Together is a Quest in Scarlet Nexus. Wakana came from 11 years in the past and leads Yuito and Kasane's team to the Kunag Gate. She tells them how to close the gate where the two need to enter the gate and unravel the entanglements.

General Information
- Phase: Phase 11
- Character: Yuito Sumeragi
- Previous: Conclusion and an Accidental Meeting
- Next: Path to the Future and Freedom
- Bosses: n/a
NPCs & Characters
- Luka Travers
- Hanabi Ichijo
- Gemma Garrison
- Tsugumi Nazar
- Wataru Frazer
- Kasane Randall
- Shiden Ritter
- Arashi Spring
- Kagero Donne
- Kyoka Eden
- Wakana Sumeragi
Bosses
- n/a
Items
Consumables and Other Items
Equipment & Upgrades
- n/a
Enemies
Feeling Unraveled Time Together Walkthrough
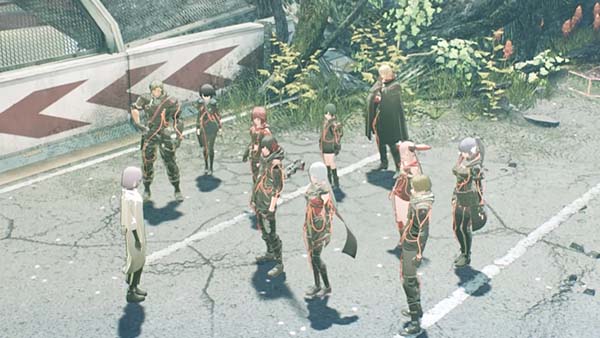
Yuito and Kasane's team, along with Wakana return to the Kunad Gate at Kunad Highway to close the gate. Wakana tells them that Yuito and Kasane must enter the gate and untangle the red strings, use it and enter the Chronos Terminal.
Chronos Terminal
You'll arrive at Kunad Highway where you will enter the Kunad Gateway, approach Wakana and tell her you're ready to enter the Chronos Terminal. For this quest, you'll be accompanied by Kasane but you'll still be able to gain access to the powers of your Companions via Struggle Arms System (SAS). After the cutscene, you'll encounter enemies such as the Marabou Pendu and Kitchen Rummy. Once you've defeated the enemies, simply head towards the marked objective where you'll trigger another cutscene.
You'll again, encounter a group of Kitchen Rummy after triggering the cutscene. When you've defeated all of the Others, you'll see one of the red entangled strings, use Psychokinesis to unravel it, and approach it to trigger another cutscene. Continue towards the next marked objective and you'll see another set of entangled strings where you'll be ambushed by a Brawn Yawn and a couple of Marabou Pendu. Defeat all enemies, and another cutscene will trigger. Upon gaining control of the character, simply head towards the marked objective and a cutscene will trigger where Yuito and Kasane find the Sumeragi Crest.
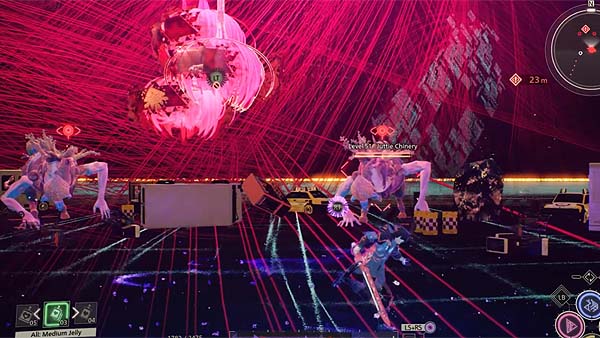
You'll be ambushed by x2 Juttie Chinery after the cutscene. A good tactic to take them out easily is to use SAS: Pyrokinesis. Defeat both enemies and use Psychokinesis on the entangled strings to unravel it. Approach it after you've straightened it to trigger another cutscene where Kasane and Yuito start to blackout but eventually made it back in one piece with the team at Kunad Highway. Wakana then parts ways and returns back to her time via the Chronos Terminal. After the cutscene, Hanabi mentions that Wakana left a message, open the Brain Messages terminal and go through the message that was left for Yuito - from here, speak to everyone and another cutscene will trigger, the cutscene is quite long, but you'll eventually return to the Hideout and enter the Standby Phase of Phase 11.
Trivia & Notes:
Trivia and notes go here
Phase 12
Path to the Future and Freedom is a Quest in Scarlet Nexus. Did Karen take on Yakumo Sumeragi's identity? Seeking the whereabouts of Karen, who holds the key to closing the Kunad Gate, they head to Sumeragi Tomb where Yakumo has been laid to rest.
[quest banner]
General Information
- Phase: Phase 12
- Character: Yuito Sumeragi
- Previous: Feeling Unraveled Time Together
- Next: --
- Bosses: Dominus Circus, Karen Travers
NPCs & Characters
- Luka Travers
- Hanabi Ichijo
- Gemma Garrison
- Tsugumi Nazar
- Wataru Frazer
- Haruka Frazer
- Kasane Randall
- Shiden Ritter
- Arashi Spring
- Kagero Donne
- Kyoka Eden
- Kaito Sumeragi
- Satori the Archivist
Bosses
Items
Consumables and Other Items
- Enhance Burn
- SAS Refueling Drink
- Barisa Santa Analysis
- Santa-type Suppression
- Marabou Pendu Analysis
- Yawn-type Suppression +
- Pendu-type Suppression +
- Chinery-type Suppression +
- Abandoned Subway Environment A
- Abandoned Subway Environment S
- Research Facility Environment B
Equipment & Upgrades
Enemies
- Rat Rut
- Cushion Pound
- Barrista Santa
- Grin Yawn
- Slippy Chinery
- Vase Paws
- Marabou Pendu
- Booger Sabbat
- Spawn Yawn
- Winery Chinery
- Bandeau Pendu
- Brawn Yawn
- Base Paws
- Saliva Santa
- Session Pound
- Saws Paws
- Doppel Pool
- Vine Yawn
- Missin Pound
- Rainy Rummy
- Cut Rat
Path to the Future and Freedom Walkthrough
The team returns to Sumeragi Tomb in Suoh City Ryujin Ward to confront and find Karen Travers in order to close the Kunad Gateway. Yuito finds his brother Kaito Sumeragi at the tomb who tells him that he is proud of avenging their mother's plan of stopping Togetsu - the team sets forth to Sumeragi Tomb to put an end to the madness before it's too late.
Sumeragi Tomb
Upon gaining control of Yuito, head down the steps to reach the lower section of the tomb. At the bottom, go through the narrow path and head towards the marked objective to trigger a cutscene. The team then loses transmission with Wataru and Haruka, and are transported to what seems a brain field on a larger scale. You'll then encounter the first group of enemies such as the Rat Rut and Cushion Pound. Another cutscene will then trigger after defeating the enemies where you'll see a vision of what seems to be memories showing Karen Travers, Fubuki Spring, and Alice Ichijo.
After the cutscene, walk onto the floating train cars to reach the Abandoned Station, which is on the west side of the map. Head inside and you'll encounter a Barrista Santa and Cushion Pound. A Grin Yawn will then spawn after defeating the first group of enemies. Proceed north on the mini-map after killing all enemies to find Satori the Archivist - recover your HP, restock on items, and save your progress if you need to.
Continue towards an open area which is behind Satori and you'll encounter another group of enemies, x2 Rat Rut, followed by x2 Barrista Santa, and a Slippy Chinery. Remember that you need to use SAS: Clairvoyance so that you can see the Chinery when it becomes invisible. After defeating the enemies, head towards the next section, 2. Memories of Fighting.
Memories of Fighting
In the next section, you'll find yourself at Kikuchiba and you'll encounter a group of Vase Paws and a Marabou Pendu, followed by a Booger Sabbat. Use Psychokinesis and pair it up with SAS: Duplication to throw multiple objects at it so its shell can easily break. Kill all the enemies and proceed forward, don't forget to grab the resource cache nearby which contains x1 Enhance Burn.
[img]
Now, you'll find yourself at a familiar location which is Kunad Highway, you can ride a bus with Psychokinesis and maneuver your way towards the area and run over enemies blocking your path. You'll then trigger another cutscene when you get past the enemies. Once the cutscene is done, work your way forward towards the highway and you'll be ambushed by x2 Spawn Yawn, Marabou Pendu, and a Booger Sabbat. The easiest way to take them out is to use Psychokinesis on the two oil trucks and make them explode, inflicting a large amount of damage, as well as the Burning Status Effect. After you've cleared the area, you'll reach the construction site of Mizuhagawa District where you'll encounter another group of Vase Paws and Marabou Pendu, followed by a Booger Sabbat, a Spawn Yawn, and a Winery Chinery - make sure to grab the resource cache nearby to find x1 Plug-in Parallelization Program H.
Memories of Longing
[img]
Next, head towards the waymarker, head up the slope where you'll find Satori the Archivist. When you're ready, continue into the next section to reach 3. Memories of Longing. You'll now reach another section of Kikuchiba where you'll encounter a group of Bandeau Pendu and x2 Brawn Yawn, as well as a Barrista Santa. Defeat all enemies and proceed towards the next area which is Arahabaki Secure Site. You'll see that there's a Base Paws blocking the path ahead, and what you can do is control a drone with Psychokinesis and use it to attack the large Other enemy. Work your way through the site while you fight more enemies along the way until you reach the entrance of the Supernatural Life Research Facility. Proceed through the facility as you fight the enemies along the way and you reach the end where Satori is standing and next to him is a large painting that you'll need to interact to continue the quest - make sure to save your game to prepare for a boss fight.
Boss Battle: Dominus Circus
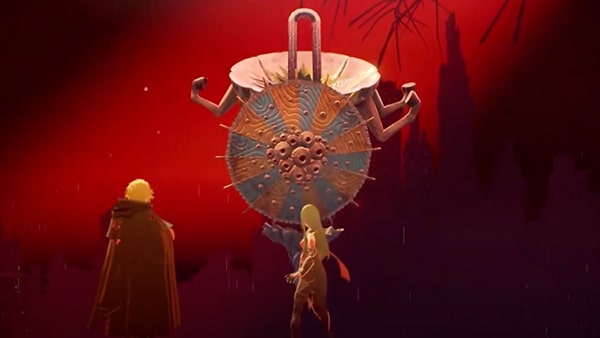
One of the most bizarre Bosses in the game, all of the Dominus Circus Others have a cumbersome, cone-shaped body causing it to support itself with one point on the bottom, forcing it to mostly be on a standstill. To completely beat this boss, the player is required to defeat a series of four sculptures that alternates between phases.
The Dominus Circus will appear as a coil-headed sculpture in the initial phase. Holding a metal umbrella in one hand, it will launch water-based attacks, such as a jet stream spraying out of the umbrella, and a shockwave that launches a wall of running water surrounding itself. Although these attacks do moderate damage, they can be avoided by simply running out of range, allowing for the player to counter with continuous Psychokinesis attacks.
If you wish to close in on the Dominus Circus while the walls of water are still active, you may do so with SAS: Teleportation, though bear in mind the respective character will be affected by the Soaked Status Ailment. By doing this, the player should be able to knock the Dominus Circus down with ease, allowing for a window of opportunity to run in and stack melee burst damage. Use SAS: Pyrokinesis to maximize damage output during this time. As the Dominus Circus attempts to stand again, the player can keep it pinned down by using SAS: Psychokinesis to perform a powerful psychokinesis burst, throwing all surrounding objects at in one swift motion. Repeat this cycle of attack for one to two more rounds to defeat the Dominus Circus in this first form.
Following the defeat of the first sculpture, a second one will instantly float up from below, beginning phase 2 of the battle. Although resembling the first sculpture in form, the second one is attached to an elephant's head, wearing a small hat. Just as cumbersome and even less protected as it wields no weapon, this sculpture is even more vulnerable to Psychokinesis attacks. Although it is capable of executing melee strikes with its trunk, and may even spray a cloud of blood from it occasionally, it can be easily dodged and countered by simply running to its side before attacking. As it takes more damage the Dominus Circus will frequently breathe steam out of hits ears to cover the entire arena up in a layer of thick fog.
Use SAS: Clairvoyance when it is available to see through the fog and continue with attacks. Use SAS: Velocity and SAS: Electrokinesis to speed things up, as the Dominus Circus in this form is weak to the Shocked Status Ailment. As it falls, bombard with melee attacks as per the Dominus Circus in its first form. The elephant stands again its hat will have been shifted, revealing a fleshy organ underneath. You will receive a prompt from your team, suggesting that this unprotected organ is especially vulnerable to attacks. Damage that organ with Psychokinesis and Aerial Attacks to deal extra damage. This cycle of attack will repeat itself a few more times until the Dominus Circus' Crush Gauge is fully depleted, allowing you to kill it in this form with a Brain Crush.
Once this second sculpture is defeated, phase 3 will begin with yet another new one, springing up from below. Completely identical to the coil-headed sculpture from the first phase, this one will wield a spiral seashell in its extended left arm. After it initiates a few swinging melee strikes with the shell, you will receive a prompt from Gemma Garrison, suggesting the party to attack its left arm right after it performs the swing. However, this tactic is risky as the swinging attack with the seashell deals enough burst damage to 2-hit kill you. Therefore, adopt this strategy with the help of SAS: Sclerokinesis and SAS: Velocity to avoid the swings, and stay protected from it them if unable to dodge. Focus on the fleshy part of that left arm just above the seashell to deal higher damage to the Dominus Circus. Continue to pressure with SAS: Electrokinesis to shock the sculpture, causing it to fall. Repeat the cycle until Dominus Circus is defeated with Brain Crush again.
At this point, the final phase will begin and the last sculpture will appear. Though created in a similar form, this final Dominus Circus will be a combination of the three previous phases - It will be assembled with the elephant head, wielding a metal umbrella in its right hand, and the seashell in its left. It will be very difficult to approach it in melee as it is shielded by a large weapon on both sides, therefore it is recommended to run around it and use Psychokinesis. Keep running around the Dominus Circus until it is facing you and away from large objects behind it, and use Psychokinesis to pull these objects onto its back to deal damage.
Once you land a sufficient amount of strikes, the Dominus Circus will again deploy a fog screen over the arena. As it does this, the Dominus Circus raises both arms, exposing itself to attacks. Use SAS: Clairvoyance right away to pinpoint its location, and throw more objects at the Dominus Circus, as you run in for a wave of melee attacks. With SAS: Electrokinesis, the Dominus Circus should fall and stay pinned down for a period of time. Another way the Dominus Circus can protect itself is to execute the shockwave that can launch walls of flowing water to deflect incoming damage from all directions. In this scenario, use SAS: Teleportation again to bypass these walls, and interrupt with a flurry of melee slashes to drop the Dominus Circus. Repeat the above steps until the Dominus Circus is finally eliminated for good.
Memories of Pursuit
[img]
After you've defeated the boss, as well as the cutscene, approach the large frame and you'll come out of the Abandoned Subway or the next section, 4. Memories of Pursuit. Upon arriving, you'll immediately encounter enemies such as the Fuel Pool and Auger Sabbat. You're outnumbered here but there's a train car nearby that you can use to hit the enemy with Psychokinesis. Make sure to use SAS: Sclerokinesis first so that you don't get interrupted while you focus on moving the train car. Work your way towards the objective until you reach a section of Hieno Mountain - the path here is pretty much linear and you simply just need to reach the entrance of Memories of Rebellion while you fight familiar enemies along the way such as the Fuel Pool and Session Pound.
Memories of Rebellion
[img]
You'll now arrive at a section of BABE. Make your way through the section as you fight enemies such as the Saws Paws, Brawn Yawn, Vine Yawn, and the Doppel Pool. The next section you'll enter is the museum section of the Supernatural Life Research Facility. Repeat the process as you fight through the enemies until you reach the marked objective leading towards the Memories of Nightmare.
Memories of Nightmare
Upon arriving, another cutscene will trigger that involves Alice, Fubuki, and Karen, the past memory shows how Alice changed into an Other. After the cutscene, you'll immediately encounter enemies such as the Rainy Rummy and Cut Rat, followed by a Booger Sabbat. Again, simply defeat all the enemies, and proceed towards the marked objective. Make sure you have a lot of health recovery items here since the enemy encounters here get pretty chaotic and hard to beat since you'll be fighting the large enemies here - eventually, you'll reach the entrance leading towards Memories of Impasse.
Memories of Impasse
[img]
Before you continue any further, make sure to save your game and restock on items since you'll be running through another round of defeating more enemies until you reach the next section. And this time, it can be quite annoying since you will be fighting against the Session Pound enemies that explode upon contact, as well as more large enemies. You'll find yourself at another section of Kunad Highway in the Memories of Impasse. Also, always save your game whenever you see Satori at various checkpoints - you'll eventually reach Millennium Hall.
Boss Battle: Karen Travers
[img]
After going on a trip through memory lane, you'll return back to Sumeragi Tomb. The path here is pretty much linear, so just go straight towards the narrow path until you reach Karen Travers' location where a cutscene will trigger. Karen Travers is encountered as the final boss of the game in the Sumeragi Tomb. In the first phase, Karen will fight using a combination of all the attacks he displayed in the first two encounters, in addition to a new move, Eruption, where he is stagnant as he becomes immune to attacks, before stomping the ground to release an eruption around himself, knocking up and damaging units within.
[img]
A frequently executed move, this attack is quite difficult to avoid once caught within the radius when cast, but players can run away preemptively when they notice Karen becoming immune to damage as he charges up the skill. Ironically, during this battle Karen will use his Teleportation skill more passively than the second encounter, allowing the player to use SAS: Velocity to catch up to Karen after he executes attacks. Another advantage the player has this time is having access to all the SAS abilities since the full platoon is present. One such ability that enables Yuito to sneak up on Karen Travers is SAS: Invisibility. Since Karen only blinks away in response to attacks throughout this fight, the player can hide in stealth, approach Karen and unleash a charged attack from behind.
When Karen's health is roughly at 70%, he will activate his Brain Field. Both during and after this state, Karen will teleport slightly more frequently, and use more lightning-based attacks, such as releasing the tracking lighting orbs and striking foes with Electrical Discharge after blinking away. Fortunately, players can utilize abilities such as SAS: Sclerokinesis to negate the lethal effects of those persistent lightning orbs.
Bear in mind that when SAS: Sclerokinesis is not available, use alternatives such as SAS: Velocity or Perfect Dodges to evade Karen's and his clones' charge attacks. This is because while lightning orbs are tailing you, a charge attack will knock you down, leaving you vulnerable to the incoming stuns from all 3 orbs, resulting in a stun lock and death from accumulated damage. Maintain pressure using SAS: Velocity after dodging attacks, or SAS: Psychokinesis if at range to continue dealing damage to Karen.
At approximately 30% health, Karen will use Psychokinesis in a fashion similar to SAS: Psychokinesis - he will pull all nearby objects to levitate around him, spinning as he hurls them at you consecutively. During this stage, players should focus on running and evading, as the levitating boxes around Karen will likely prevent all kinds of attacks. Right before the respective box is thrown, it will be highlighted in red, prompting the player to dodge.
If hit by any of the boxes, a cutscene will play, featuring Karen using a Brain-Crush-like combo on the player, dealing roughly 70% damage to the respective character's health. Quickly heal up with Medium Jelly, and counter pressure with previously mentioned SAS abilities. At this point, Karen's Crush Gauge should be depleted soon. Proceed to win this first stage of the fight against Karen with Brain Crush.
The next cutscene will begin, revealing Karen's past memories and pain manifesting as 5 giant, masked statues. In this second phase, the player does not fight Karen himself, but rather, against these statues one by one, each defeated through using the same attack pattern. During this battle, Karen will be unconscious, hidden behind one of the statue's metal fans as he controls these statues with his mind. Defeating each statue will knock down the metal fan, exposing Karen to damage for a long duration. The metal fan will then resume position as the next statue readies itself to fight the player.
These 5 statues will start off as mere holograms holding a flower in front of their faces. Each statue will then take turns materializing, turning the flower into a mask as they appear to fight the player. The fight will always start off with the statue spawning a specific, large object on the arena, such as a Big Dipper Fan, Anchor Crystal, Column Crystal, etc. When these objects spawn, a timer will appear on the object, and the player must fully deplete that object's health bar with attacks before time is out.
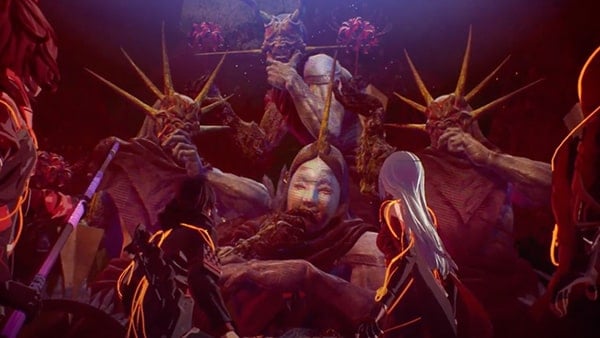
Doing this will allow the player to throw the large object at the respective statue, causing its mask to fall onto the arena. The player must then hold down the (LT) button in order to lift the mask and smash it down onto the ground with Psychokinesis to destroy it. The impact from the smash will send out a shockwave, knocking down all statues and the metal fan protecting Karen, allowing players to stack damage on him for a set duration. Once Karen's body begins to release dark matter, you will receive a prompt to back up from Karen, and the next statue will materialize with a new mask as the cycle repeats.
Some of these statues will spawn their respective object on the arena with false copies, leaving the player to guess which object to destroy as the timer counts down. Use SAS: Clairvoyance to see through the disguises and destroy the real object before time is out. Additionally, in the battle against the last few statues, an untargeted shadow of Karen will cast attacks to disrupt the player from destroying said objects, as well as charging up Psychokinesis to throw the statue's mask. Make sure to use SAS: Sclerokinesis and SAS: Velocity to avoid Shadow Karen's attacks, and if the objects are obstructed by lightning fields, use SAS: Psychokinesis to destroy them instead. Fully deplete Karen's health in between battles against each statue to progress onto the next phase.
With most of his powers exhausted, Karen will resort to using some form of dark illusion to isolate the player from the rest of the team. In this third phase, the battle will begin with the player fighting against Karen alone, with all forms of SAS powers and communications disabled. The goal here, in the beginning, is to merely survive, allowing the respective character to read out the monologue in prompts. After dodging a few of Karen's blinks and melee attacks, a cutscene will play, showing the timely entrance of Hanabi and Shiden, saving the player from Karen's attack and automatically dealing damage.
As the fight goes on, Karen will often be automatically countered by pre-determined cutscenes, featuring the entrances of other OSF members. At this stage of the story, you can begin to counter pressure and defeat the weakened Karen with ease as you will have near perma-access to all SAS abilities. As Karen is finally defeated for good, the system log will display the reward of 70,00 EXP and 50,000 kins received for defeating this final boss.
Trivia & Notes:
Trivia and notes go here


